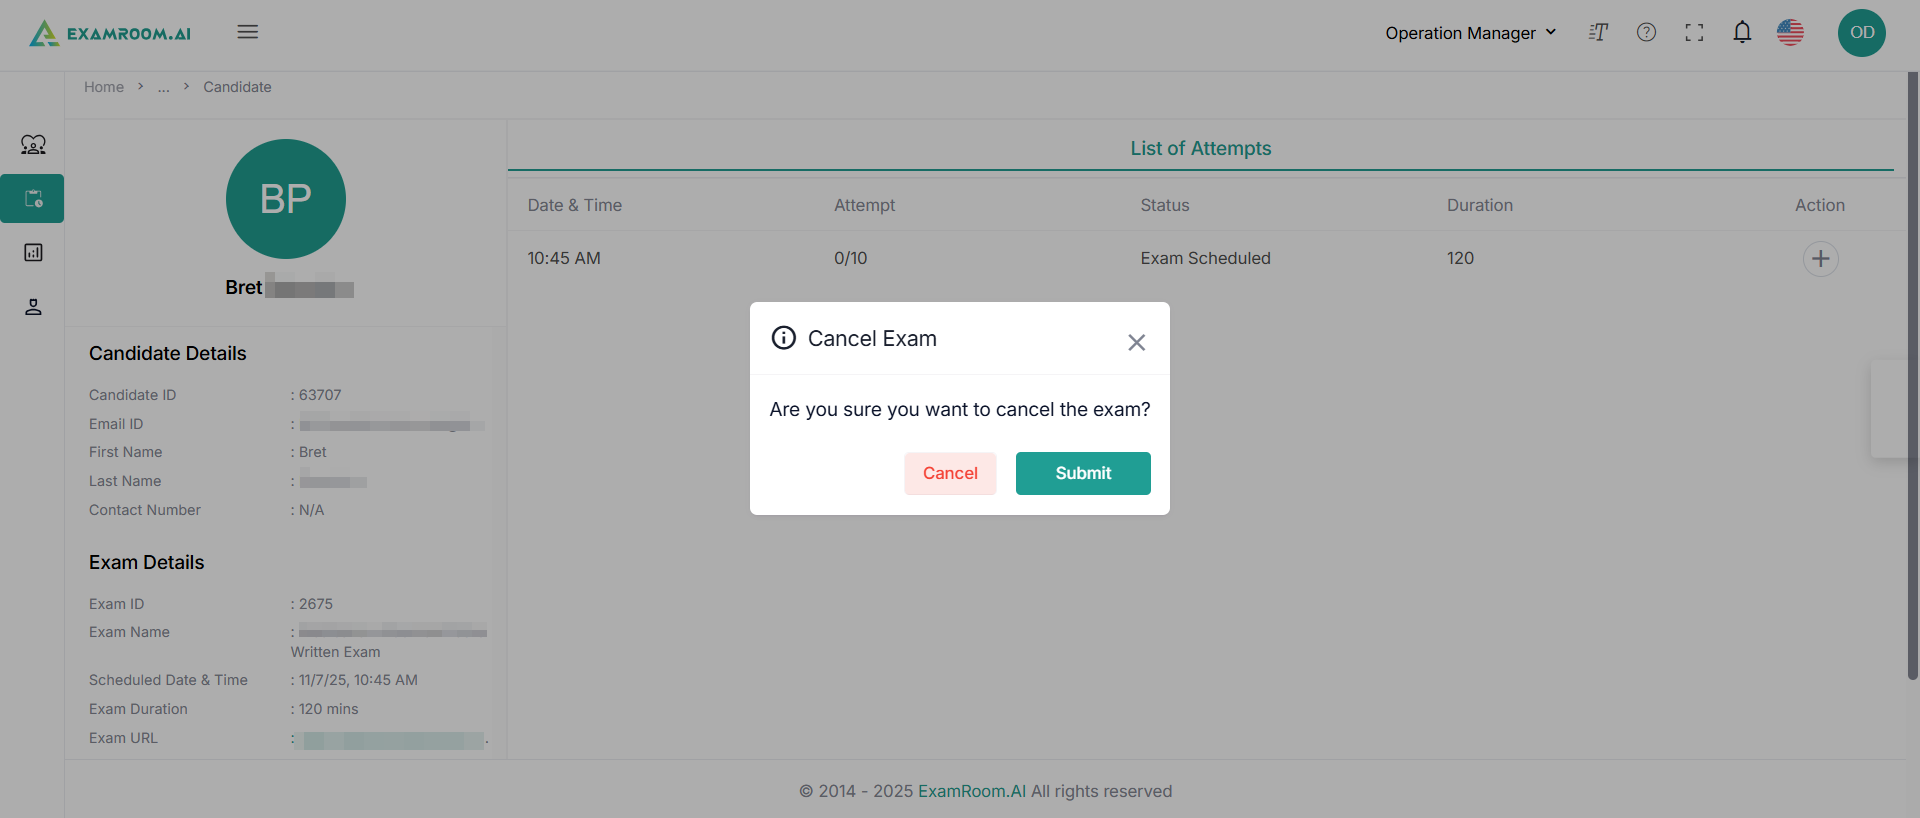
Scheduled Events
- Navigate to the side menu on the left of the page and select Scheduled Events.
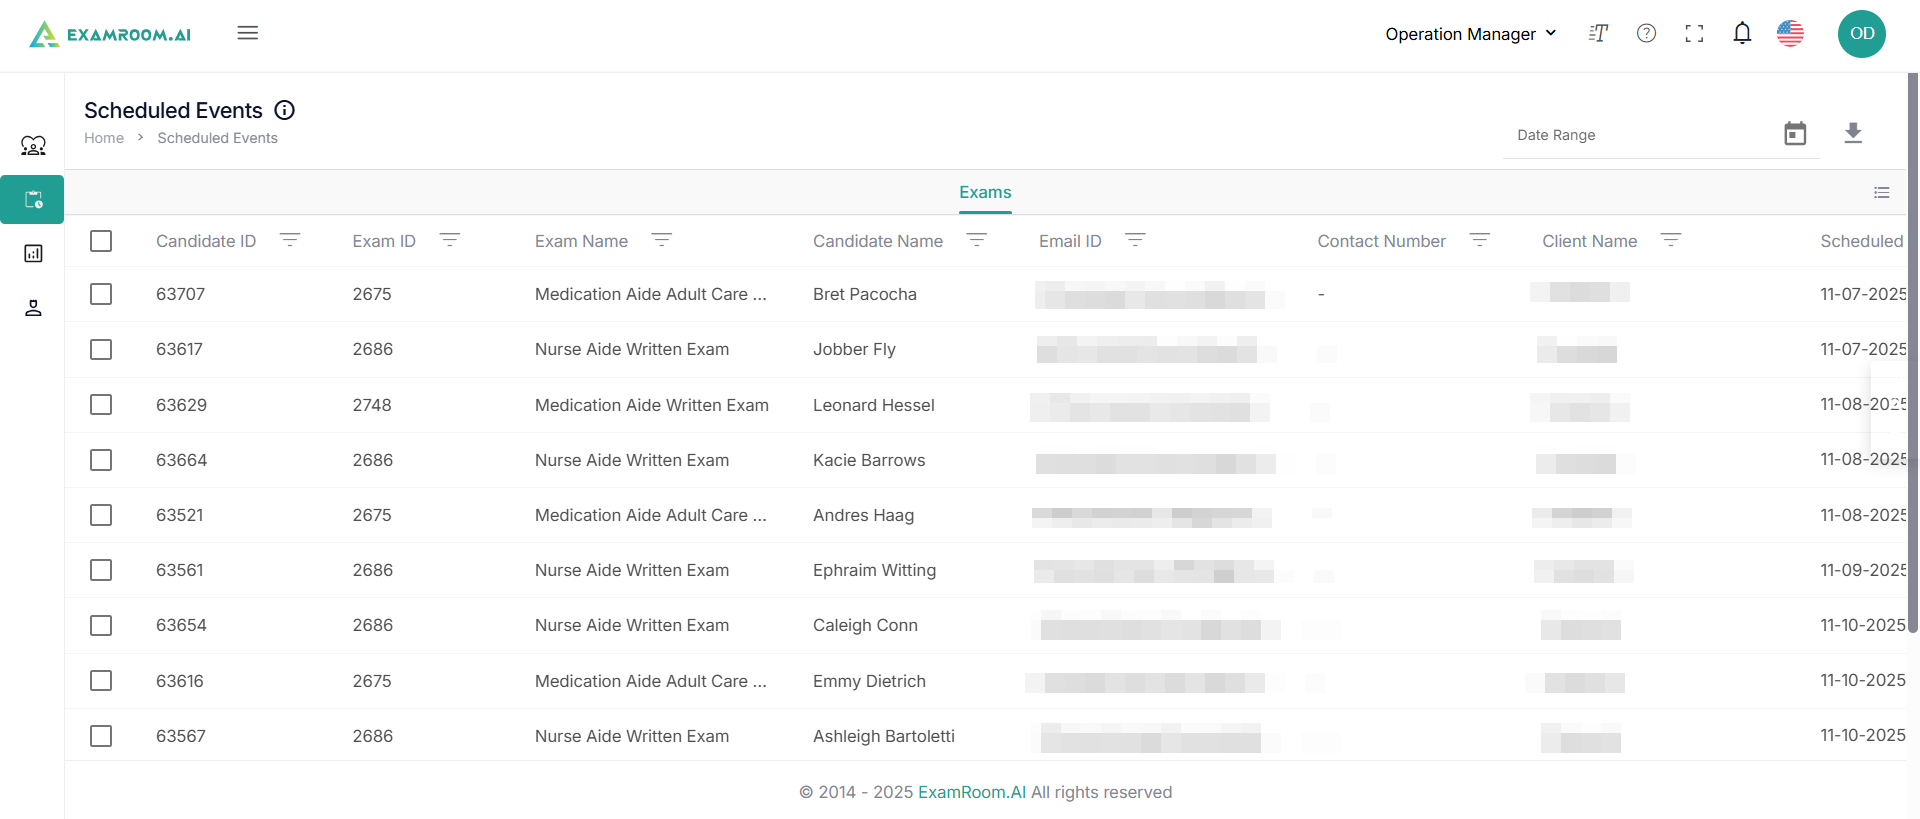
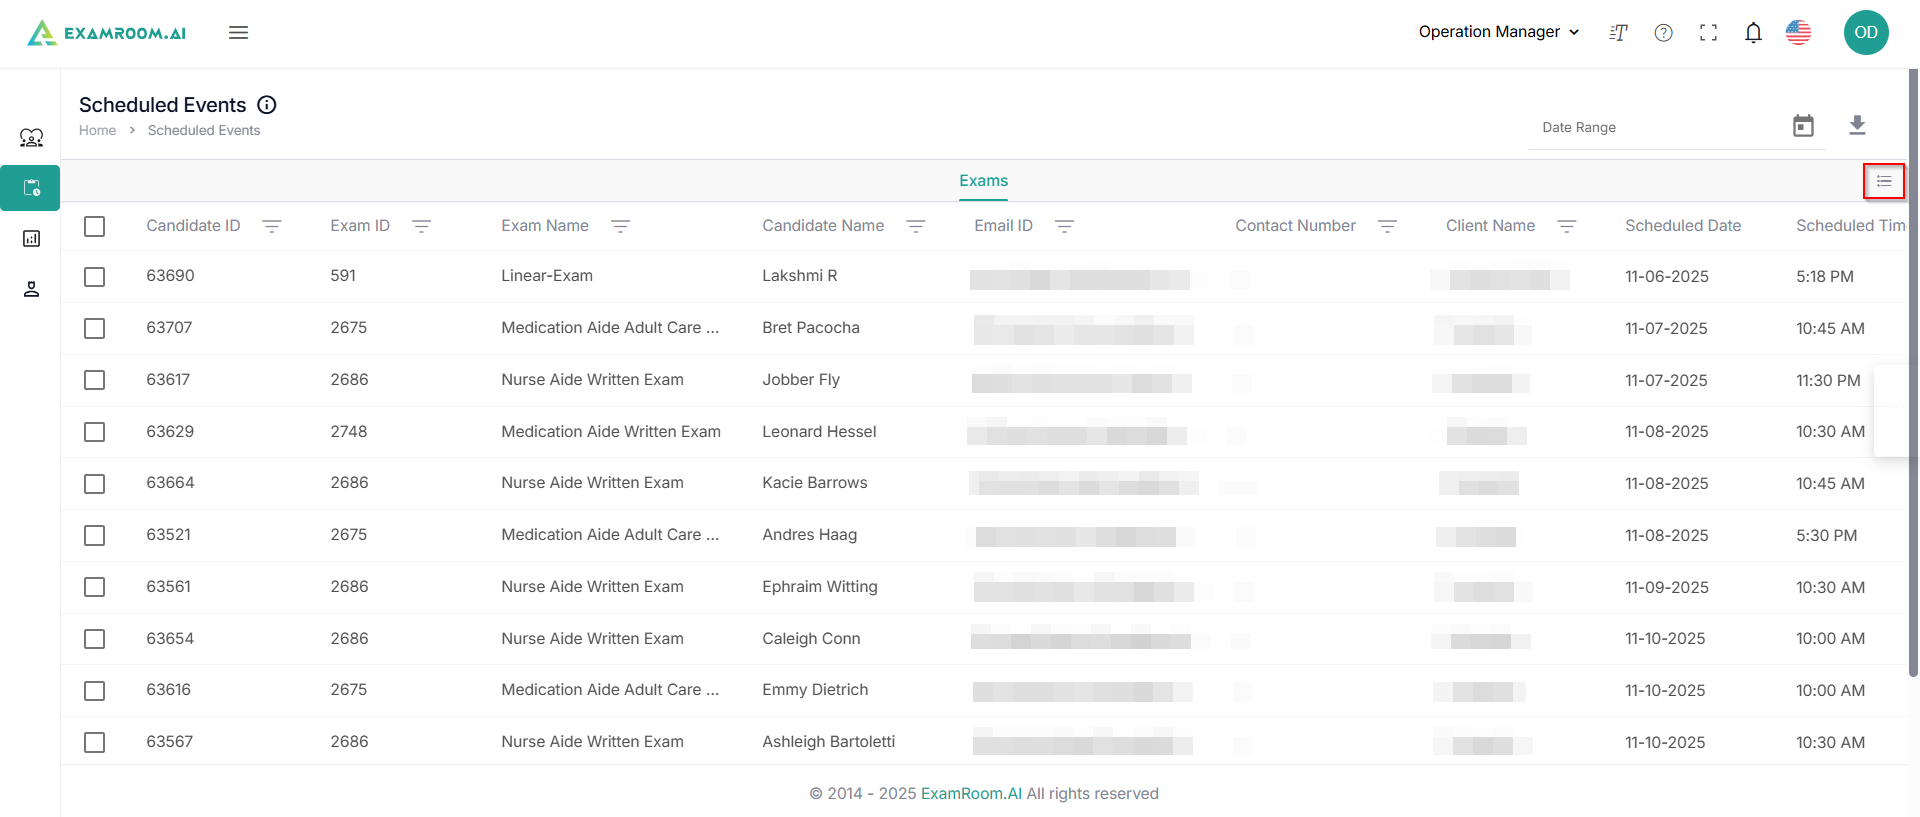
- The Scheduled Exam details are displayed as a list with the following details:
- Candidate ID: The unique ID of the candidate
- Exam ID: The unique ID of the exam
- Exam Name: Name of the exam
- Candidate Name: Name of the candidate
- Email ID: Candidate’s email ID
- Contact Number: Contact Details of the candidate
- Client Name: Name of the client
- Scheduled Date: Scheduled date of examination
- Scheduled Time: Scheduled time of examination
- Language: Candidate’s preferred language for taking the exam
- Duration: Duration of the examination
- Action: Available actions on the scheduled exam.
- View: Click the view icon for a particular scheduled exam for a detailed view
- No Show: Click to manually mark the candidate as a no-show
- Cancel Exam: Click to cancel the exam for a candidate
- Technical Issue: Click this if the candidate during the exam faces a technical glitch. This enables the candidate to retake/reschedule the exam from their dashboard.
- Start Refresh: Click this to enable the start exam button on the candidate dashboard.
Note: The listed actions may or may not be available for you, depending on the client.
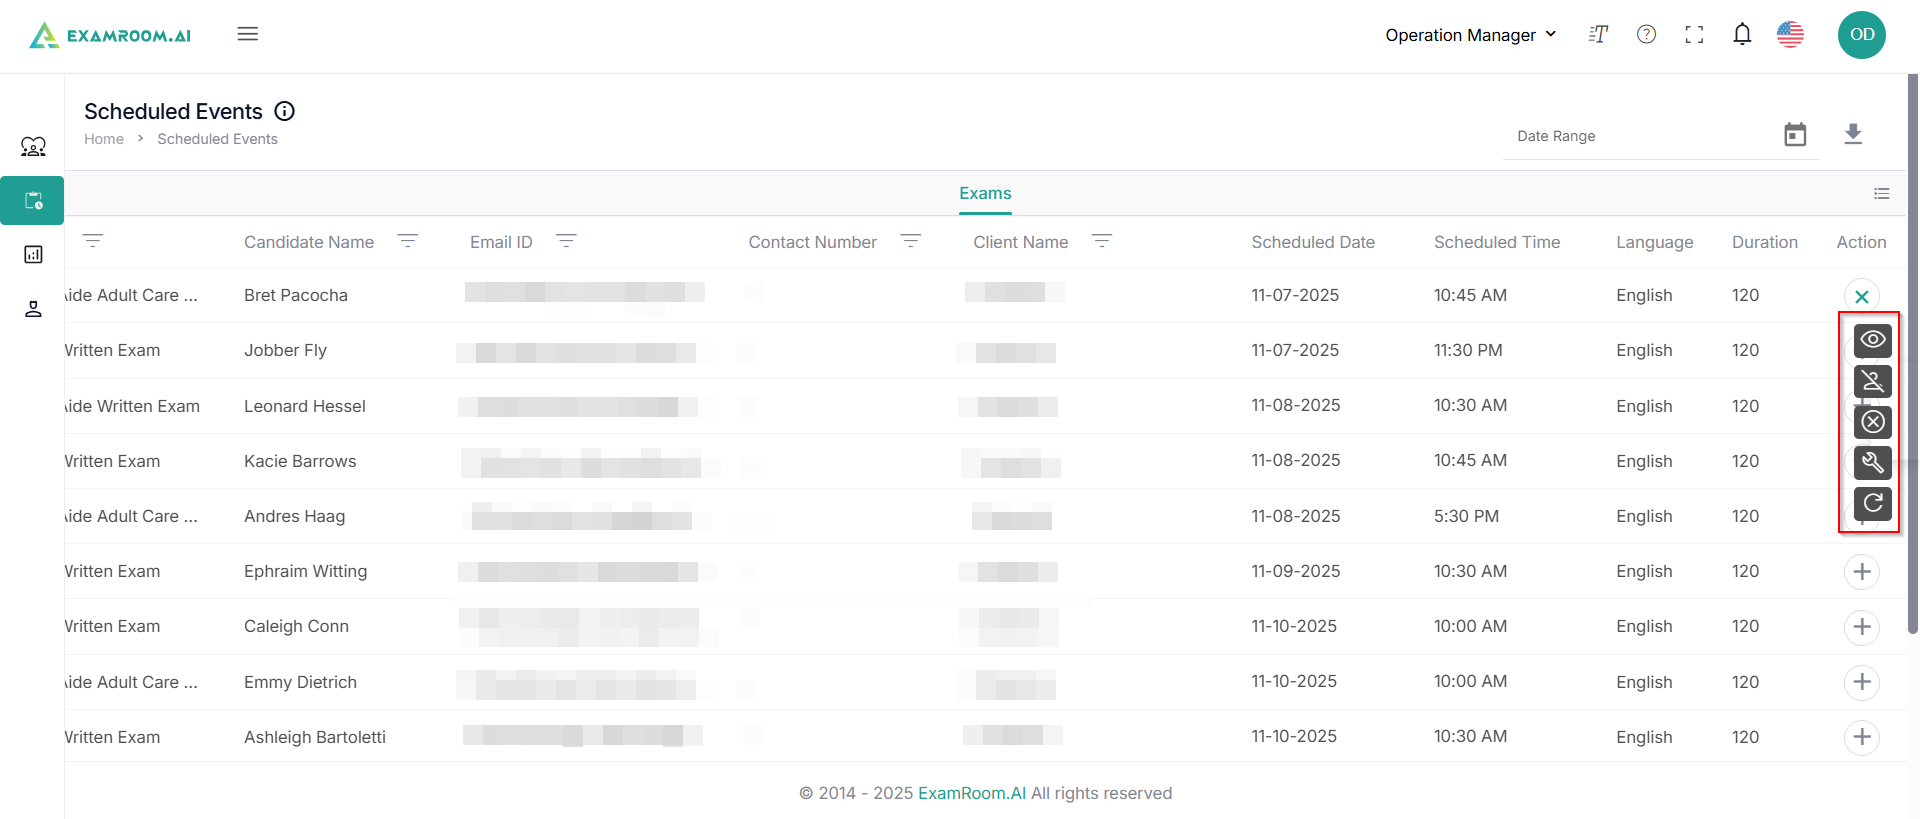
- As you click the view icon under actions, the left side of the view scheduled exam screen has candidate, exam, and client details.
- The main information displayed on the page includes details of the list of attempts, including the following information:
- Date & Time: The date and time of the scheduled exam
- Attempt: Availed by the available count of attempts
- Status: The status of the examination
- Duration: The duration of the examination
- Action: Available actions on the scheduled exam
- View: Click the view icon for a detailed view of the examination
- Reschedule: Click to reschedule the examination
- Cancel: Click to cancel the examination
- Logout: Click to log the candidate out of the exam.
- You can customize to view any of these through the customize display option.
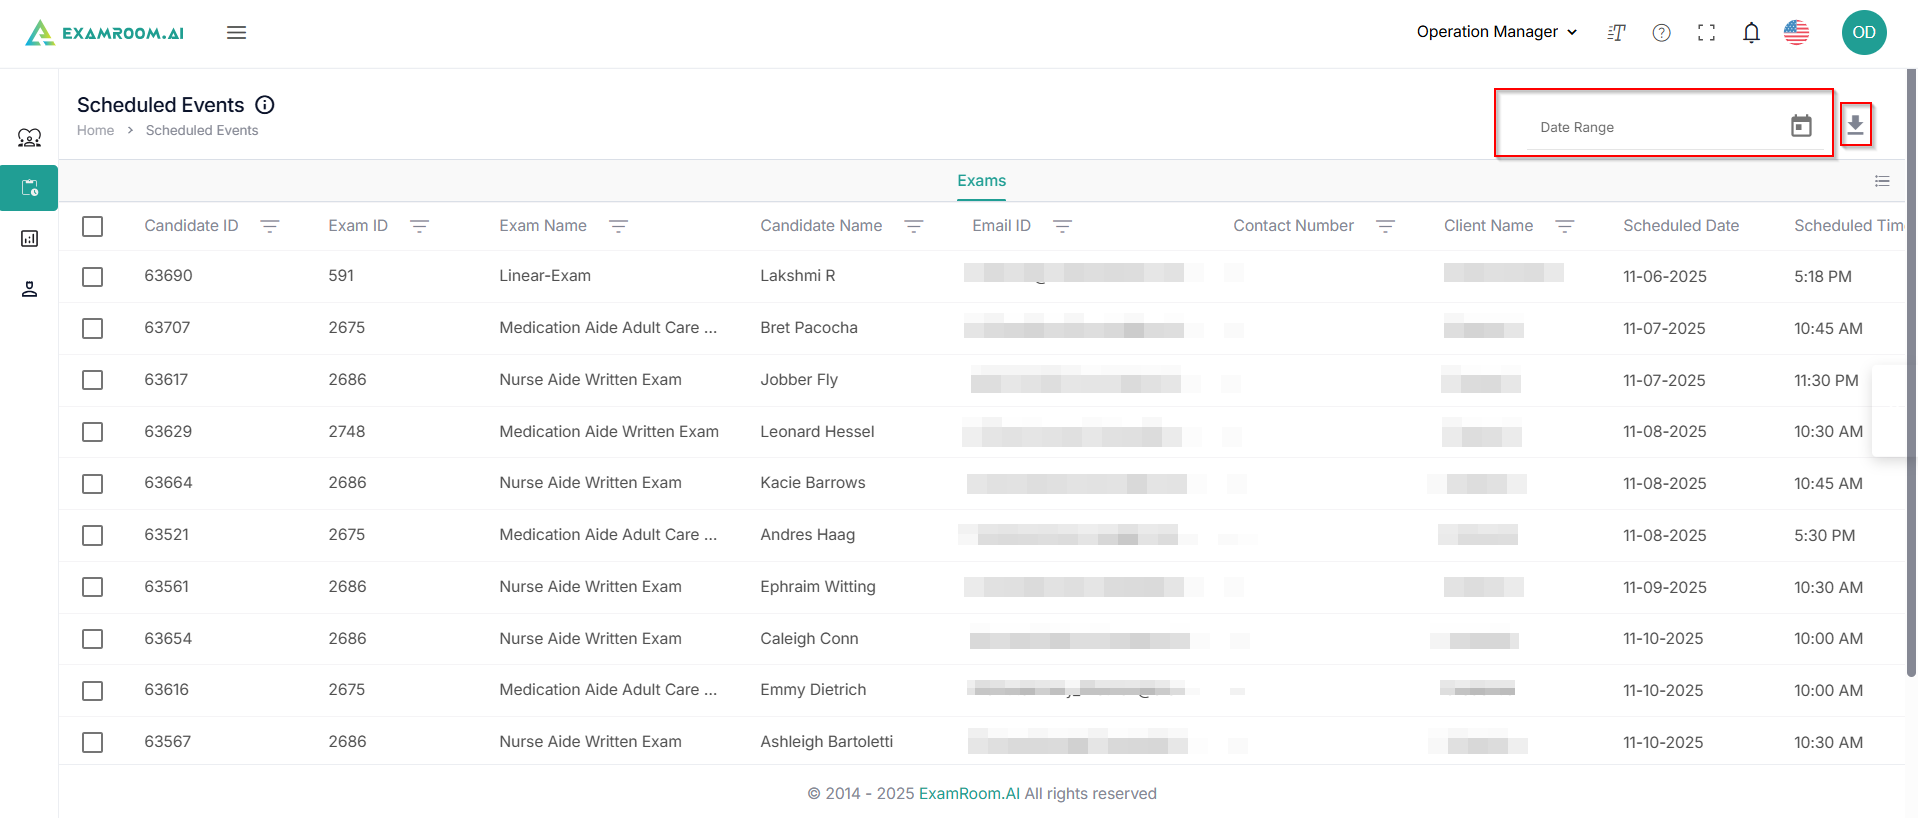
- You can download the scheduled event data as an Excel spreadsheet by clicking the download icon. You may also choose a specific date range using the date picker, then download the spreadsheet containing events scheduled within that range.
Rescheduling Examination
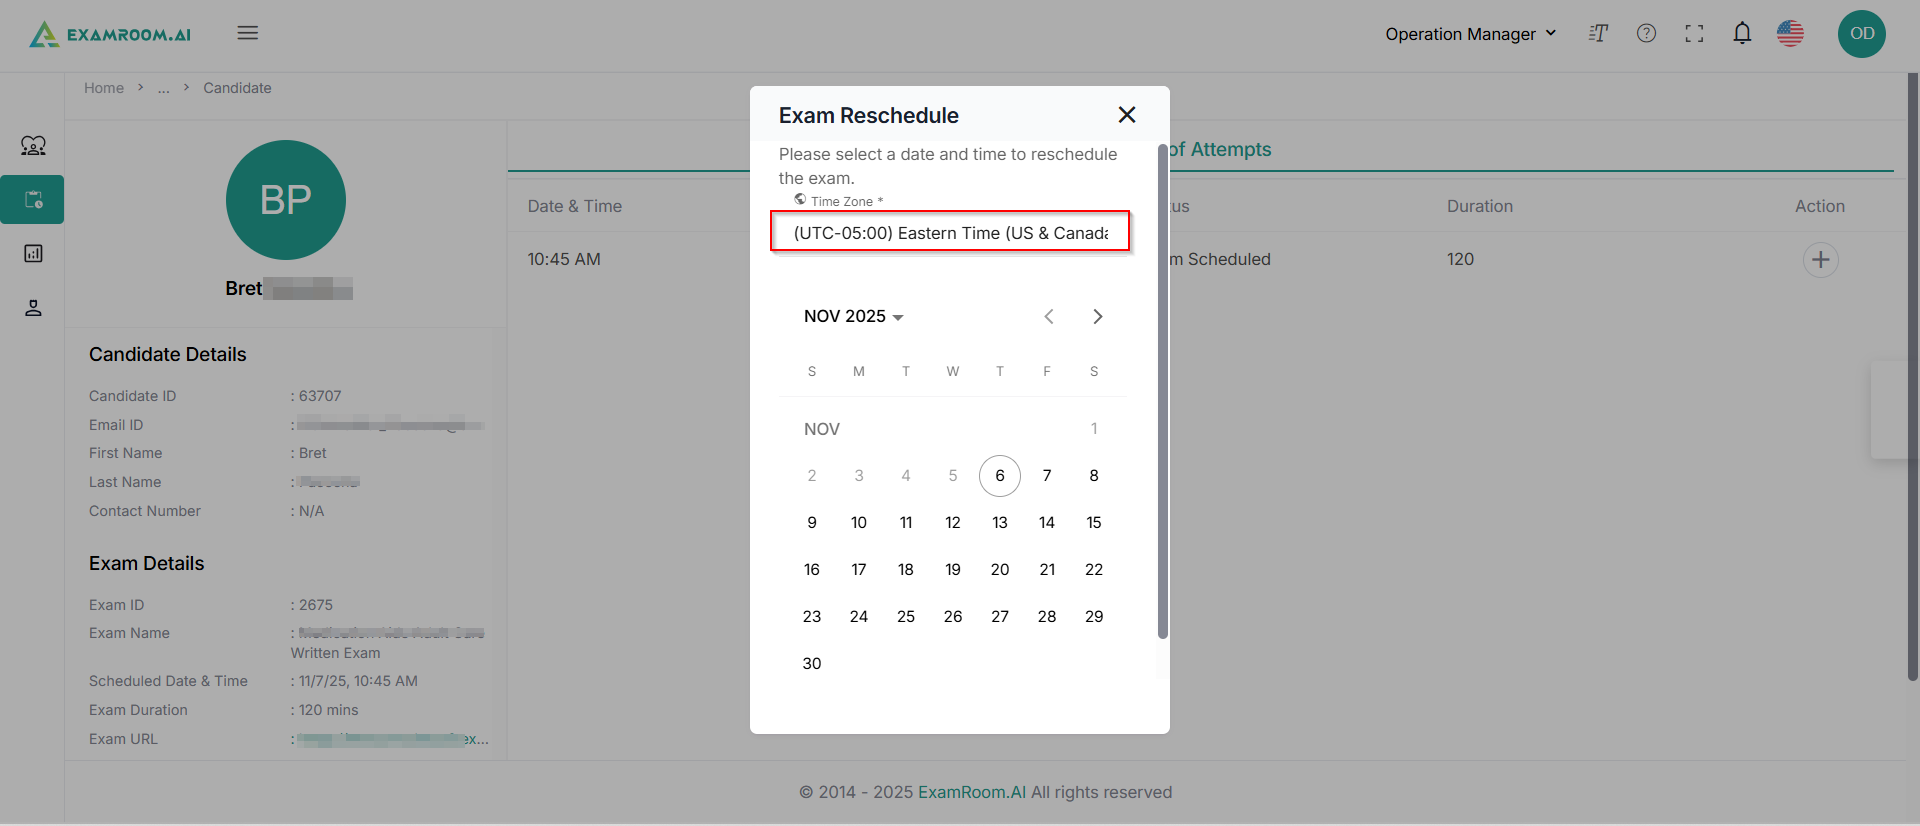
- To reschedule the examination, click the reschedule icon under the action button. Select the time zone from the dropdown and click the date.
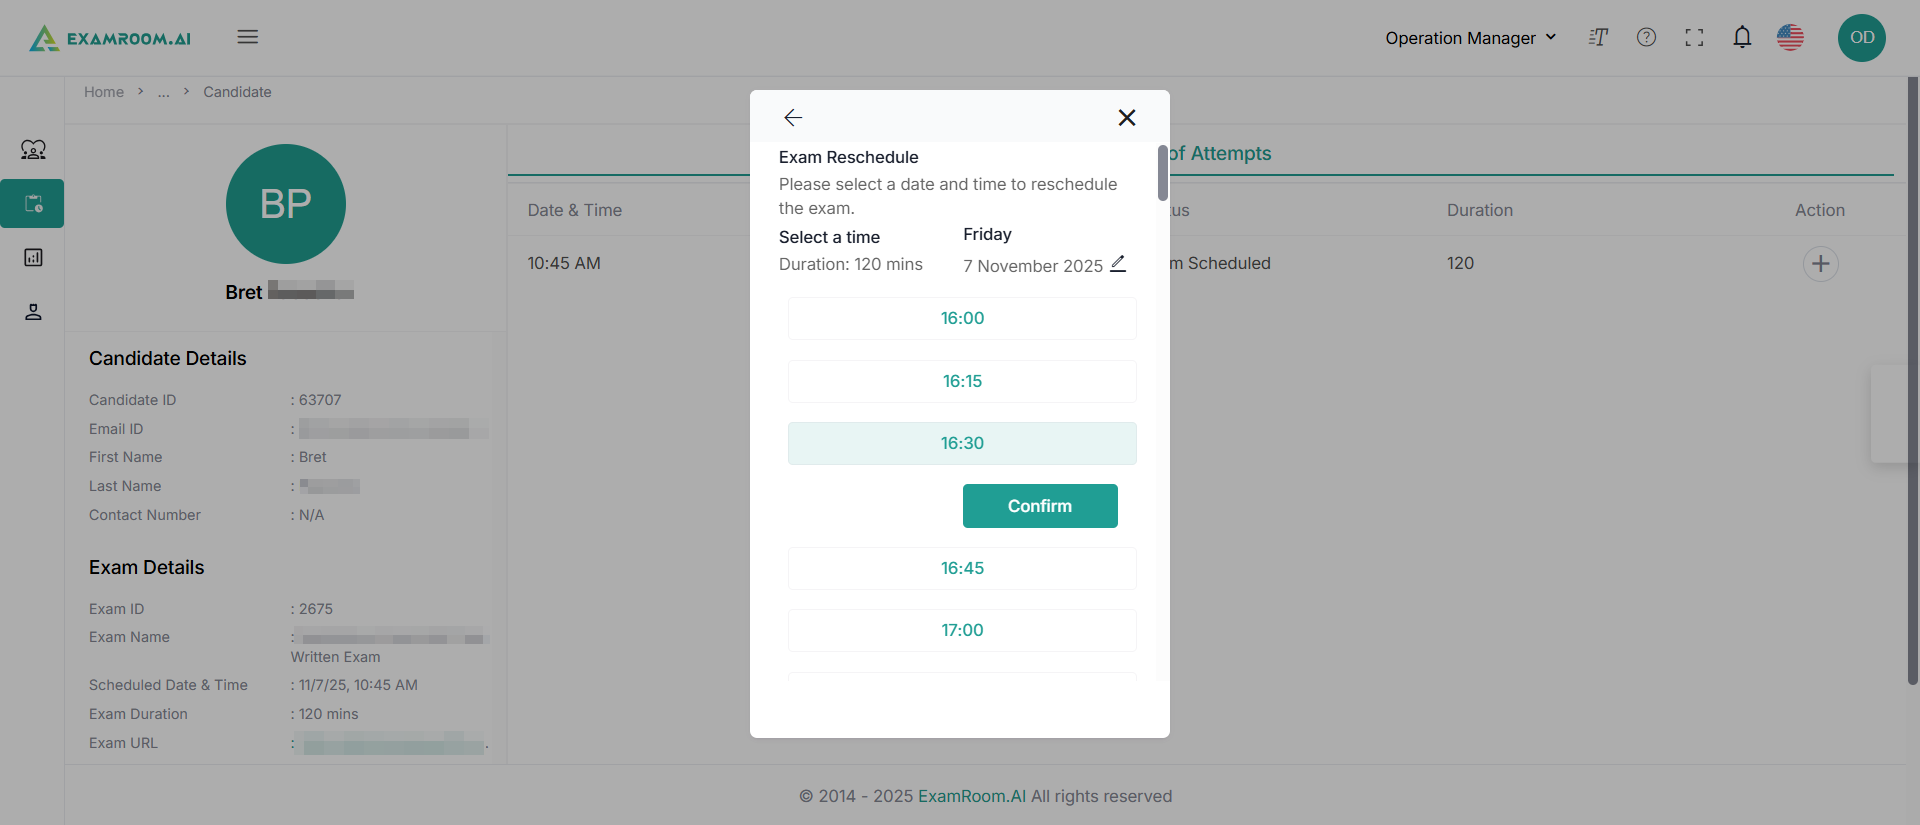
- Now select the preferred time slot and click Confirm to reschedule.
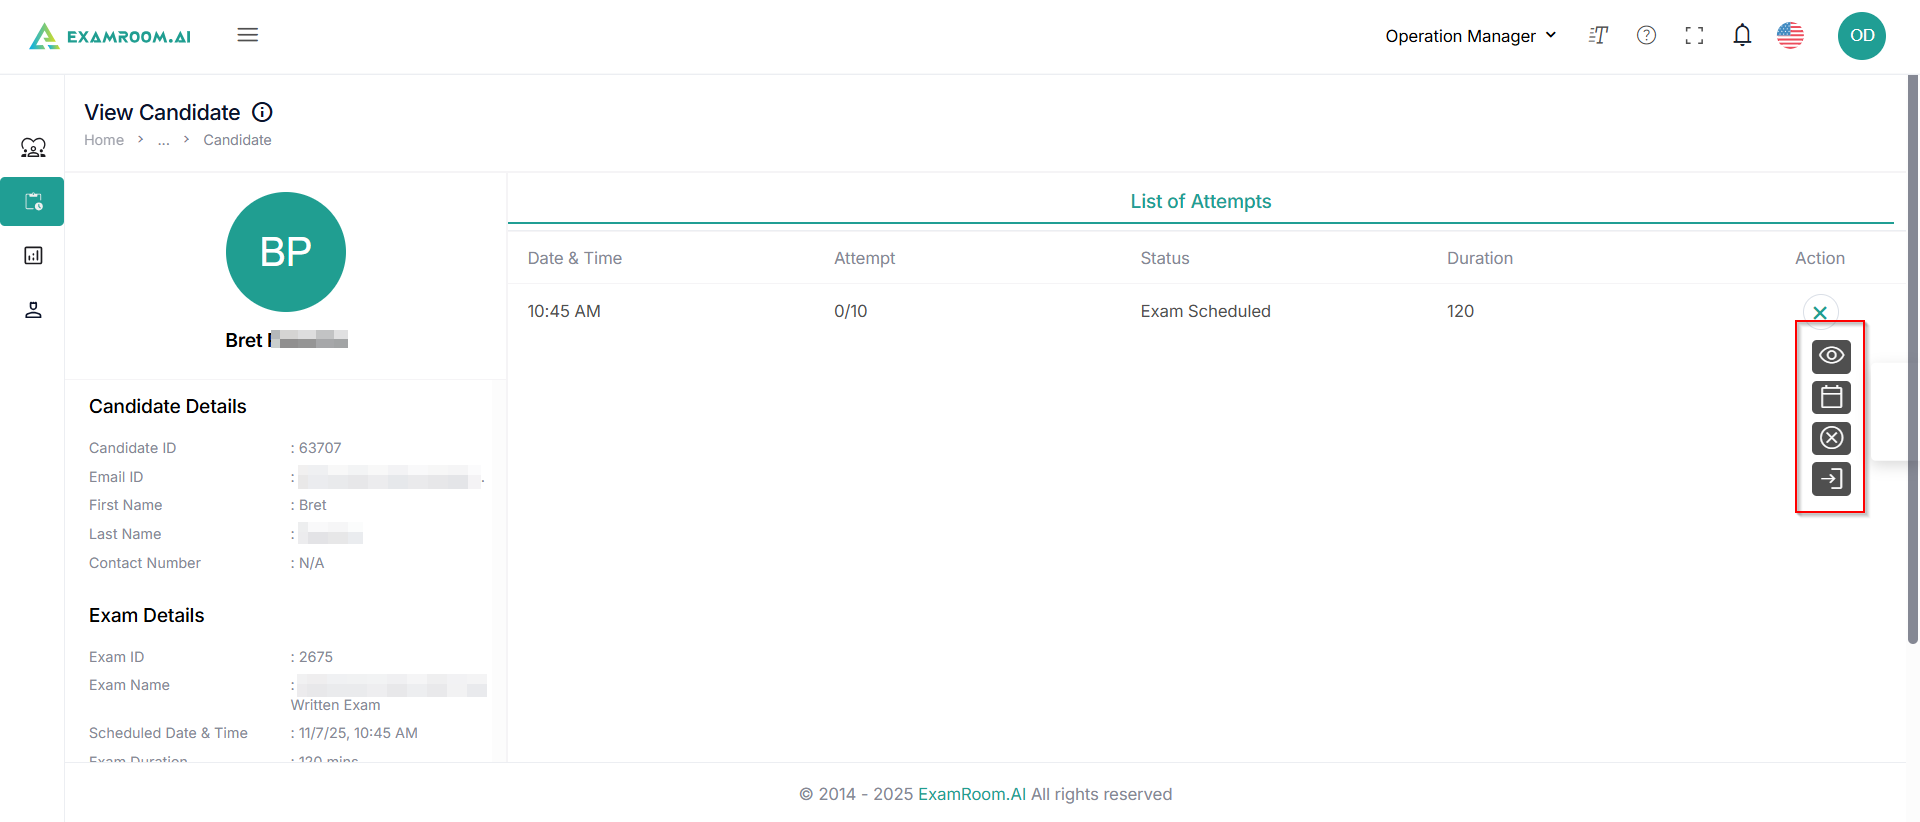
Cancel Examination
- To cancel the examination, click the cancel icon under the action button and click Submit to cancel the examination.