Proctoring
Note: Ensure to set your role to Proctor L1 and status to active to proceed with onboarding and other OBA features.
- In the proctoring section, you can proctor and manage all the candidates accepted for proctoring the remote exam.
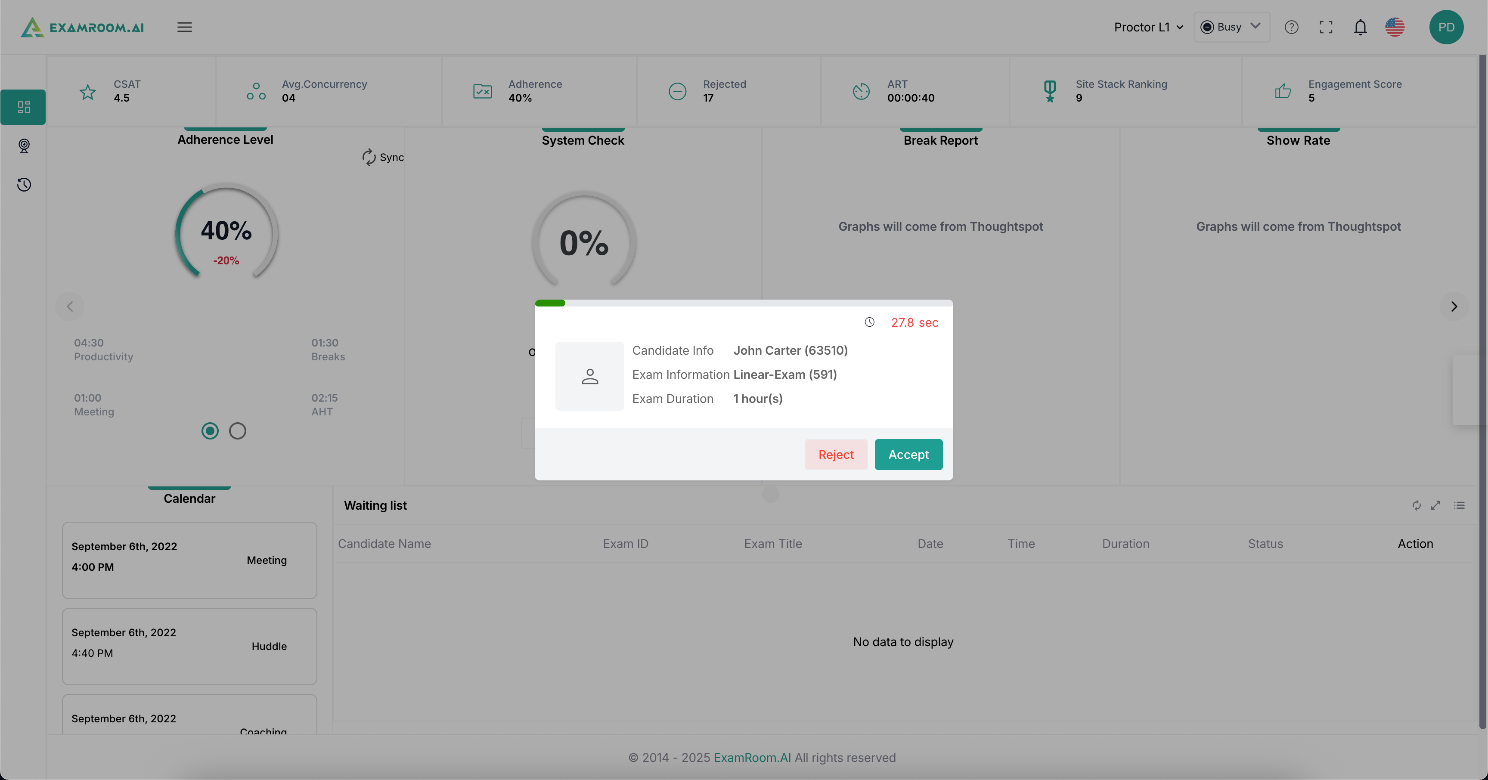
- When a candidate is assigned to you, you will be notified by a pop-up notification of the assigned candidate to accept for the proctoring. You can also accept a candidate waiting after onboarding, from the waiting list available on the dashboard. Click Accept to begin.
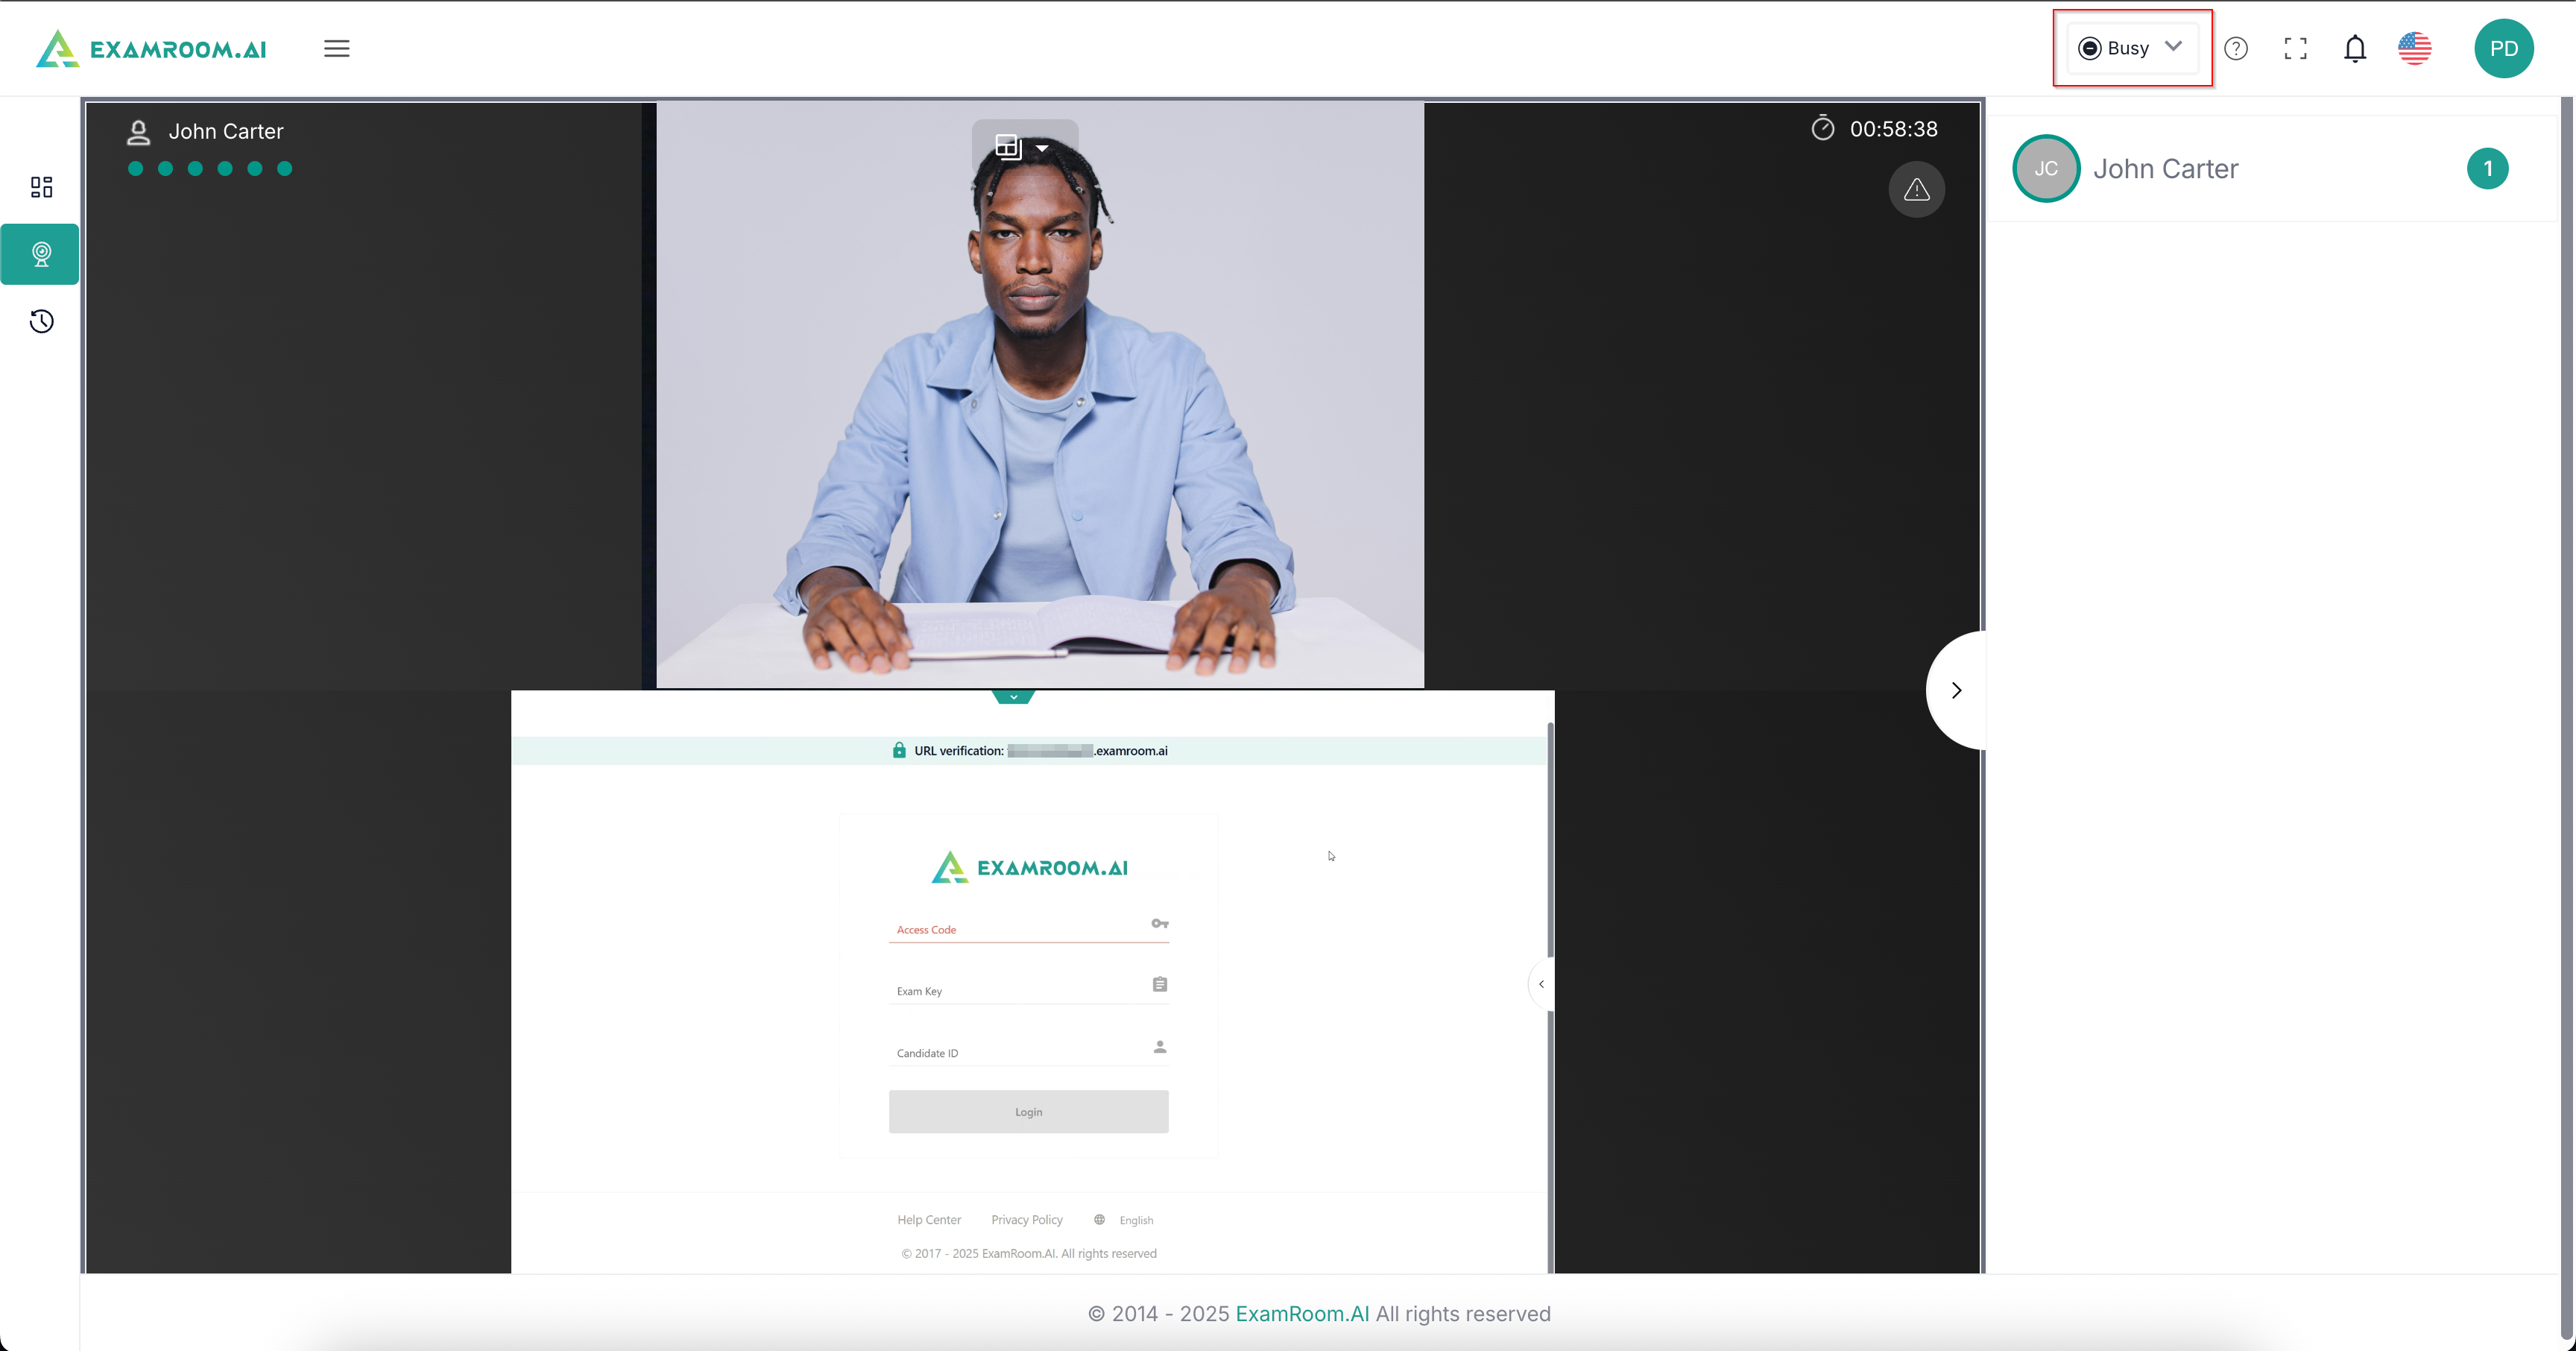
- Once you accept the candidate, your status will be updated to busy, and you will be taken to the proctoring screen. Alternatively, you can access it by selecting the proctoring option in the left menu. Here, you can view the accepted candidate’s live stream along with their exam details.
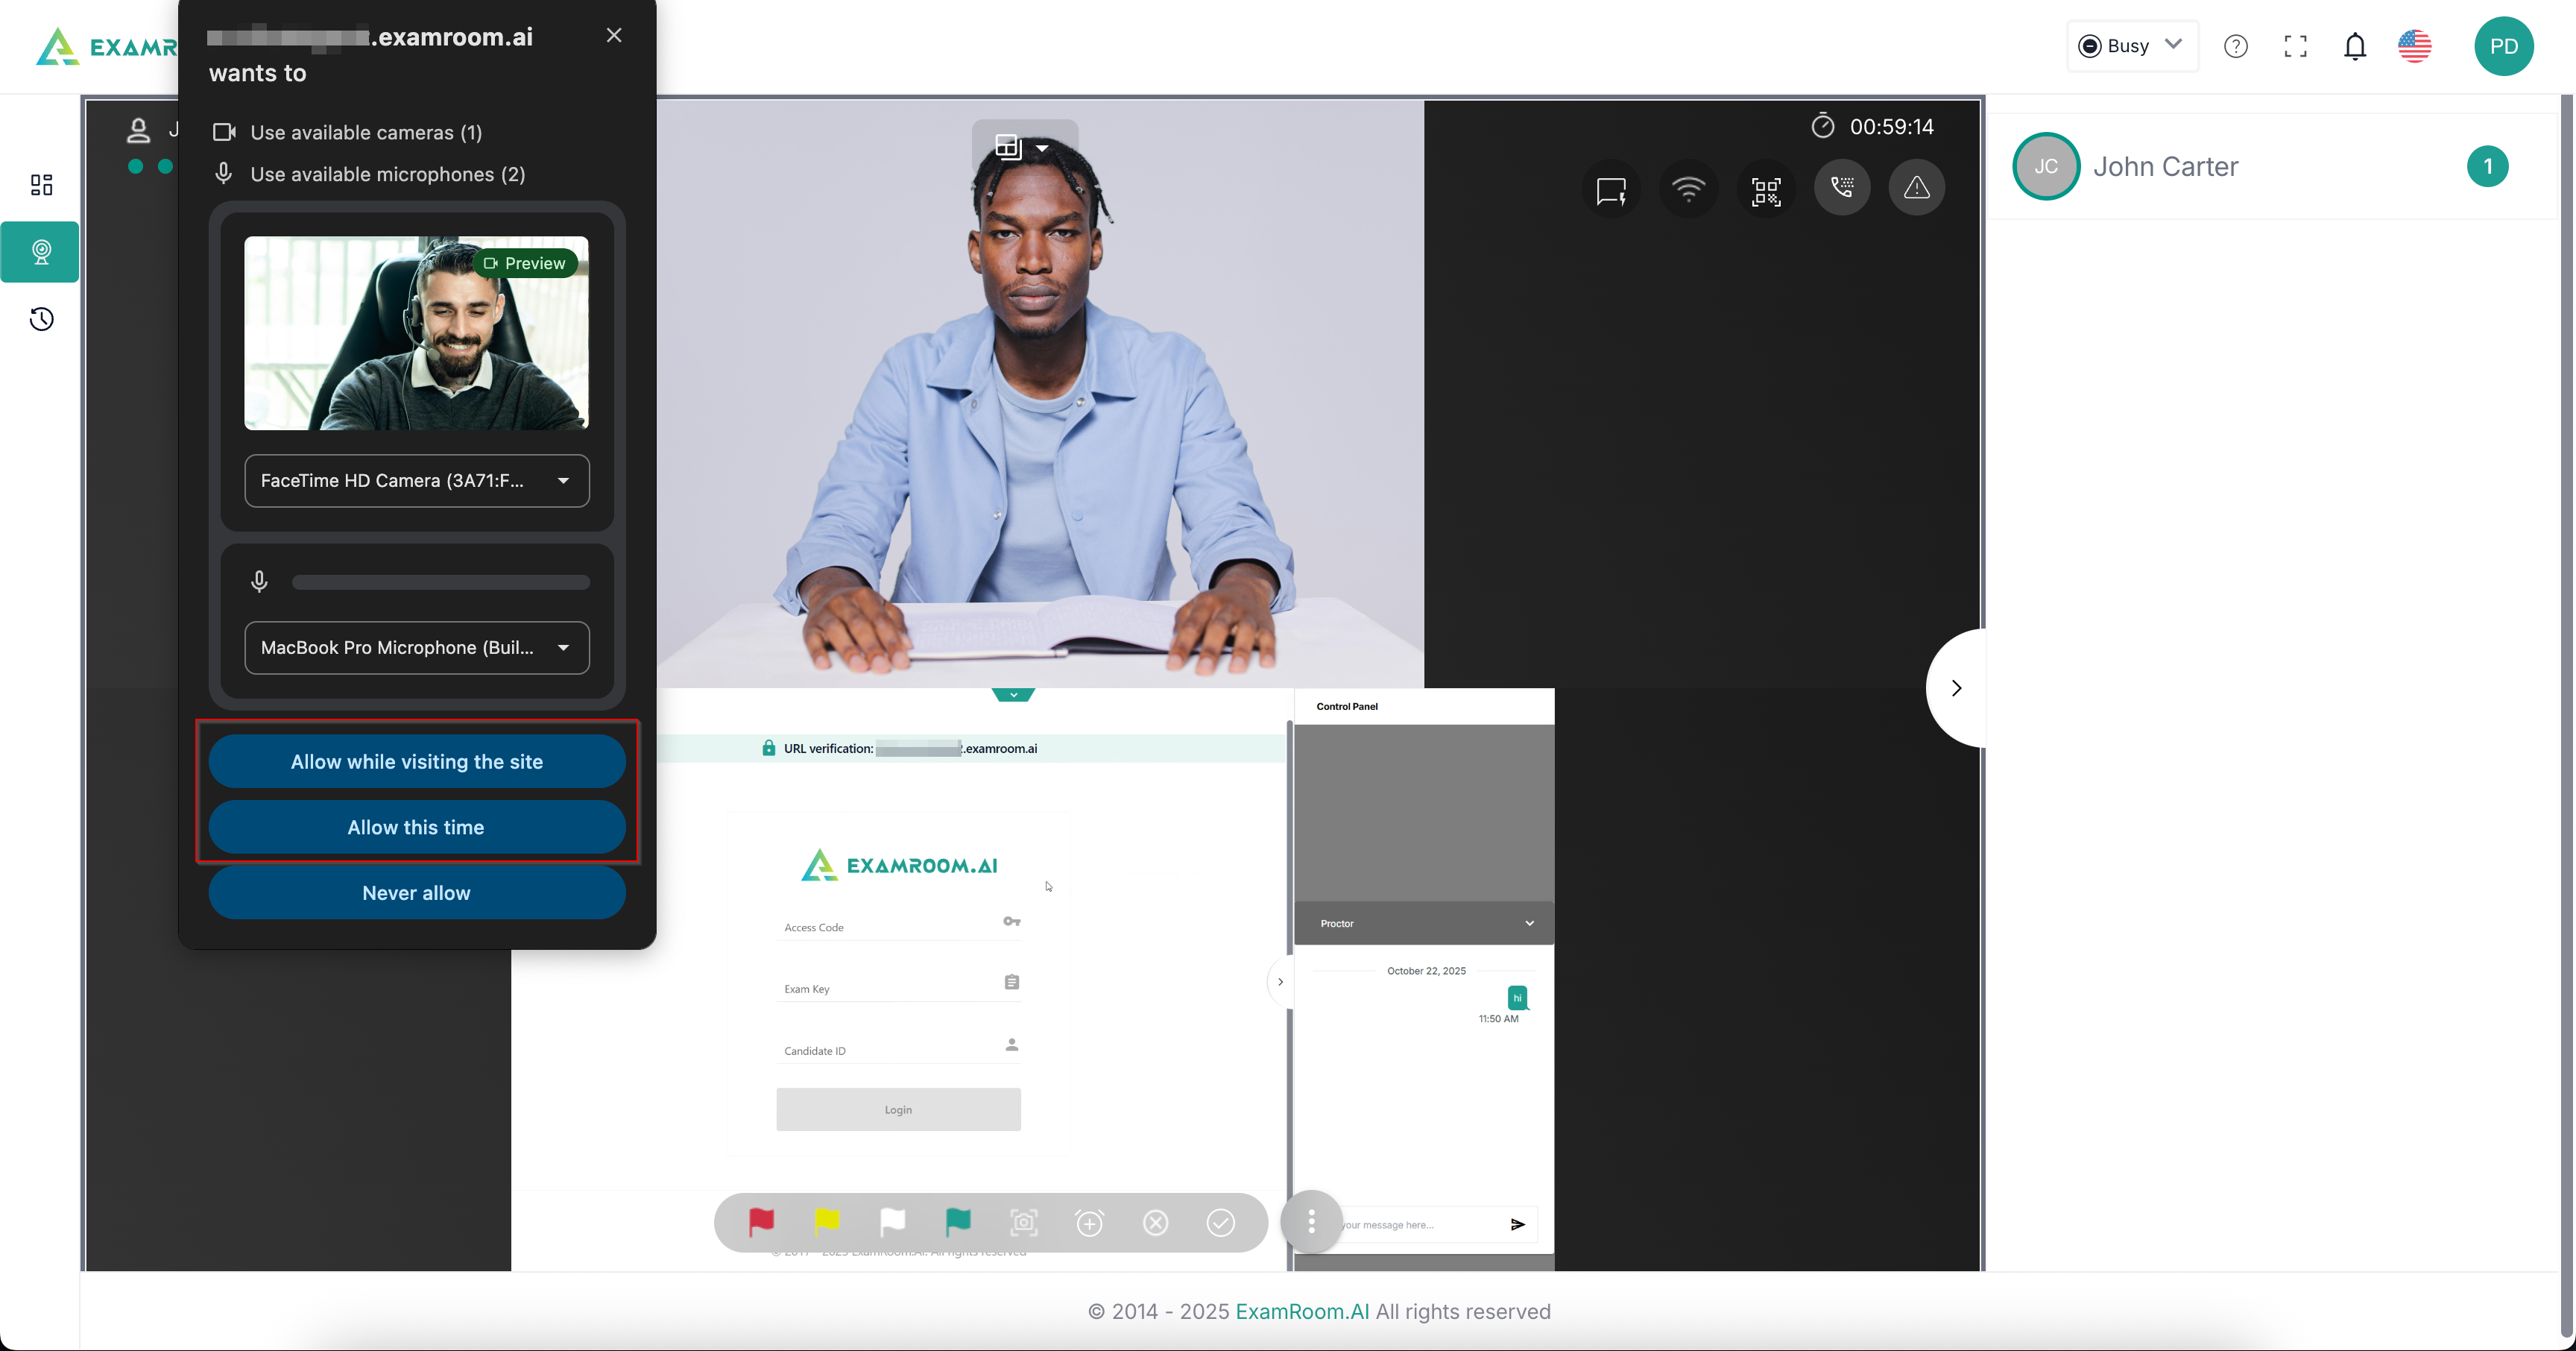
- You will be asked to provide access to your camera and microphone. Click Allow to provide access.
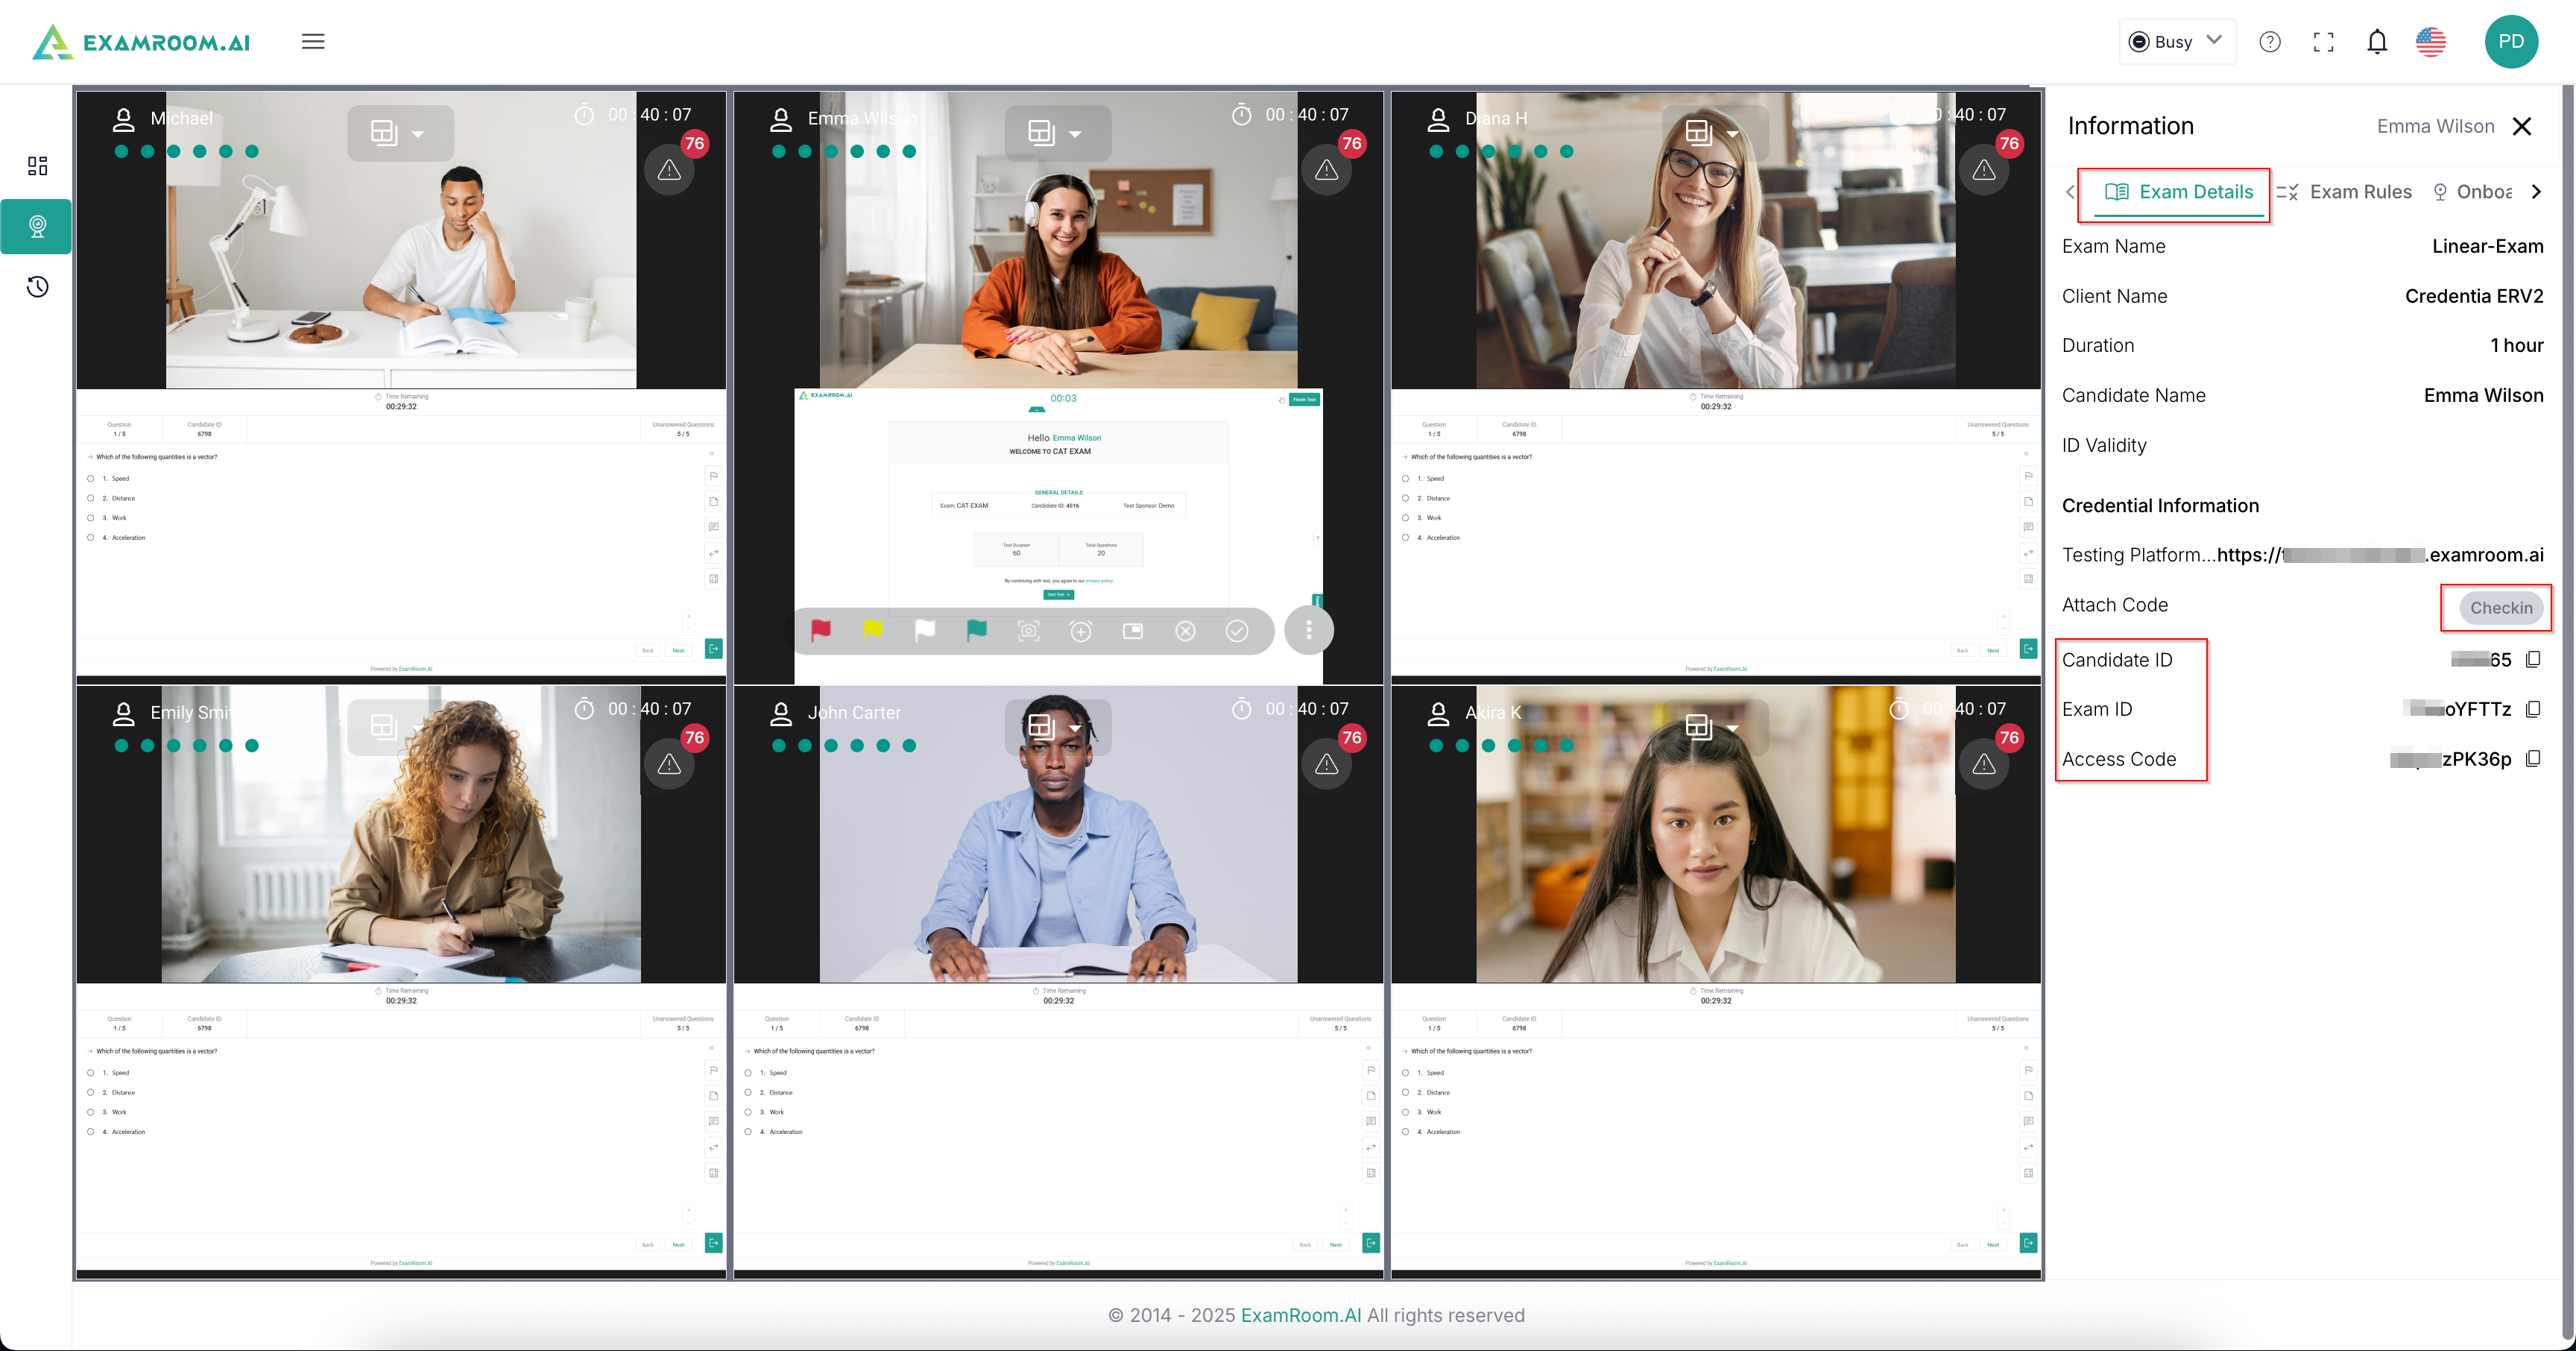
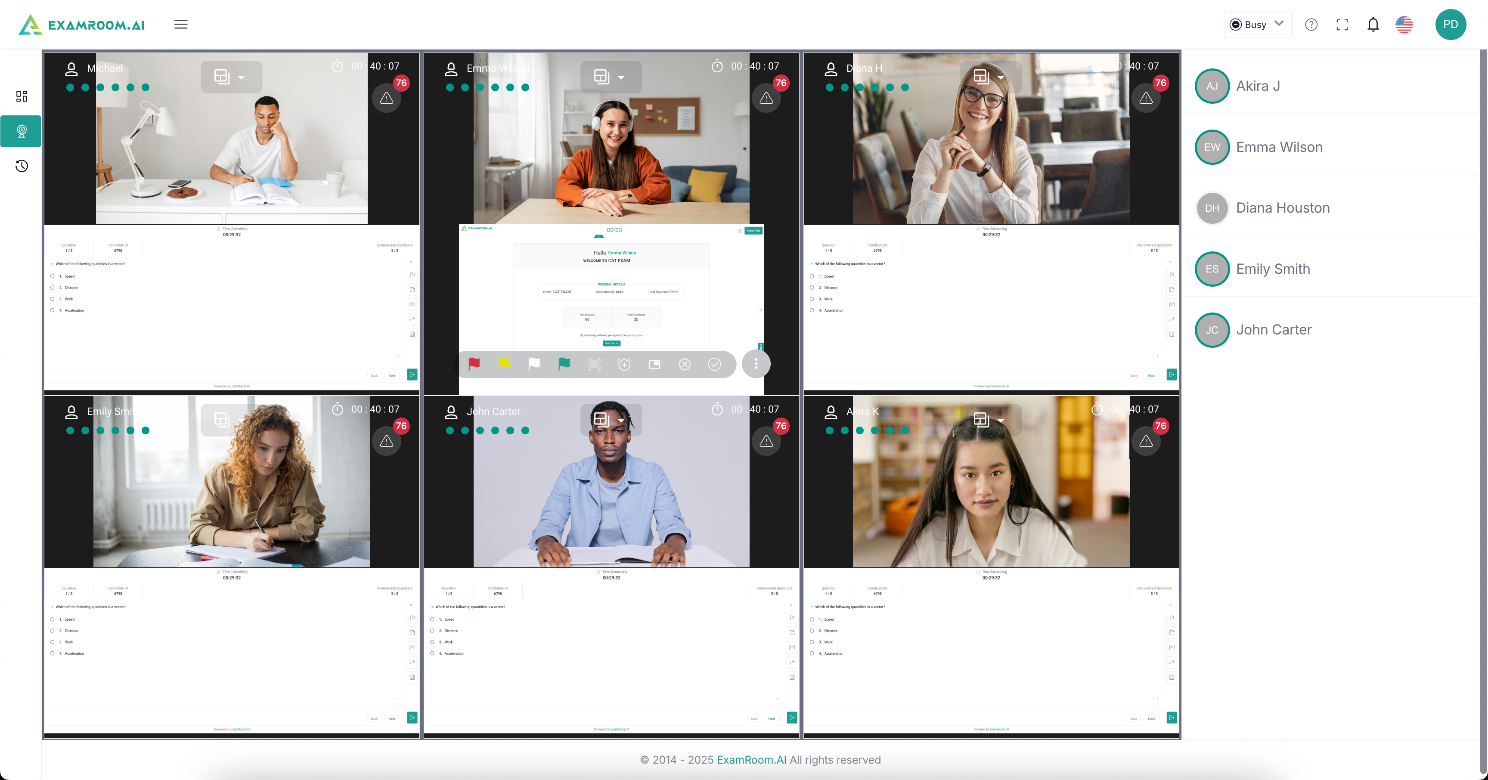
- As an L1 proctor, you can proctor six candidates at a time. You will be able to accept candidates successively, and they will be added to your proctoring screen in the same manner.
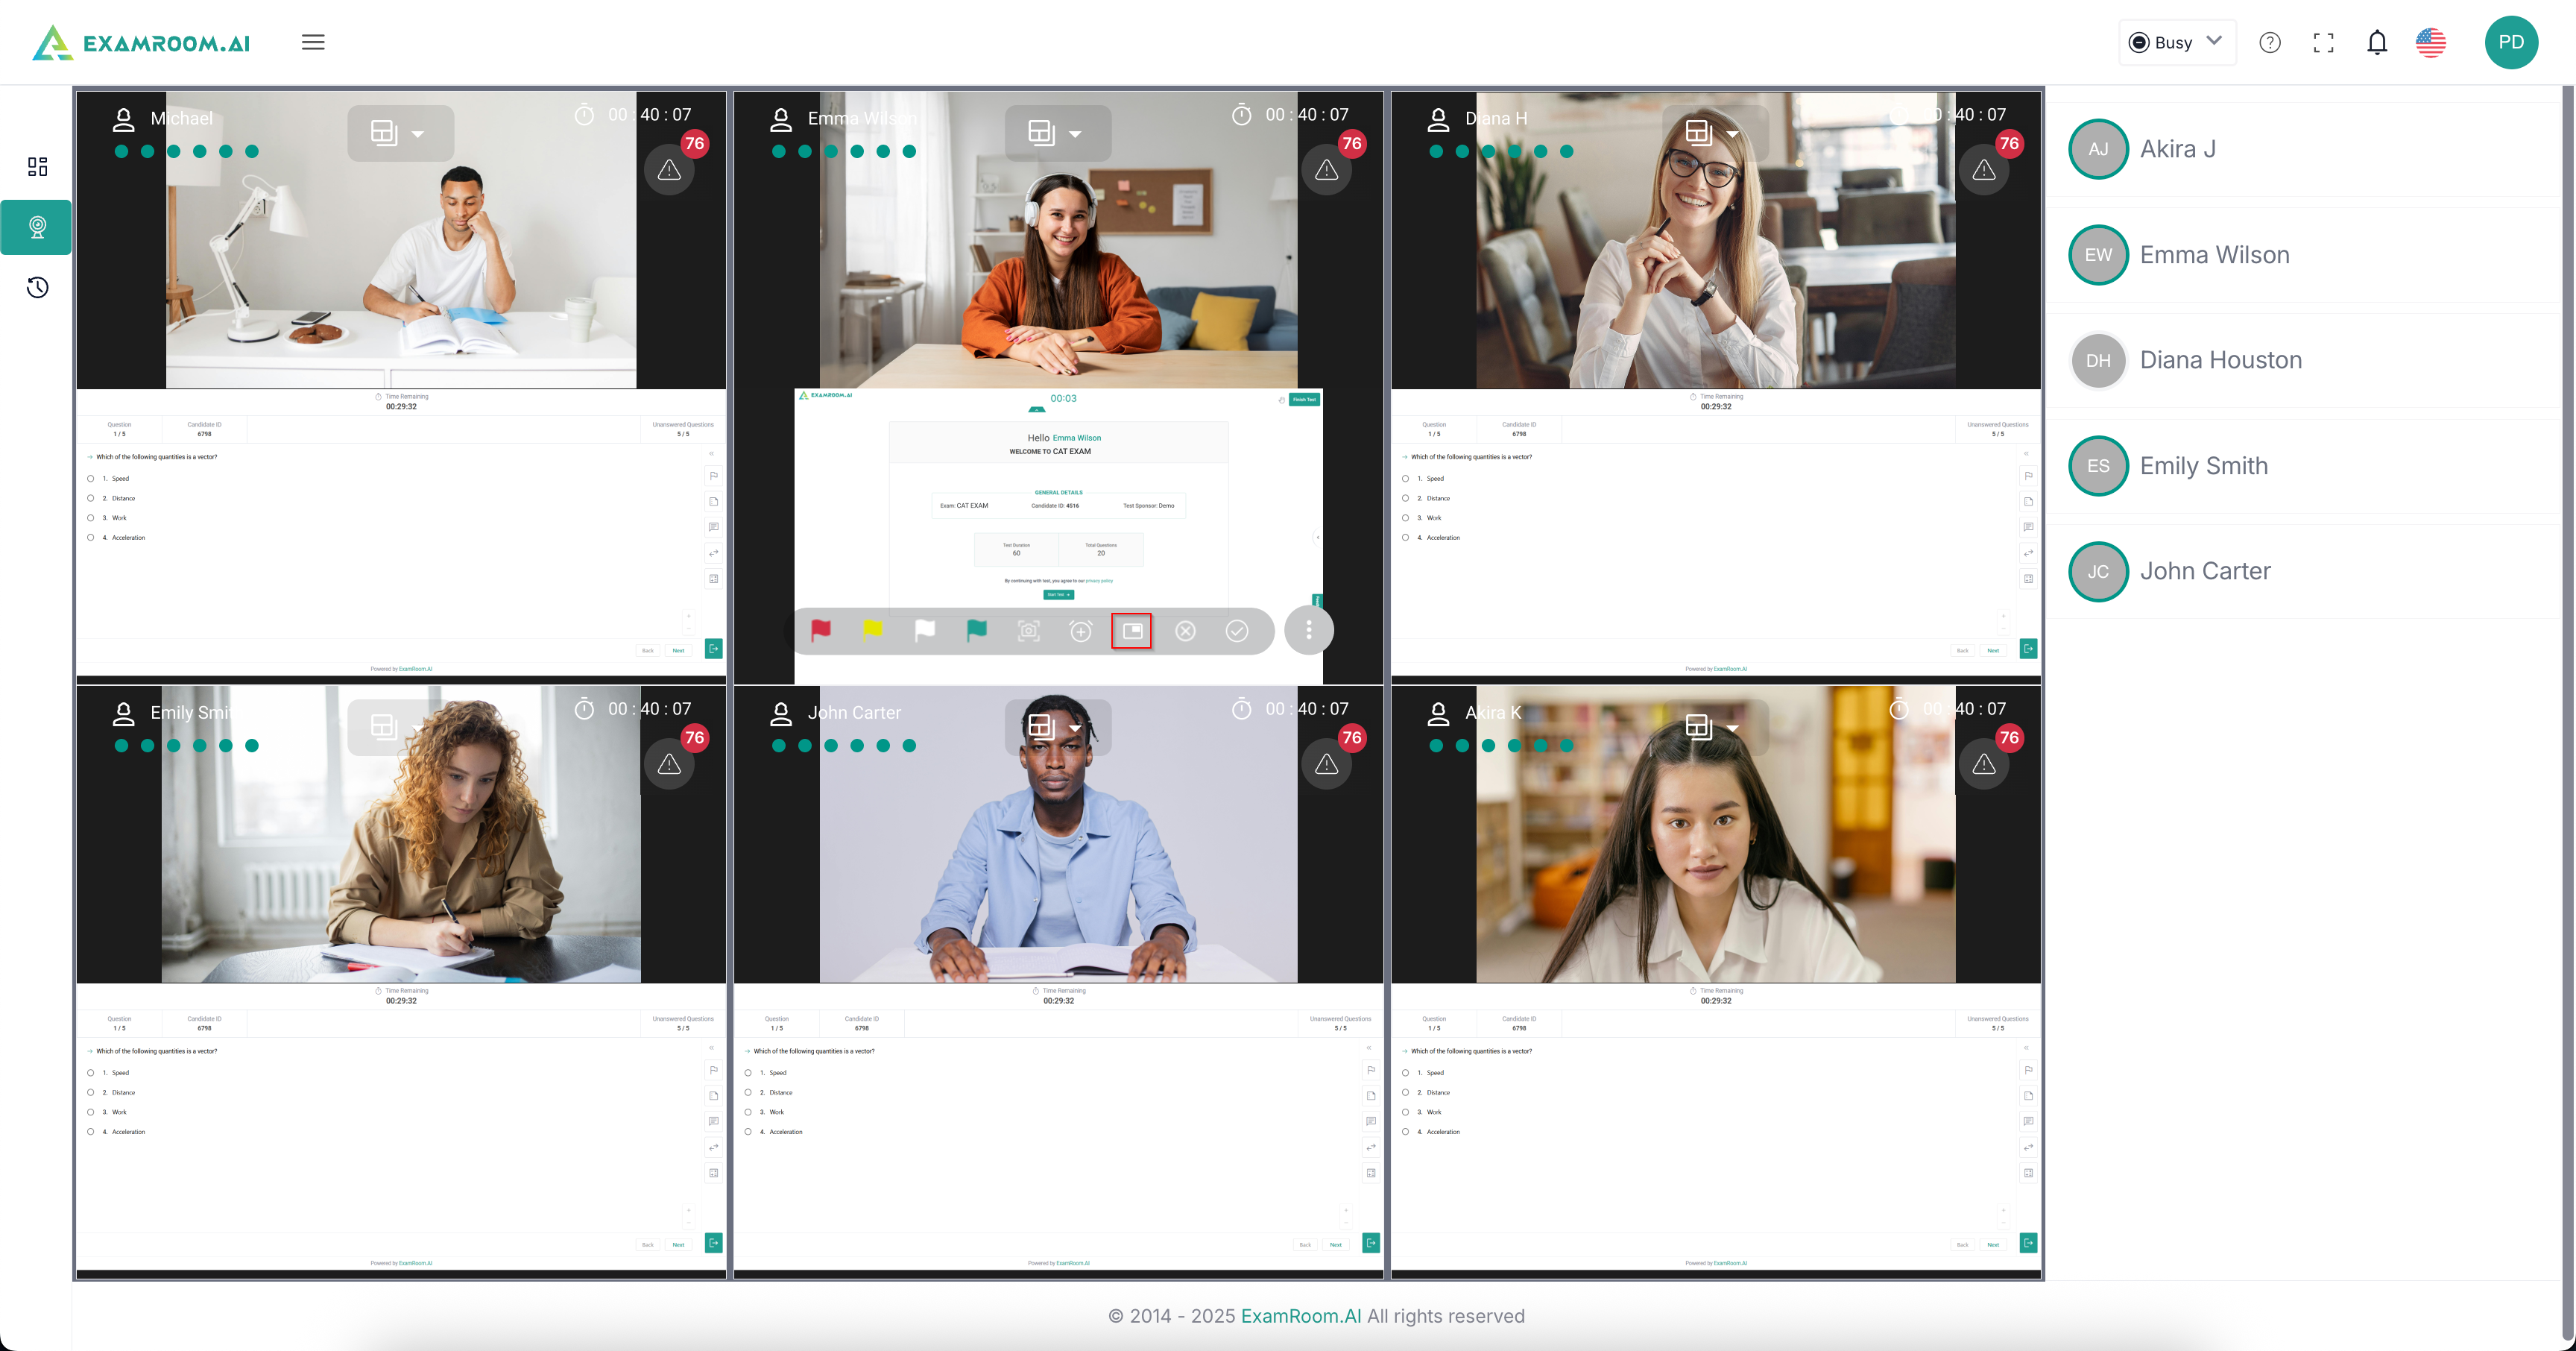
- You will be able to see all of the candidates on your screen, and their names on the right-hand side panel, which indicates their chat options.
- We will be explaining the candidate features using Emma Wilson as an example ahead.
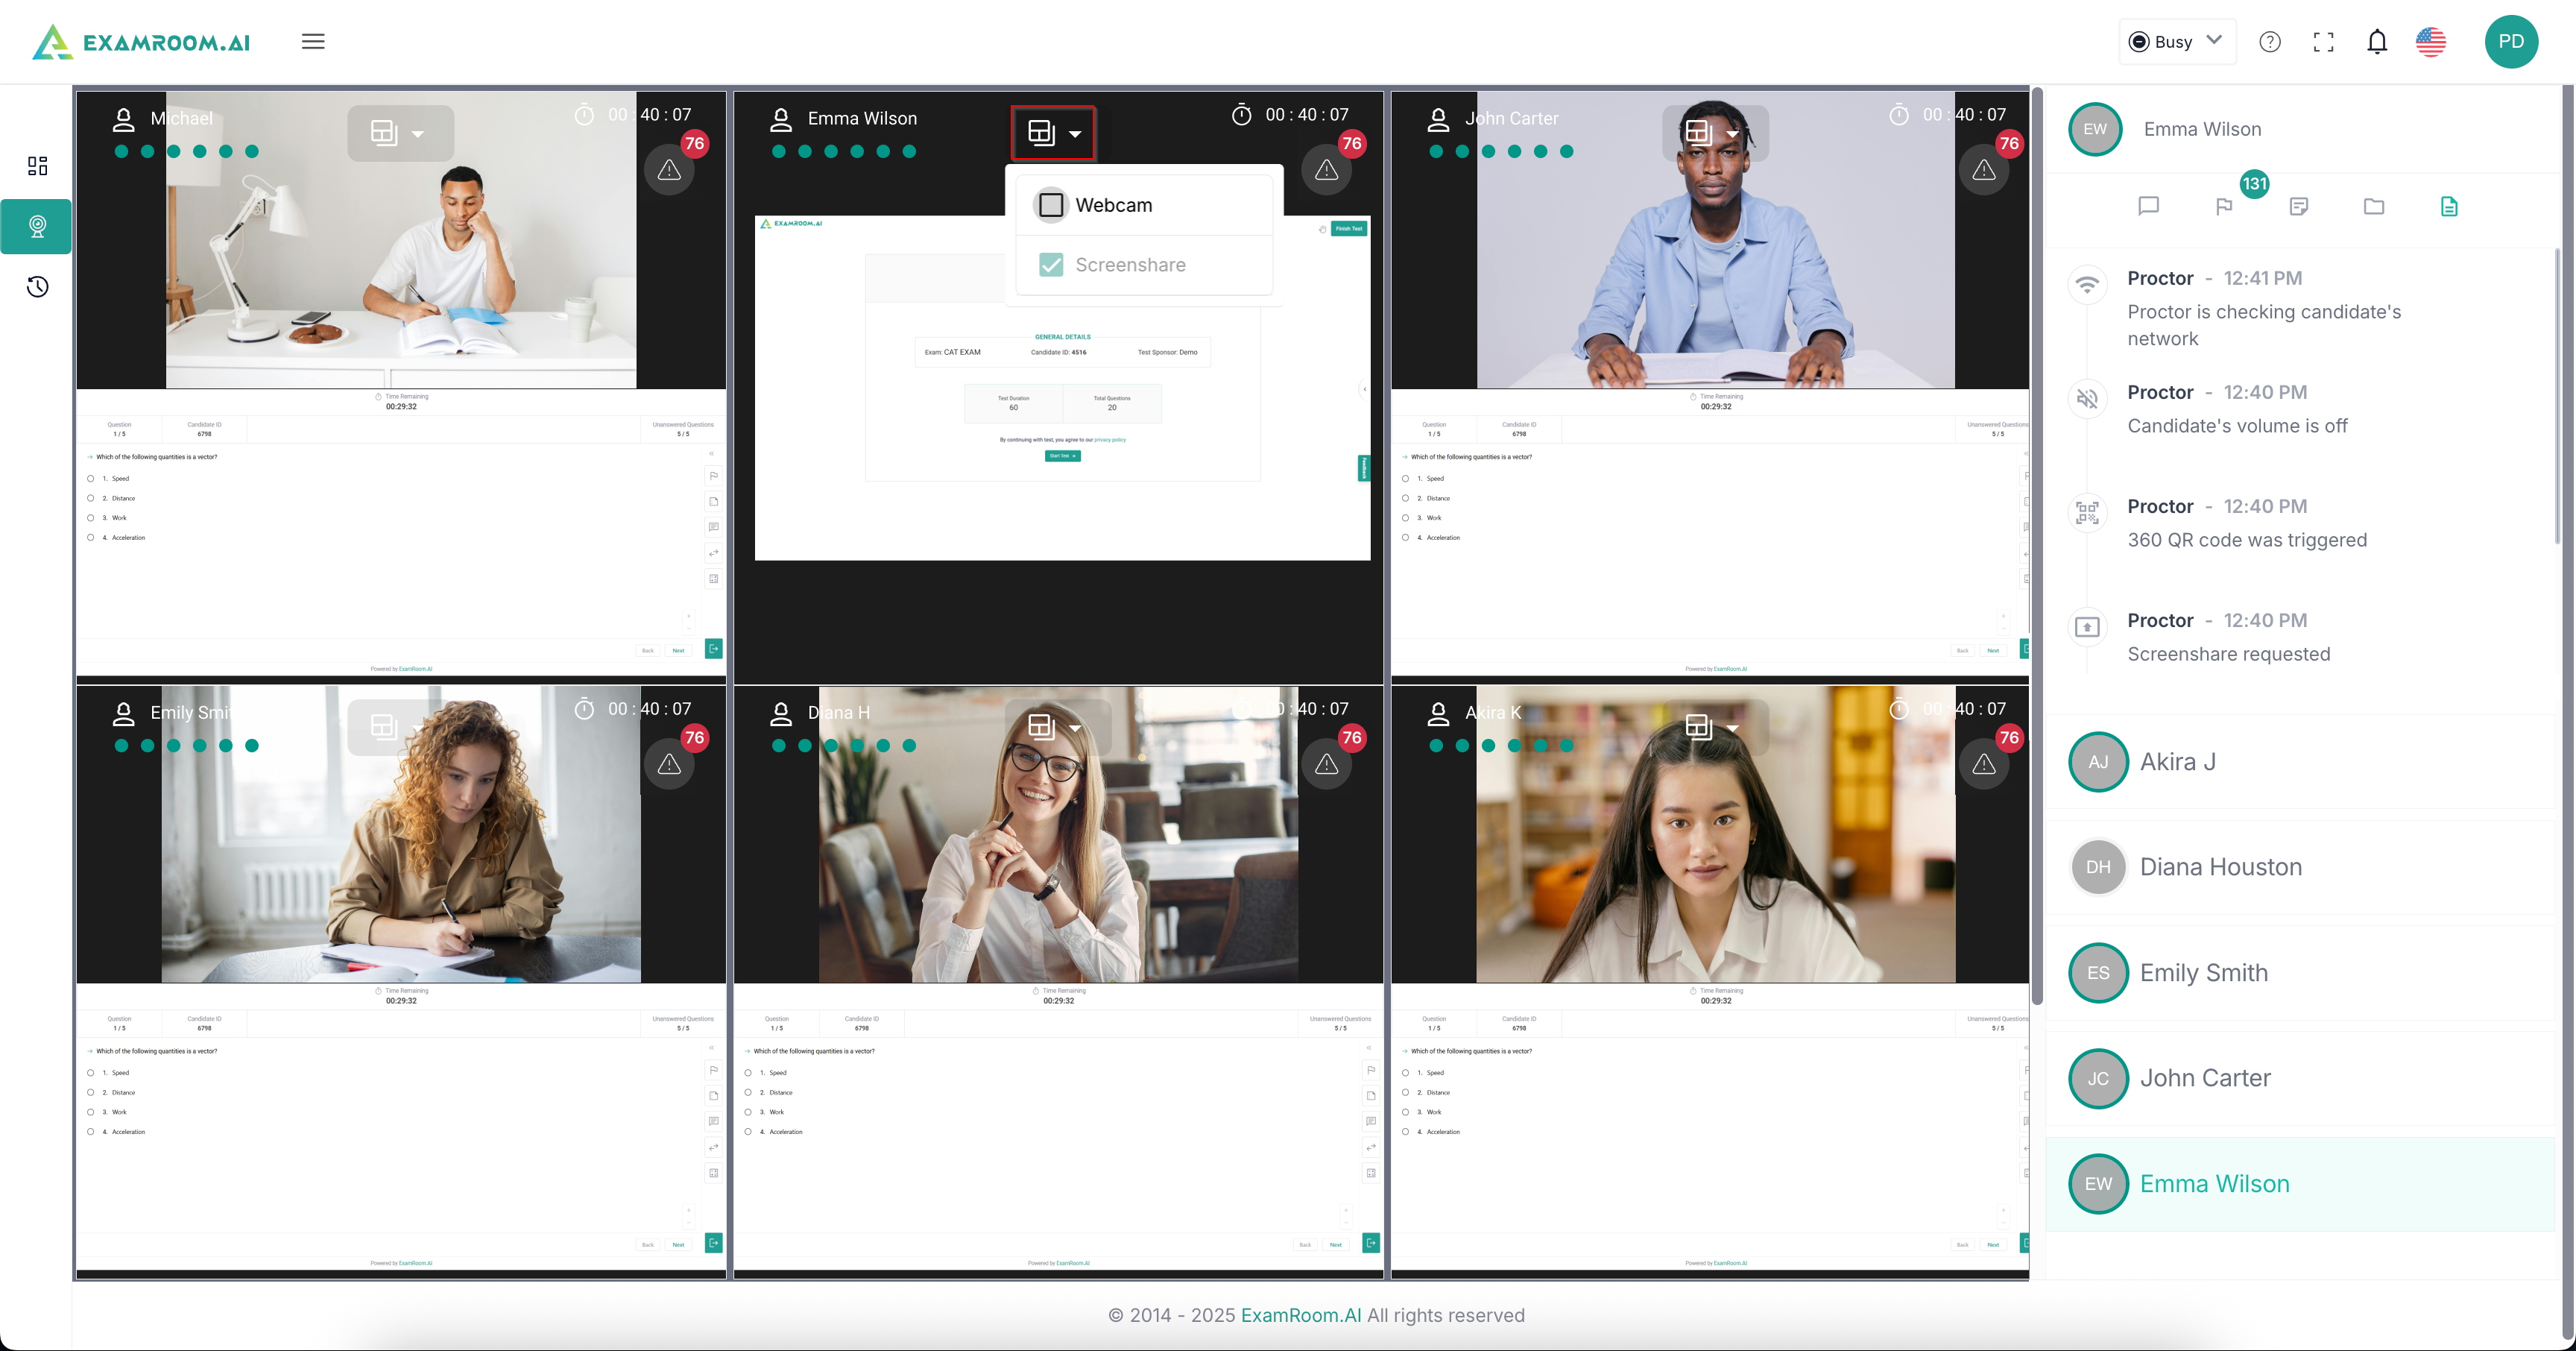
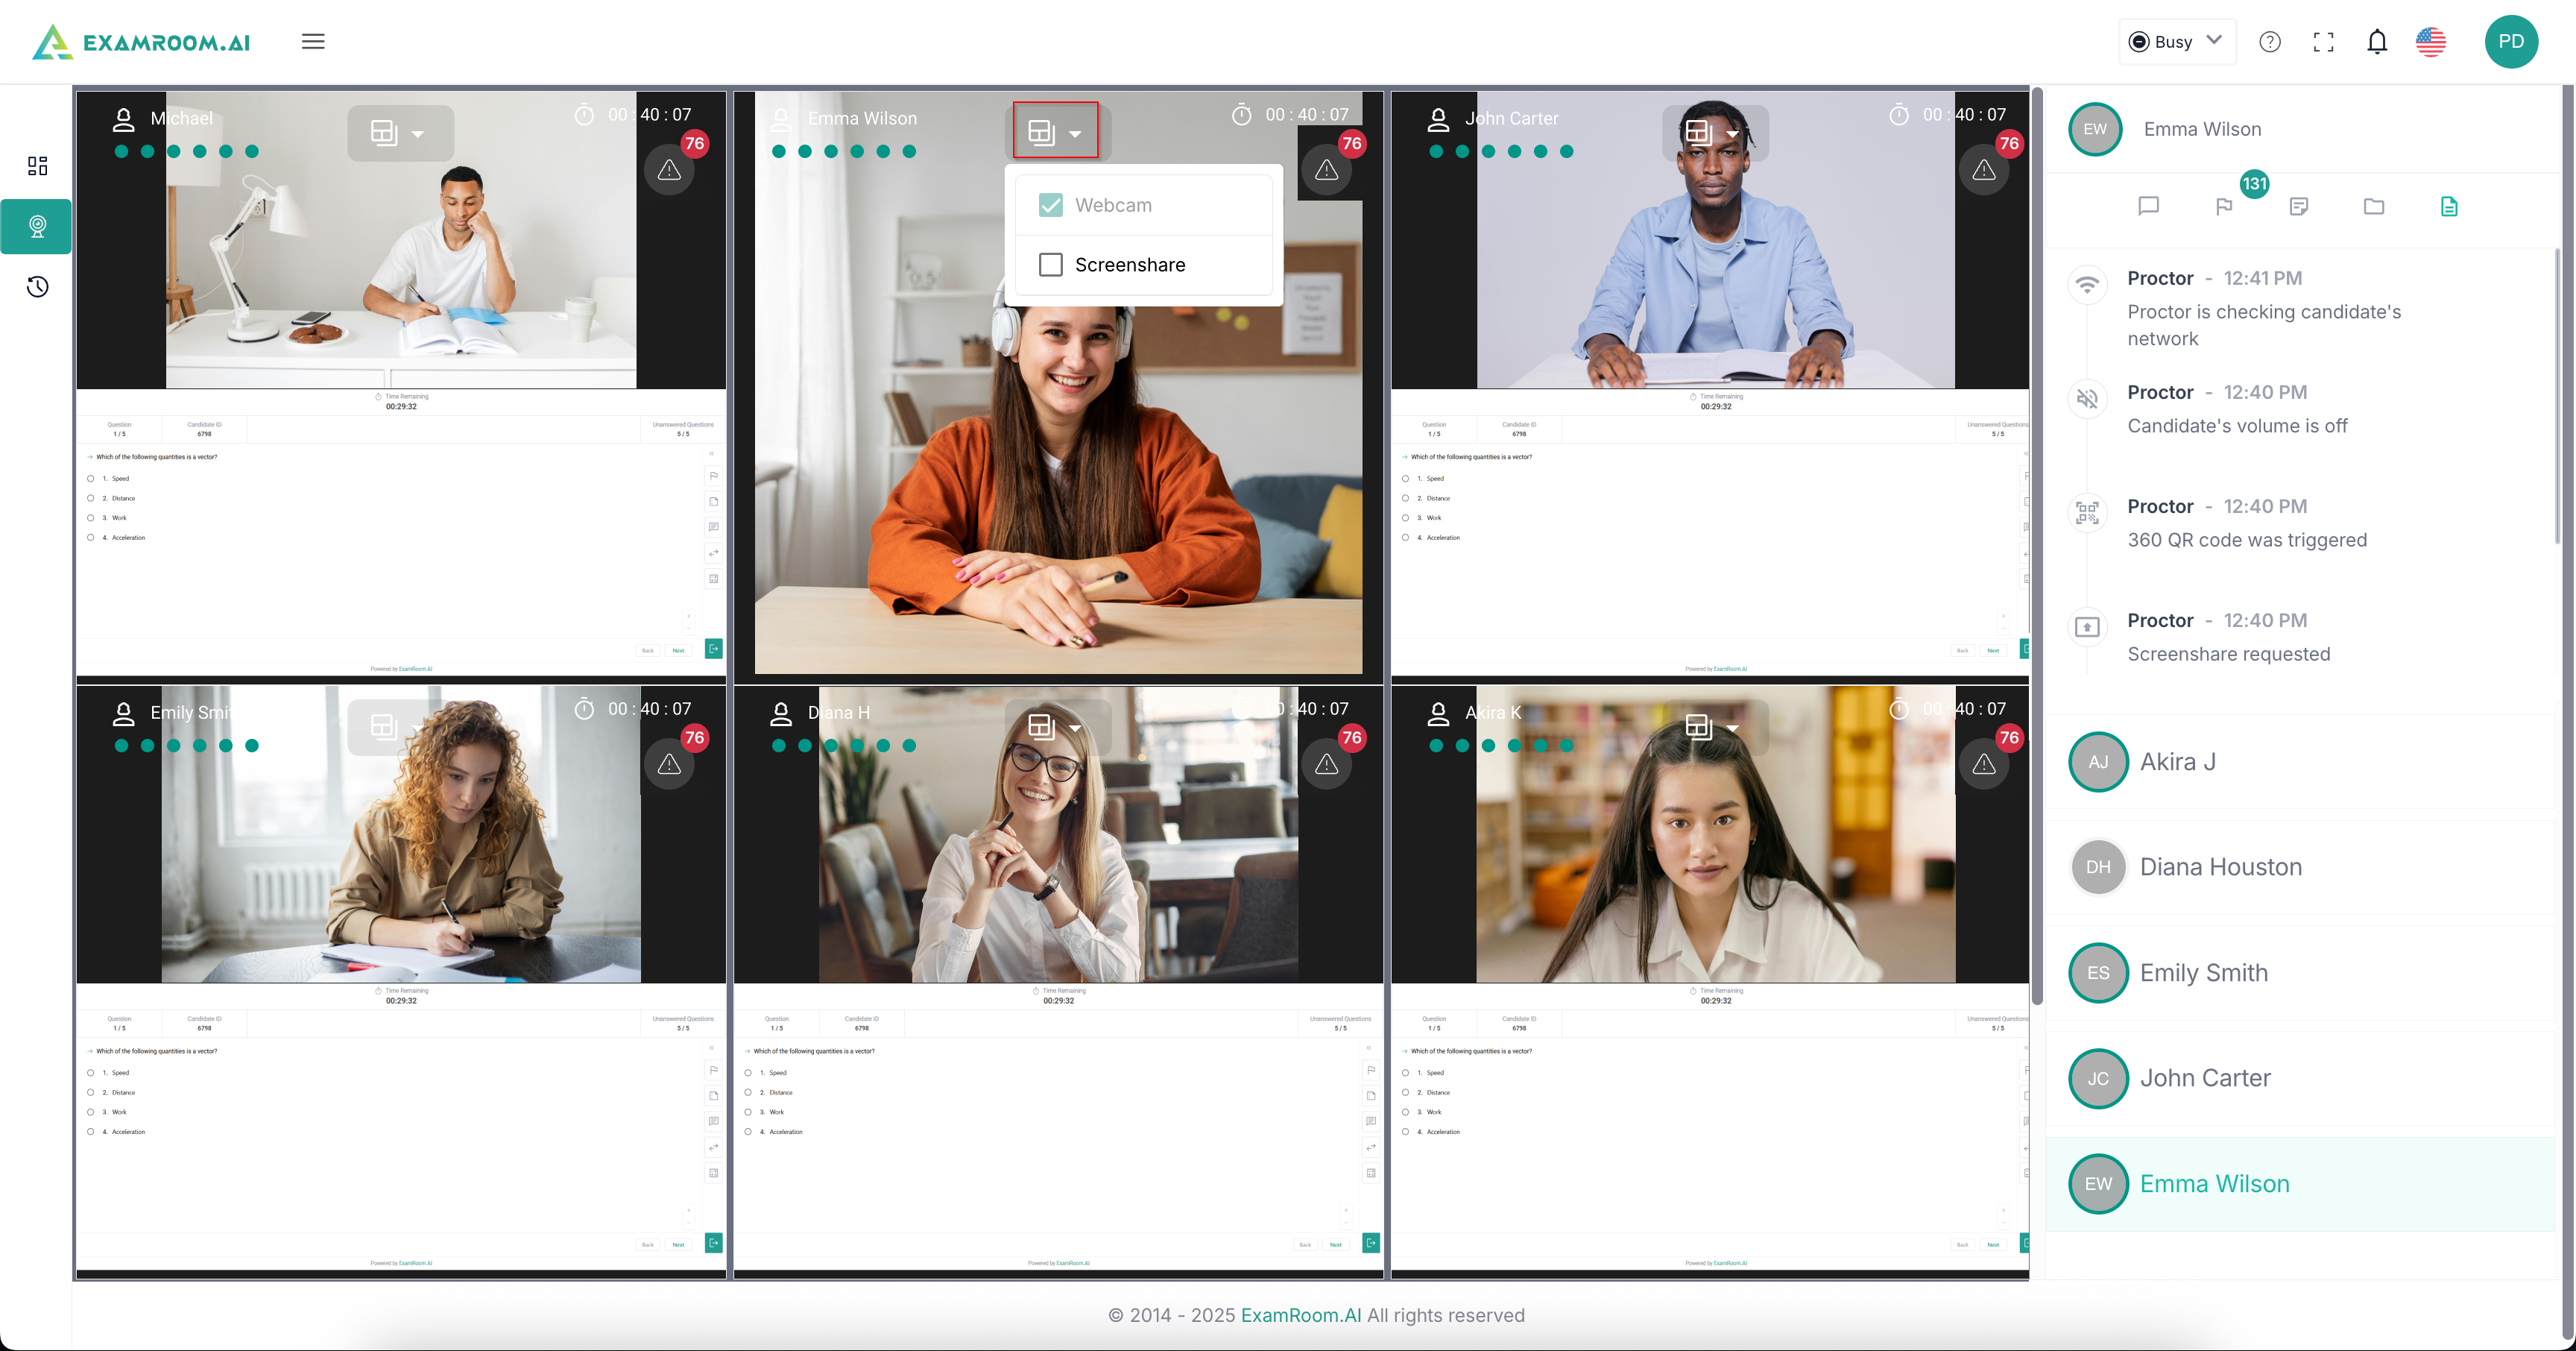
- All the candidates’ views are in the auto layout format by default. You have the option to switch the view of any candidate to only the screenshare or even the webcam.
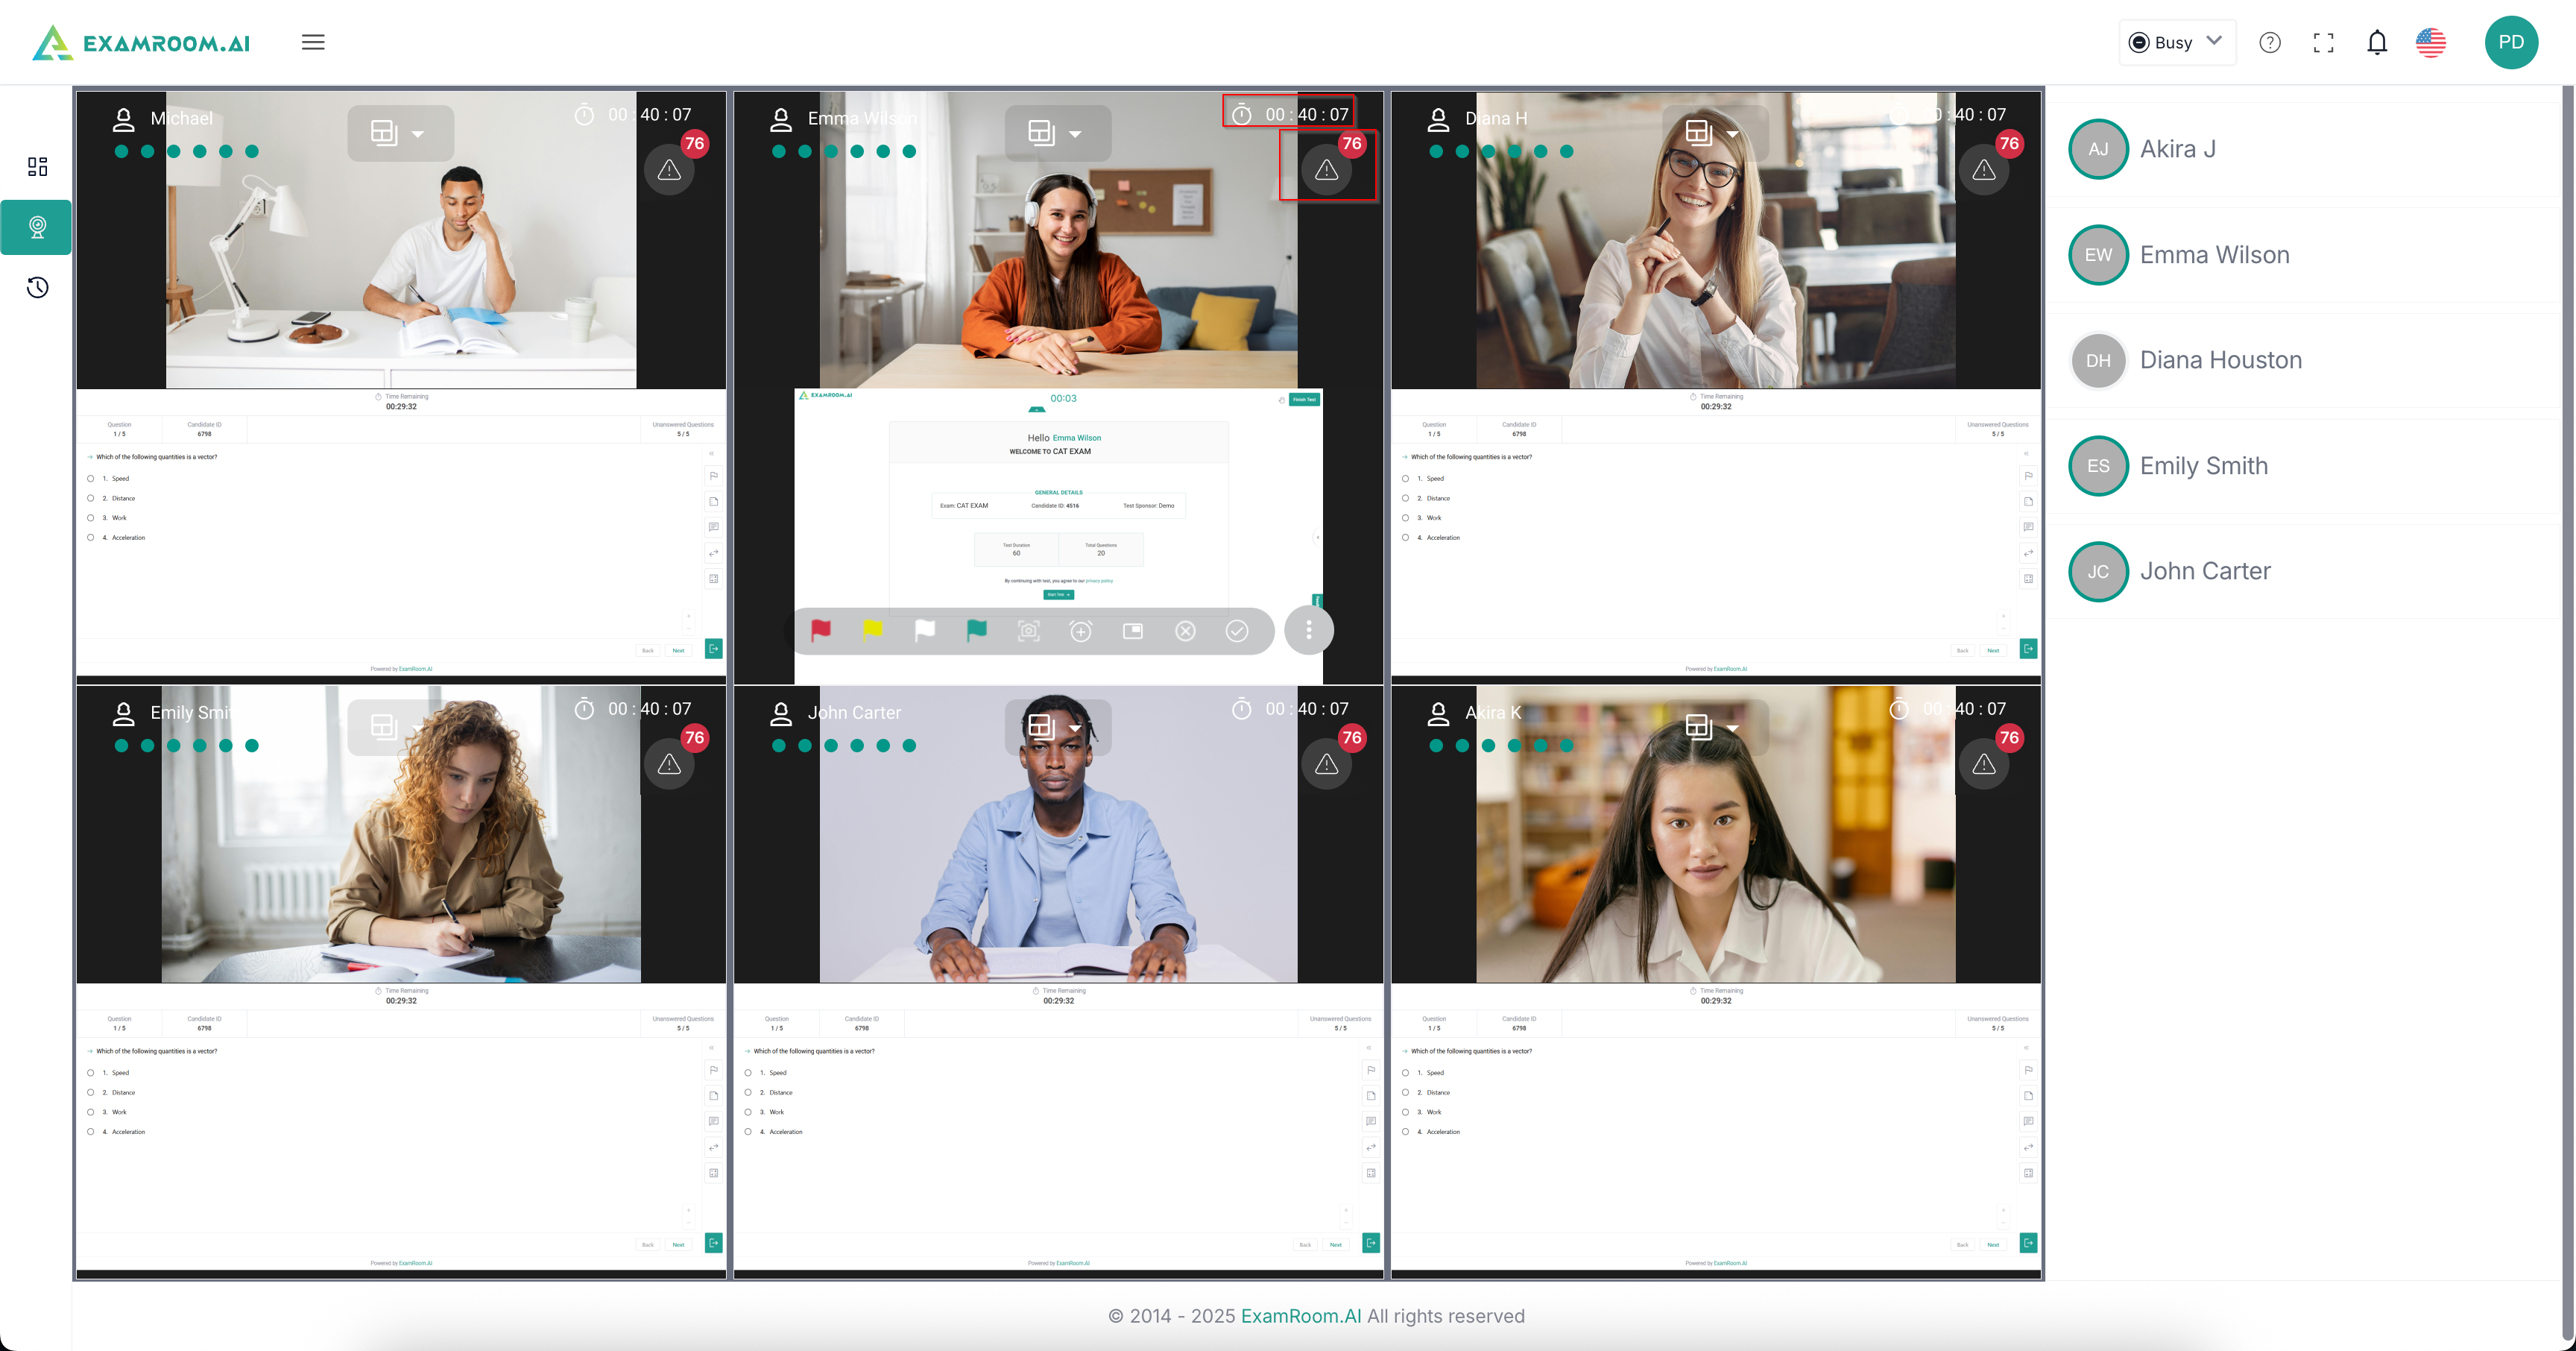
- On the top left of the candidate view, you’ll find the candidate’s name. Below it, a series of dots that blink if there is any sound from the respective candidate.
- On the top right of the candidate view, you can see the proctoring time and the alert icon. The alert Icon is to display the AI notifications. If AI raises any flags, they will be shown on the right panel when you click on it under the flags.
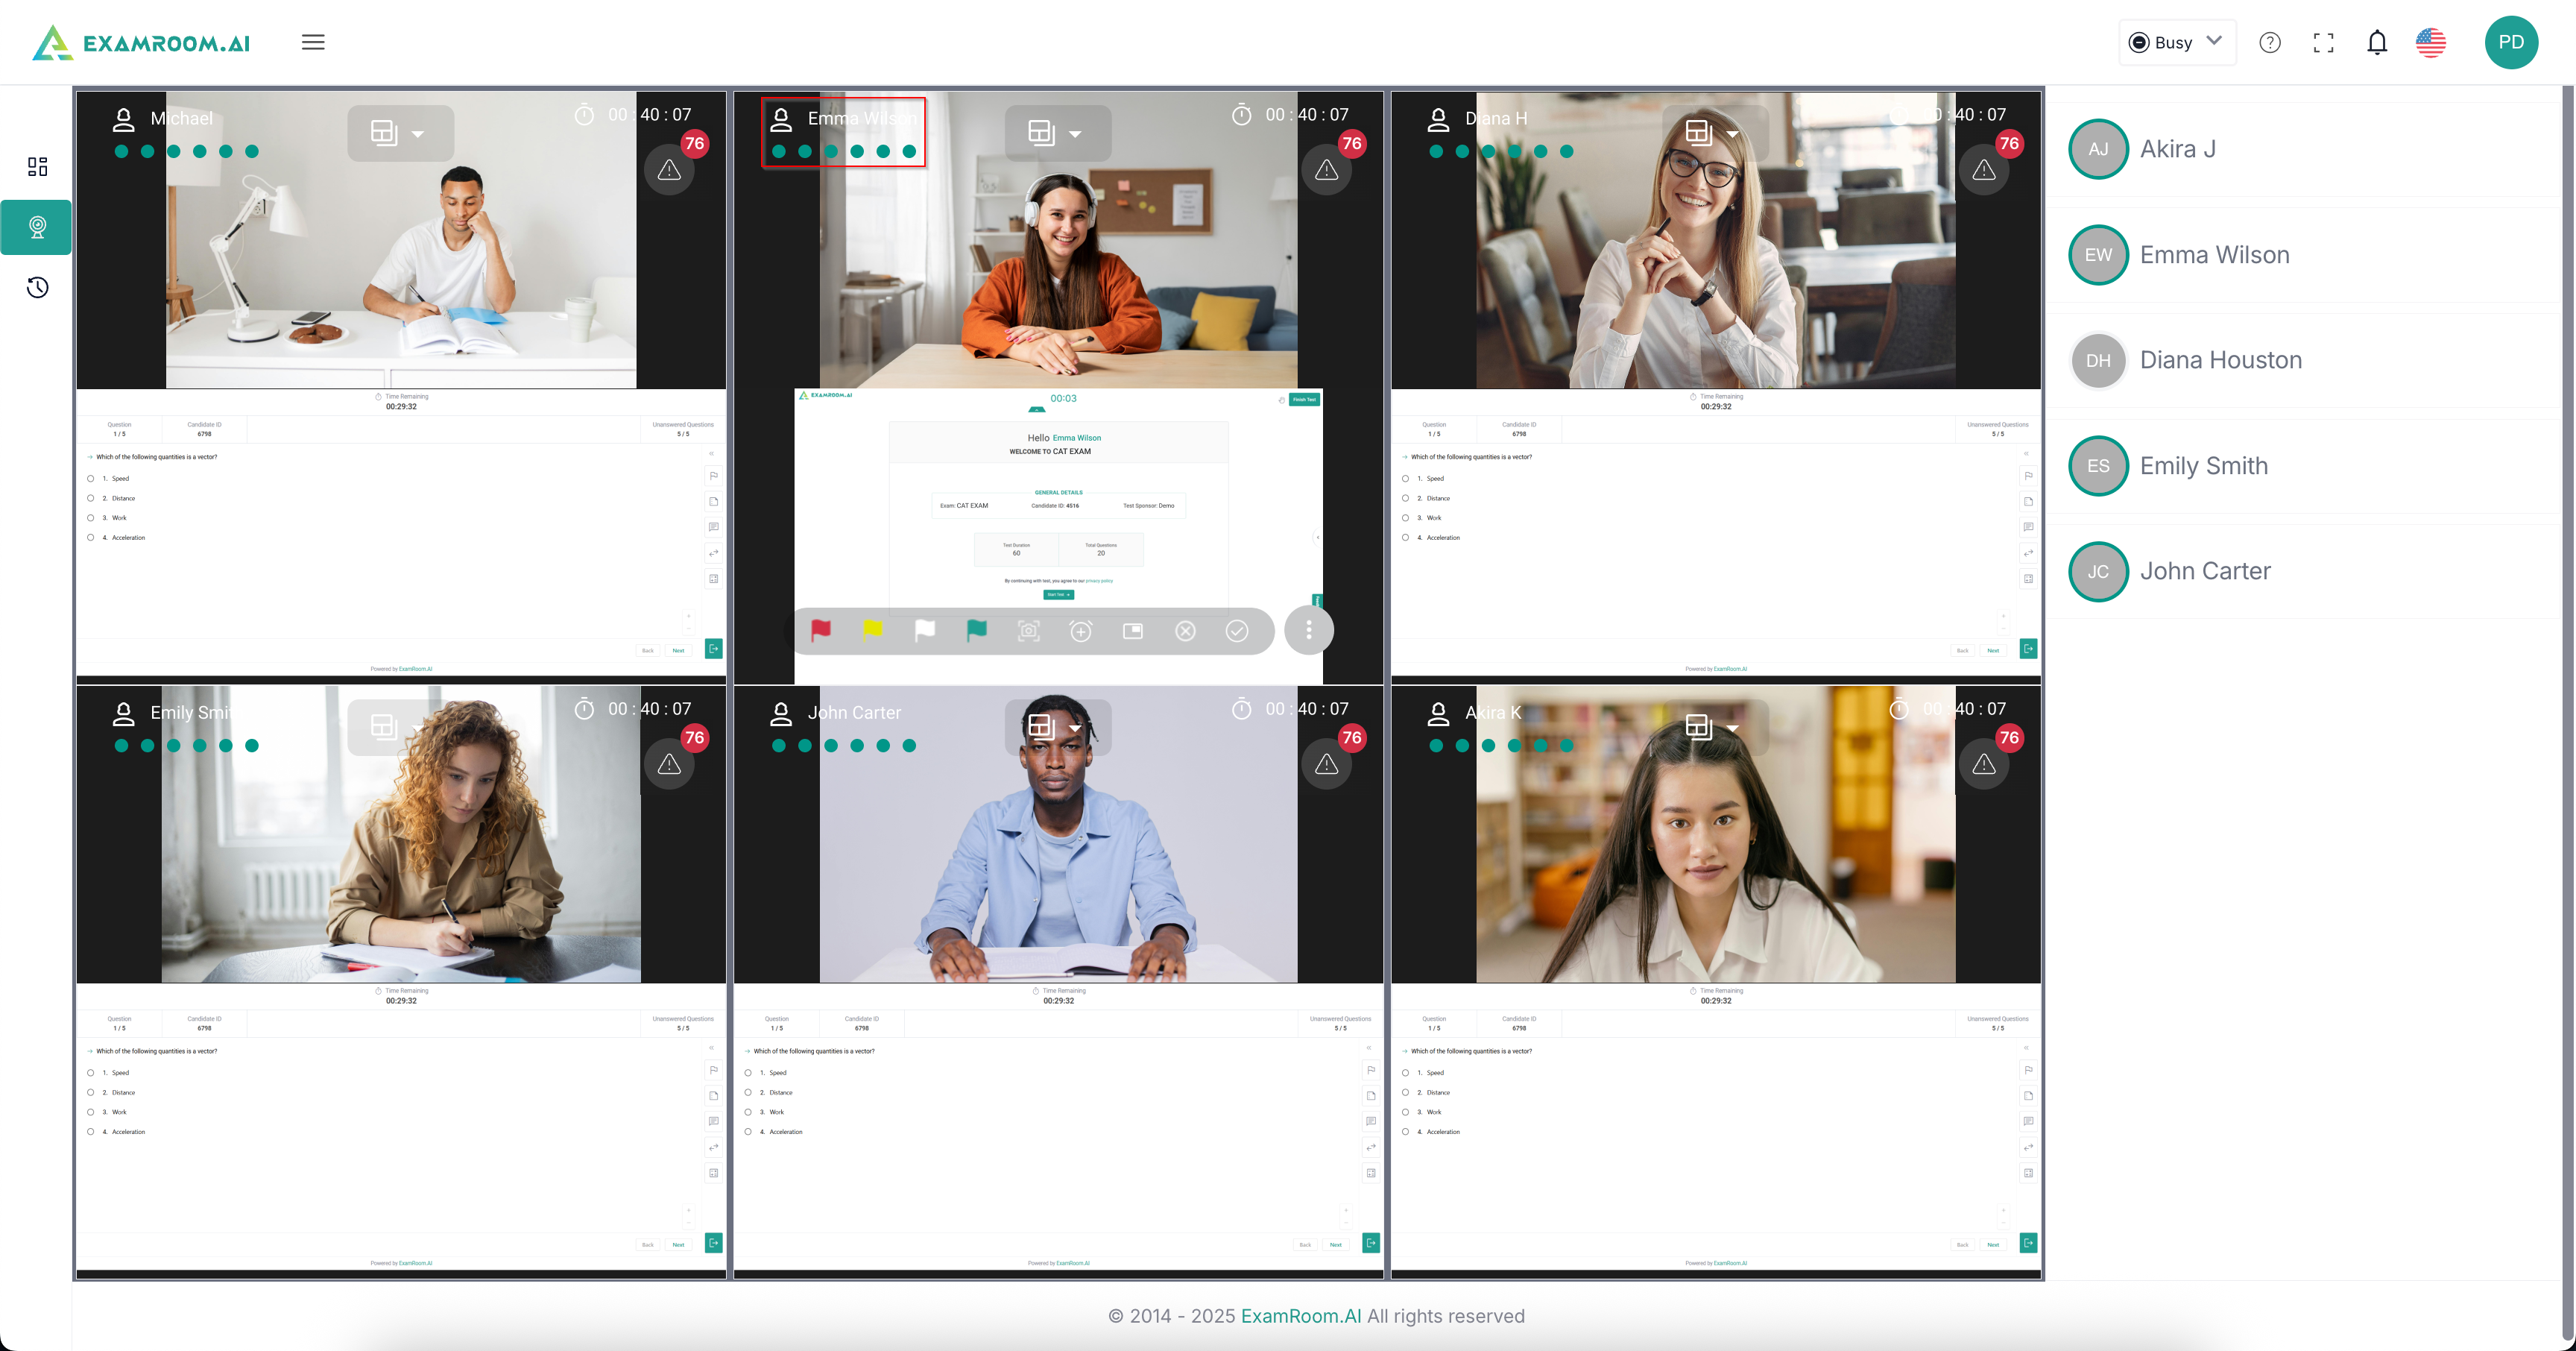
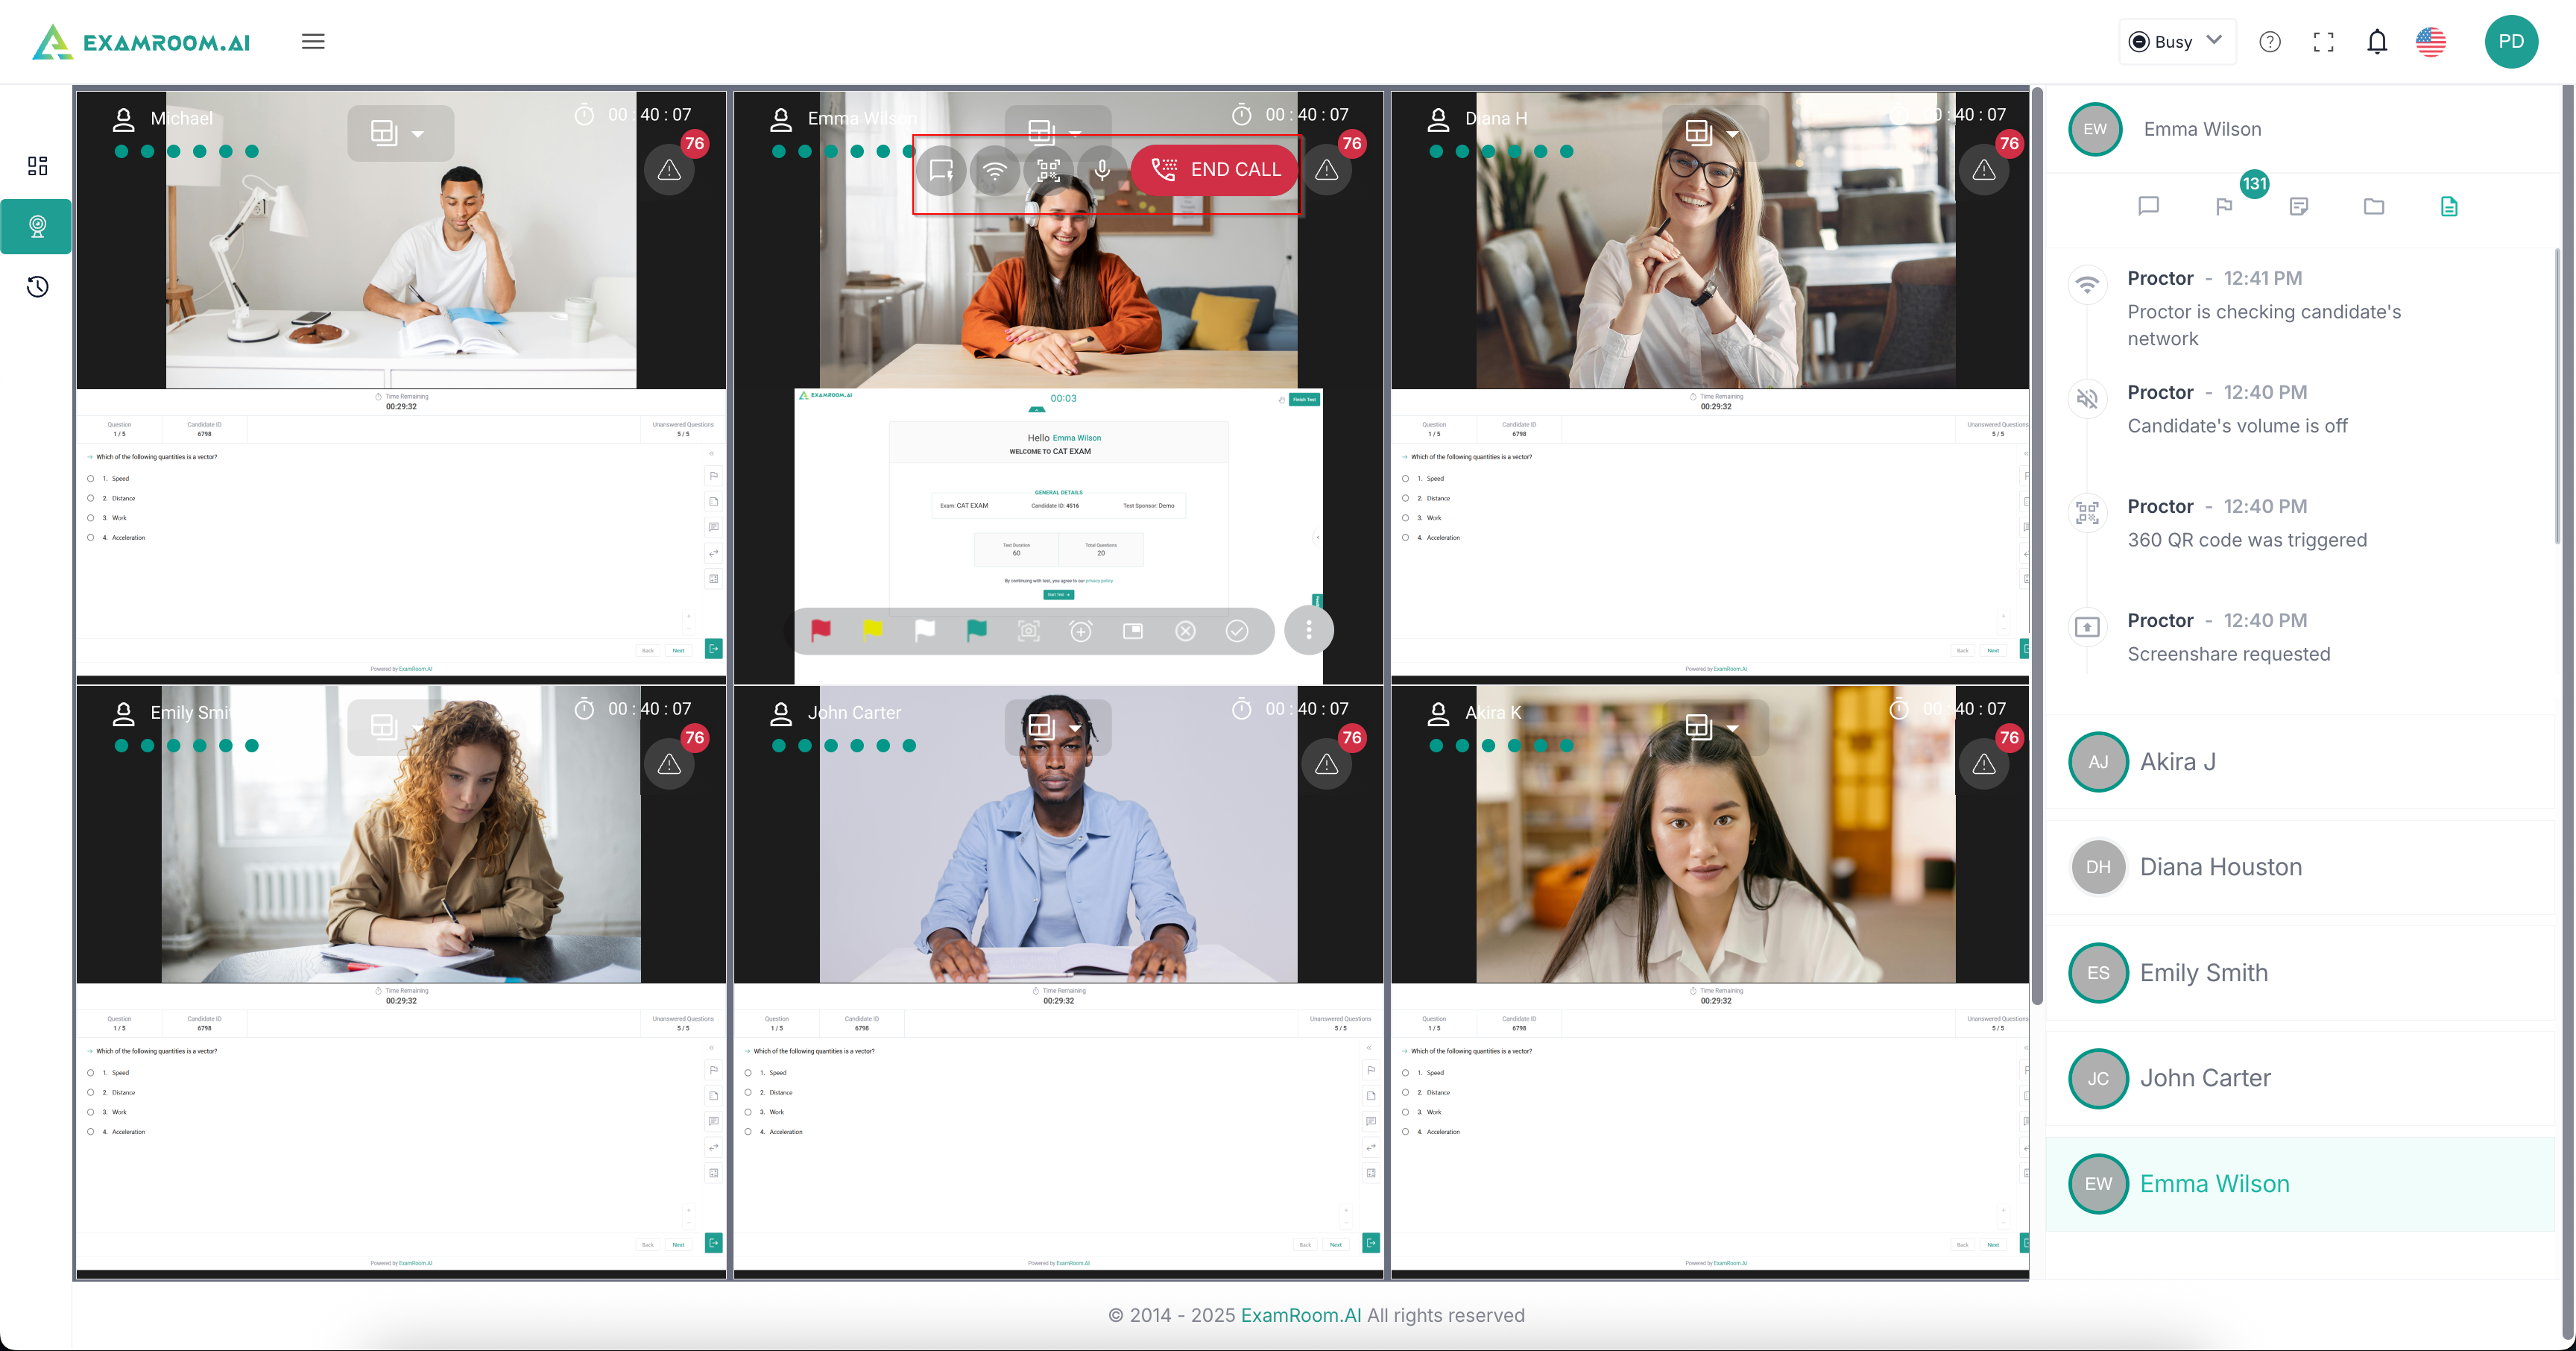
- If you hover on the candidate view, for example, Emma Wilson here, you will be able to explore more options available on the top panel, which are as follows:
- Live Notification: Click to enable or disable this feature. This is a live notification, related to flags and the candidate's activities.
- Wi-Fi: Click to view the stability of the candidate’s internet in real-time. Clicking enables you to see details like internet speed, download, and upload speed.
- QR Code: Click to display the QR code to the candidate for the 360 application installation on their mobile device.
- Dial Icon: Click to call the candidate at any point during the examination. Use the same icon to end the call.
- Mic: Click to mute or unmute yourself during the call
- If you hover on the particular candidate's view, for example, Emma Wilson, you will be able to see an action ribbon at the bottom. The first four icons are raising flags; the candidate's name will be displayed for each flag type on the right panel when you are raising the flags. The note given ahead describes the information to consider while raising flags.
Note:- Red Flag
- If the candidate’s activities are against ER proctoring/Client rules
- If the candidate performs any other malpractice and the proctor confirms the suspicion
- If the candidate is found using a phone other than the phone used by the 360 application.
- If the candidate is speaking to someone even after the proctor issues a warning
- Usage of smartwatches/Bluetooth devices etc. to cheat
- Opening a new tab if not allowed
- Take pictures of the screen or otherwise try to make a copy of the exam questions
- Use of more than one screen
- If the candidate has a screen recording on
- If client rules do not permit the usage of Computer Assisted Translation tools or certain websites and the candidate is found using any of those
- Yellow Flag
- If any suspicious activity is done by the candidate
- If the candidate goes on a break without informing the proctor
- If the candidate goes on permitted/emergency breaks and does not return within the specified time
- If the candidate moves out of the camera frame and is absent for a long time or continues to do so even after the proctor notifies them repeatedly
- Minimizing the screen where they are taking the exam
- White Flag
- When the candidate reads the first question on the screen
- When the candidate begins the exam
- Used to highlight the number of questions answered (Candidate has answered 35 questions).
- General remarks (Candidate is taking a break by informing the proctor and once back, the candidate is back from the break, to resume the exam).
- If the candidate is using the ExamRoom 360 application and the feed is lost, (possibly due to low battery/Phone getting dislodged from its place/Phone locking itself) the proctor needs to confirm that it was not a deliberate attempt and raise a white flag.
- Green Flag
- Raised at the beginning and end of each session
- When the candidate completes the exam
- Indicate that the candidate is testing without any issues and is abiding by the exam rules
- For every four white flags raised, a green flag should be raised
- If the proctor finds something suspicious and raises a yellow flag, and it turns out to be false, they should raise a green flag to counter the yellow flag raised due to suspicion
- Red Flag
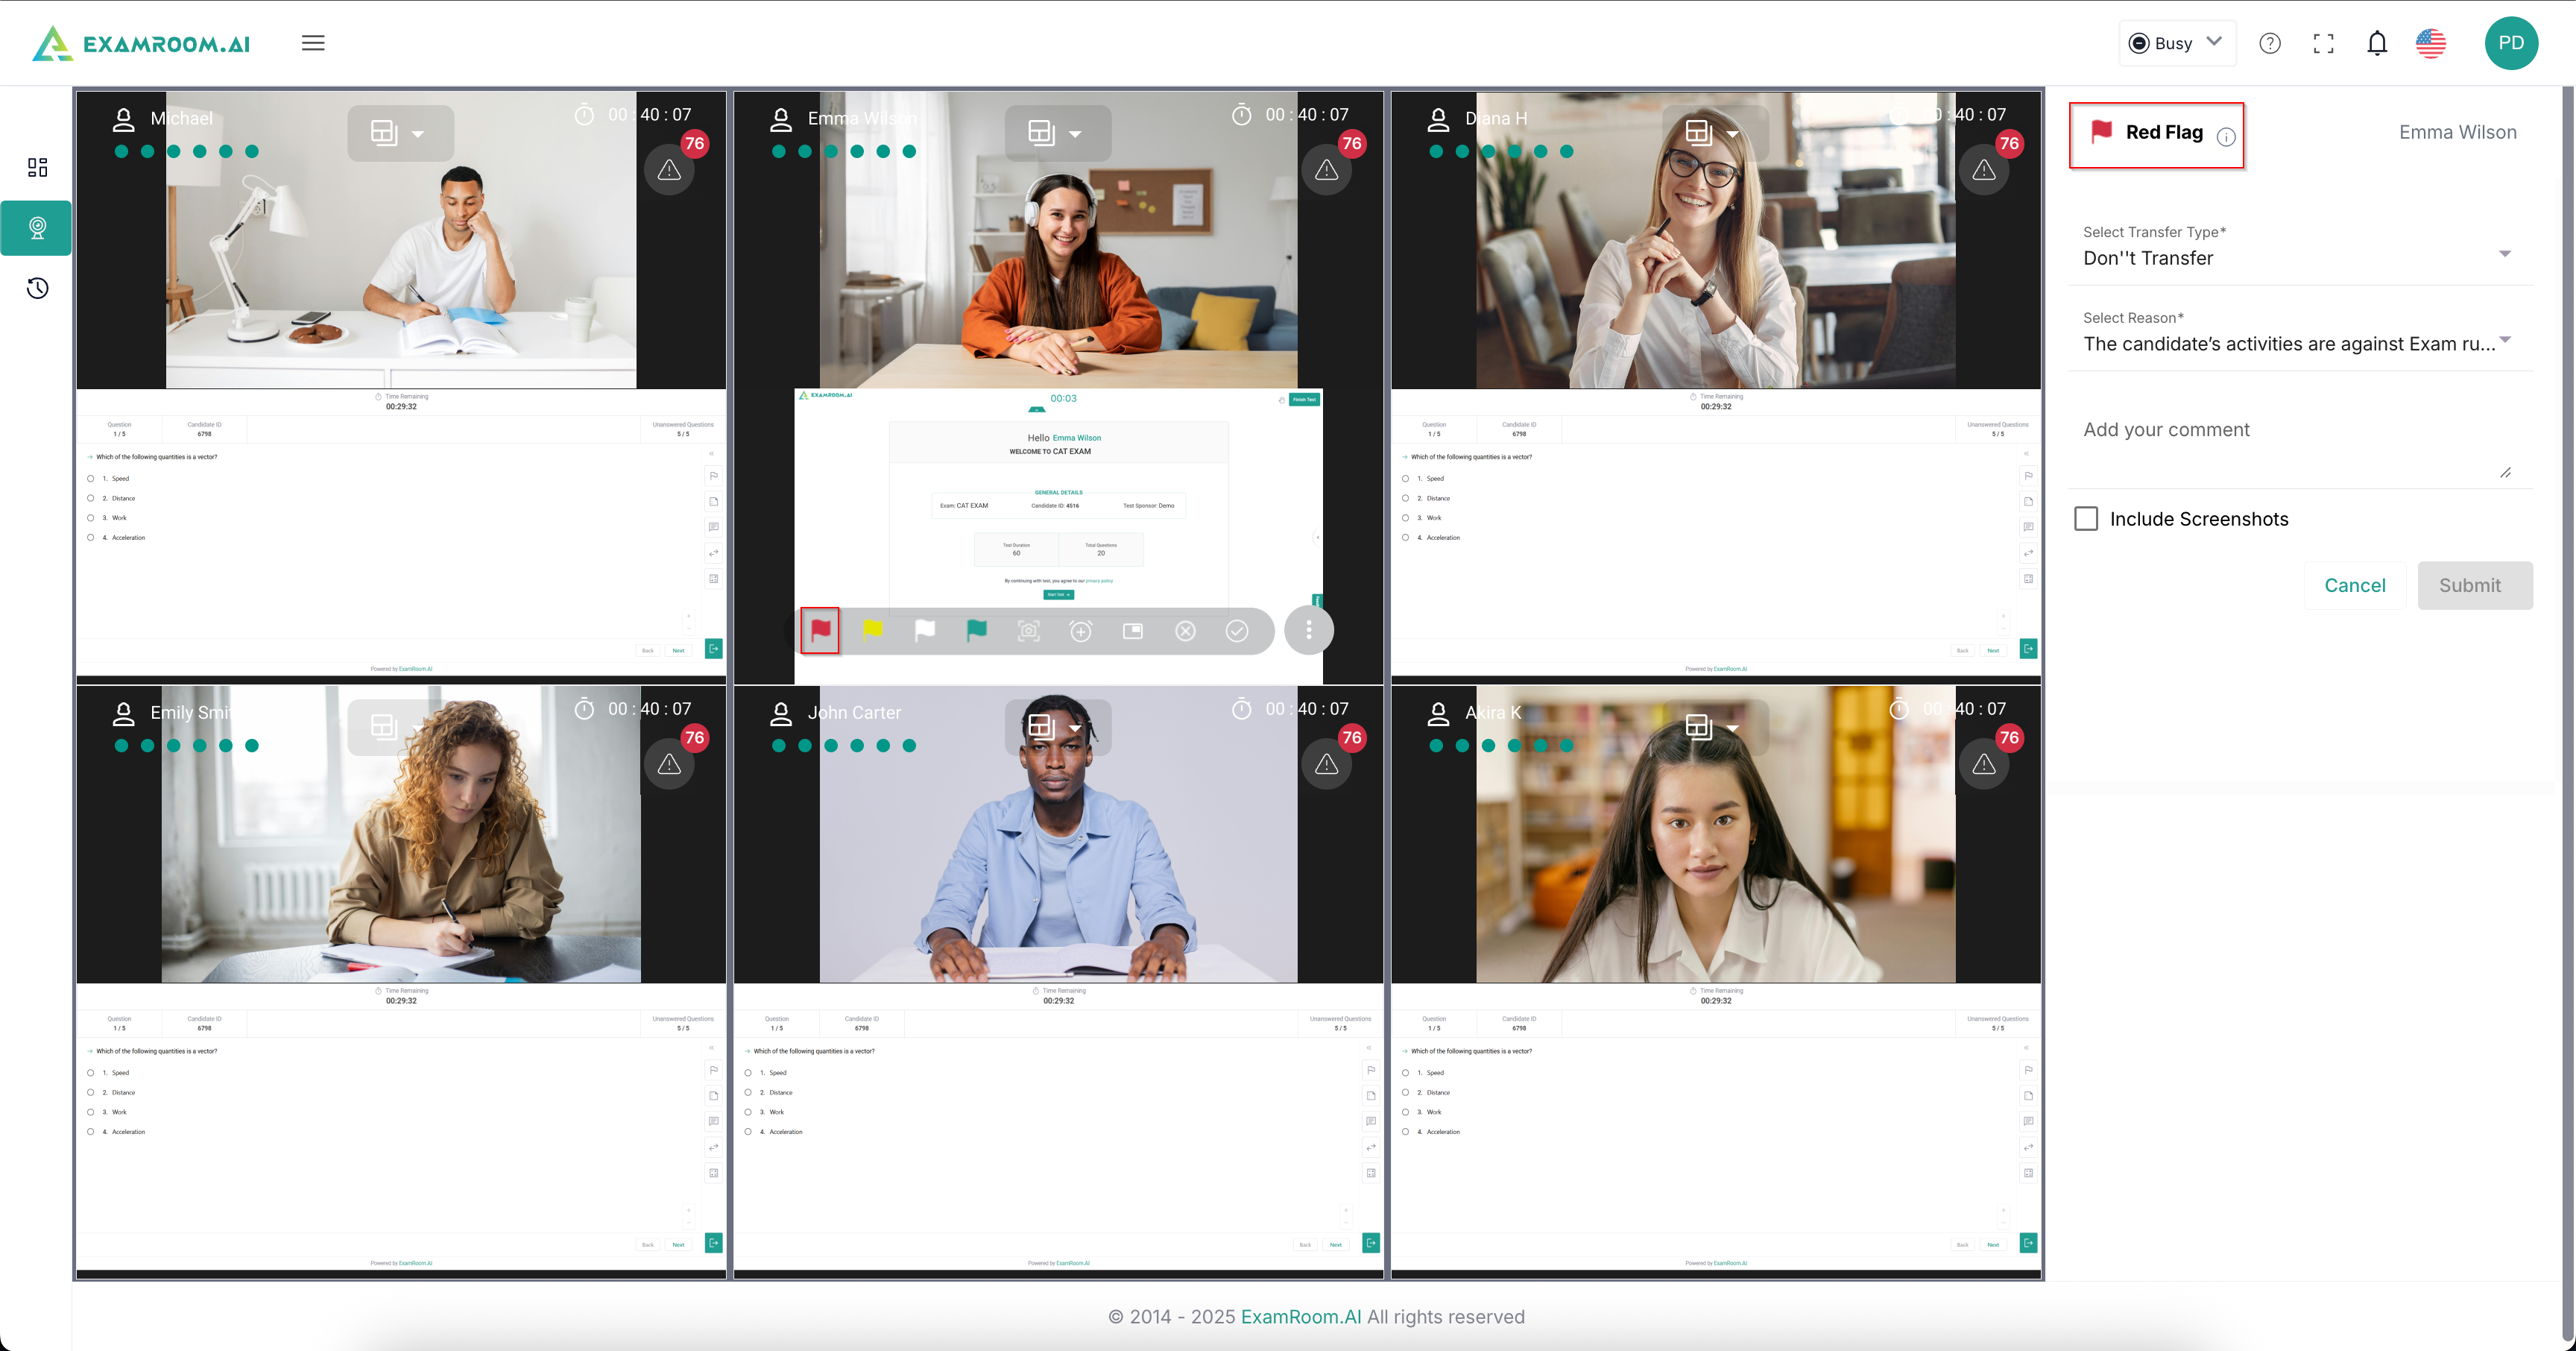
- Click the red flag icon to raise a red flag. When you do this, a screenshot will be automatically captured and attached. You may remove the screenshot if desired. In the right panel, fill in the transfer type and select the reason for raising the flag from the drop-down menu, add a comment if any, and click Submit.
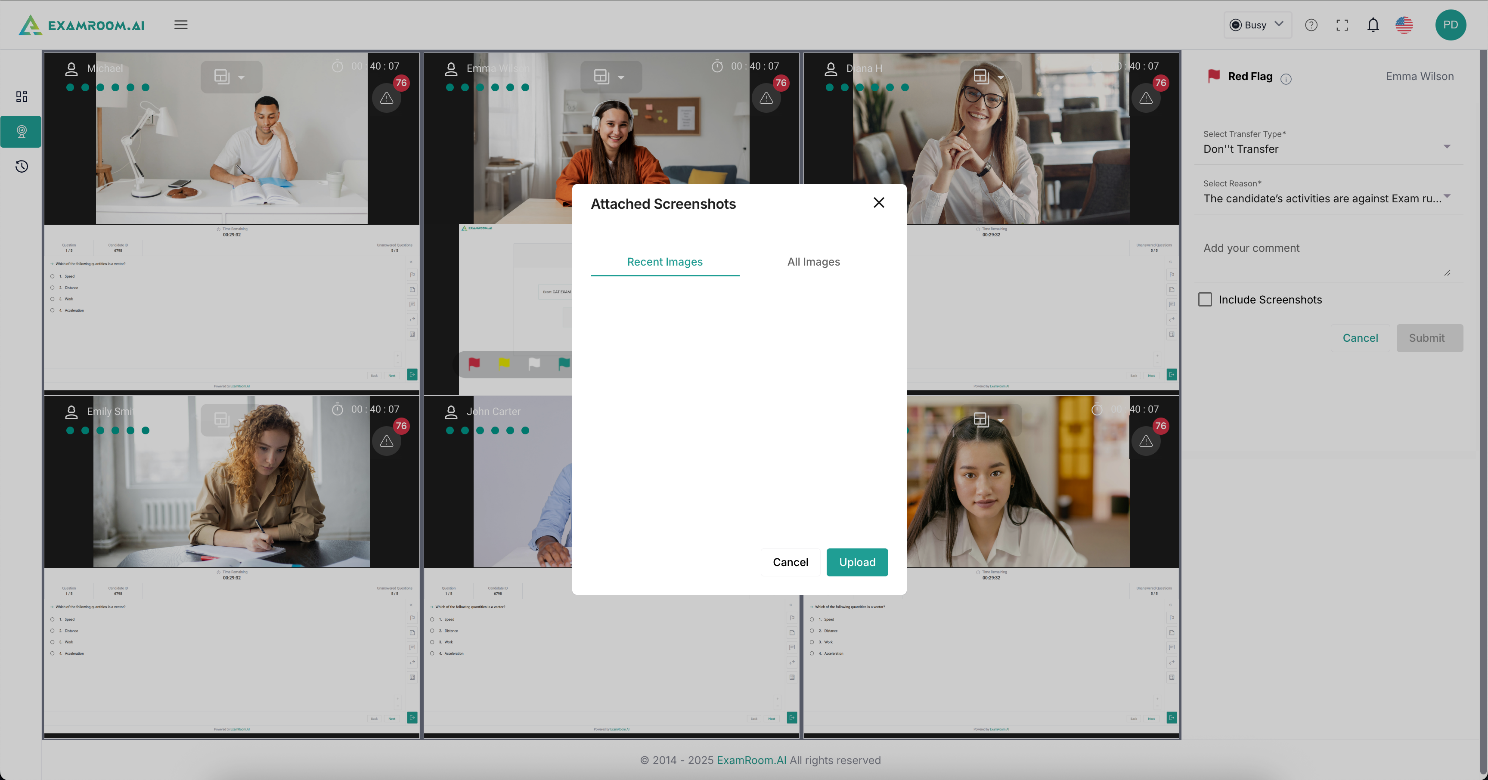
- If you wish to attach any additional screenshots, select the checkbox to include screenshots. A pop-up opens, where you can select the image from the recent or all images tab. Click Upload to upload the image, followed by Submit.
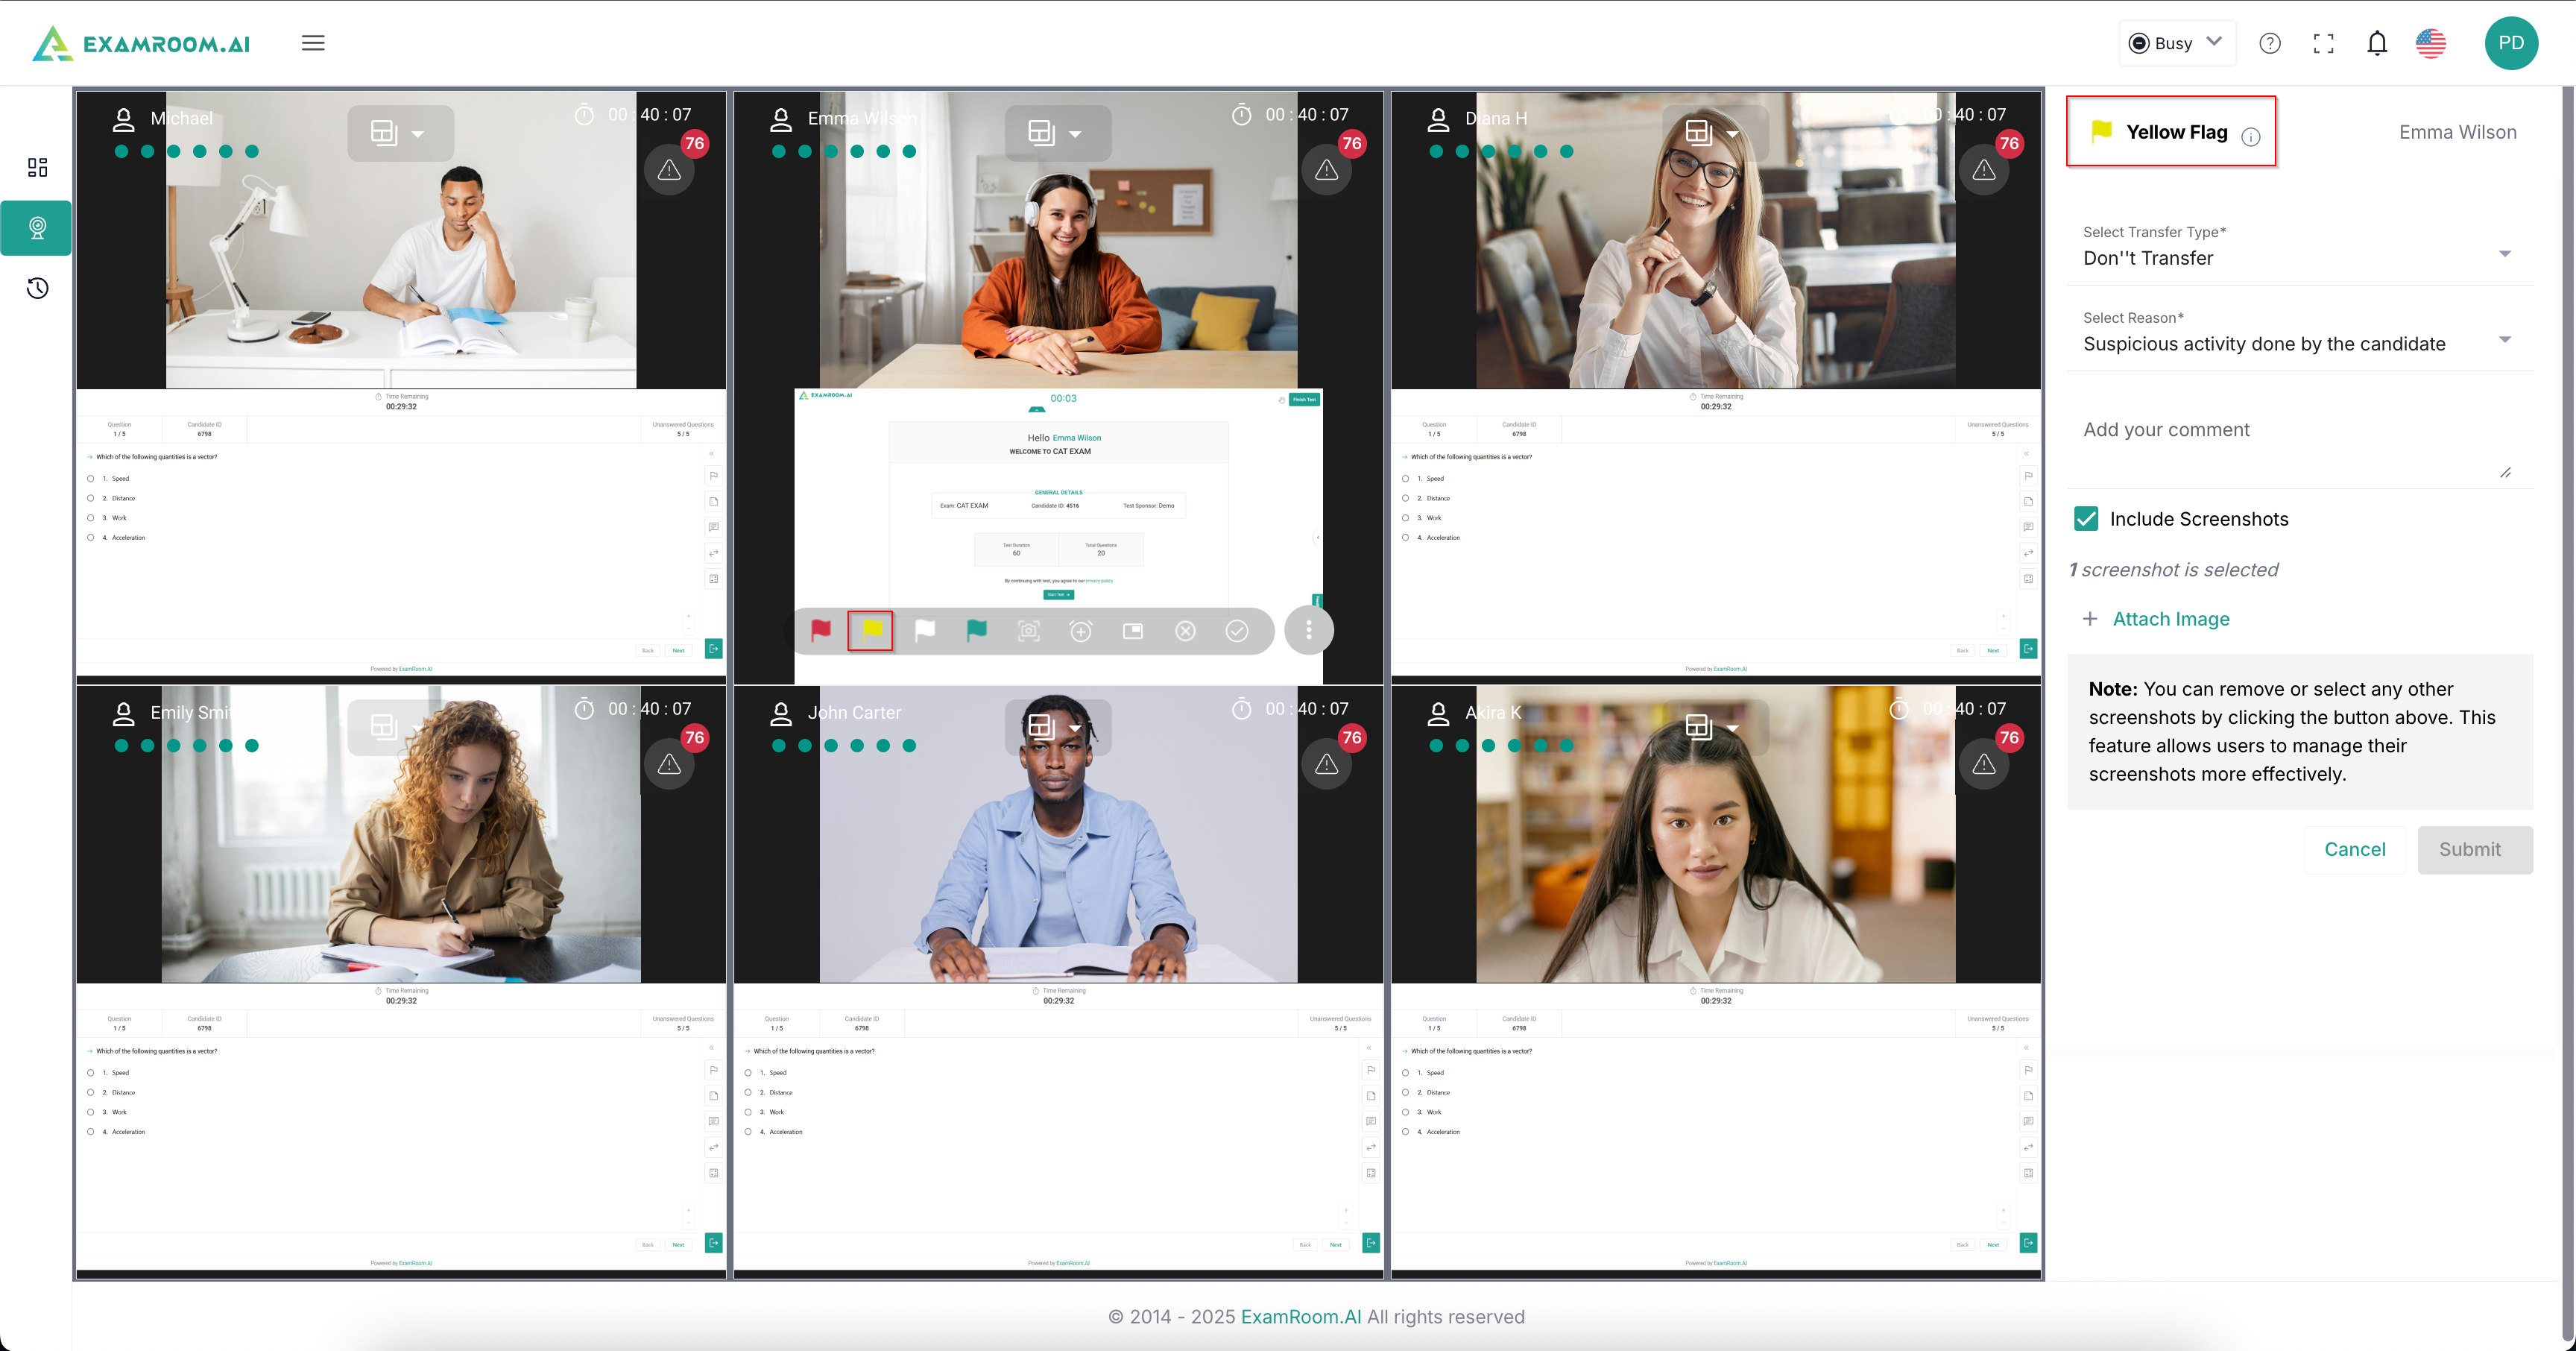
- Click the yellow flag icon to raise the yellow flag. When you do this, a screenshot will be automatically captured and attached. You may remove the screenshot if desired.
- In the right panel, fill in the transfer type and select the reason for raising the flag from the drop-down menu, add a comment if any, and click Submit. If you wish to attach additional screenshots, select the checkbox to include screenshots. A pop-up opens, where you can select the image from the recent or all images tab. Click Upload to upload the image, followed by Submit.
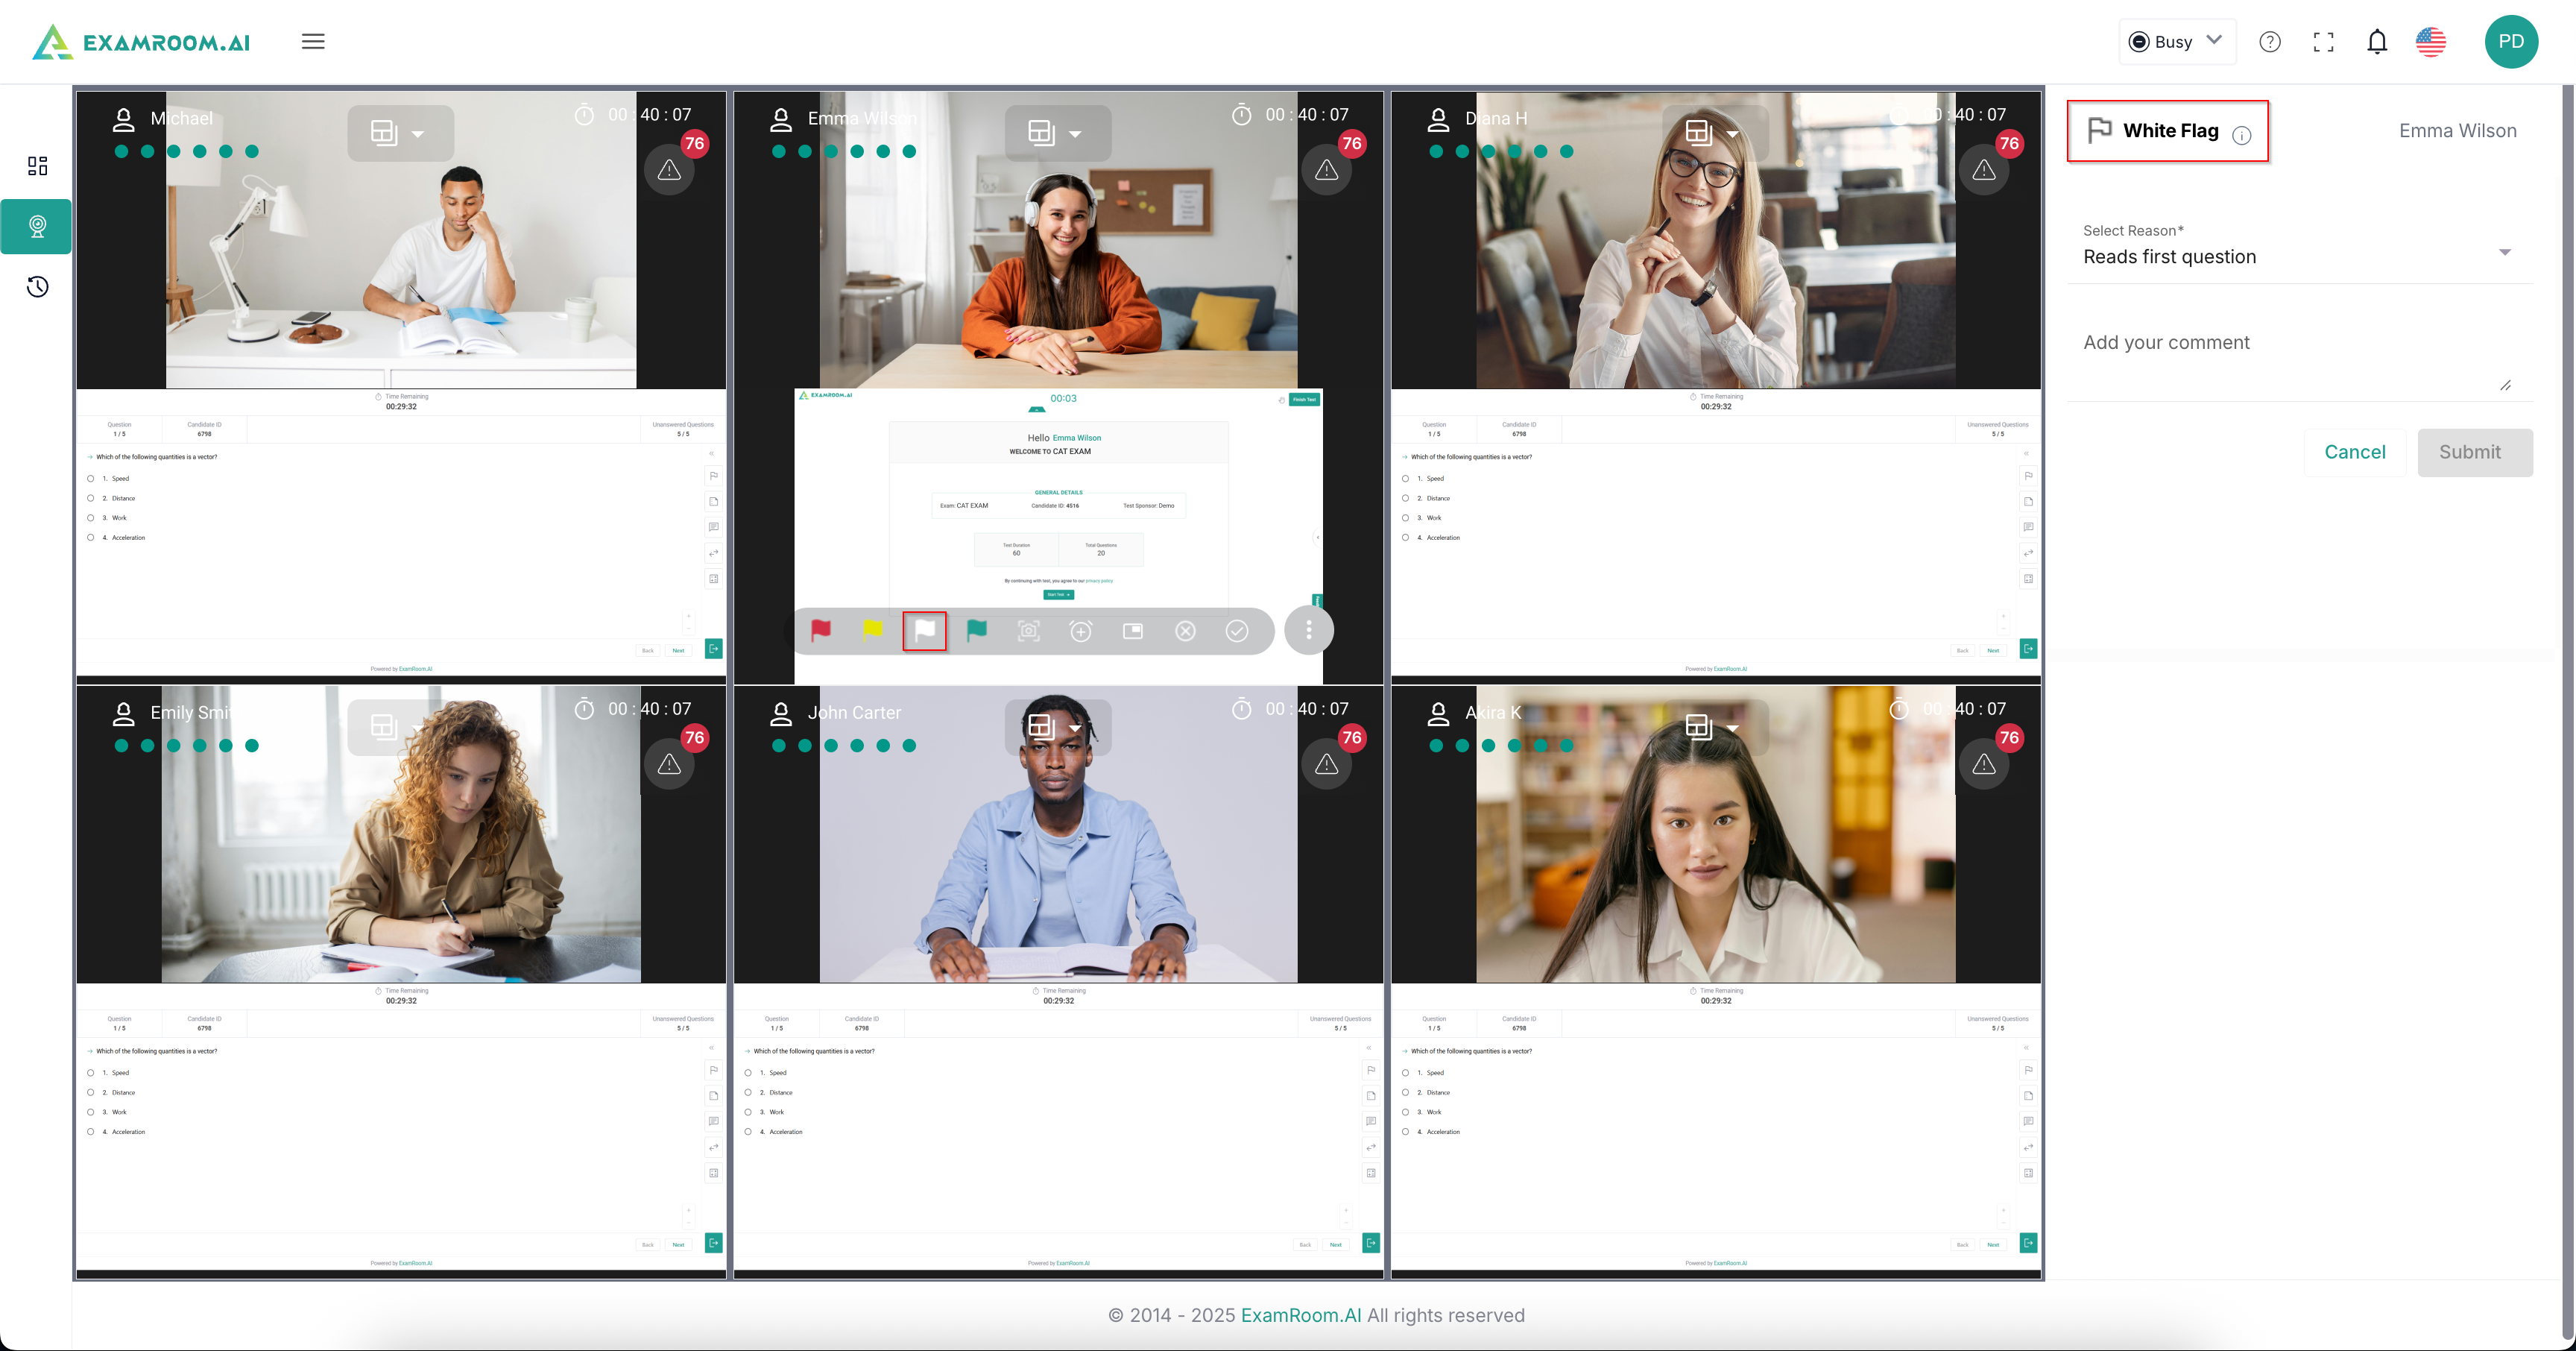
- Click the white flag icon to raise a white flag. In the right panel, select the reason for raising the flag from the drop-down menu, add a comment, and click Submit.
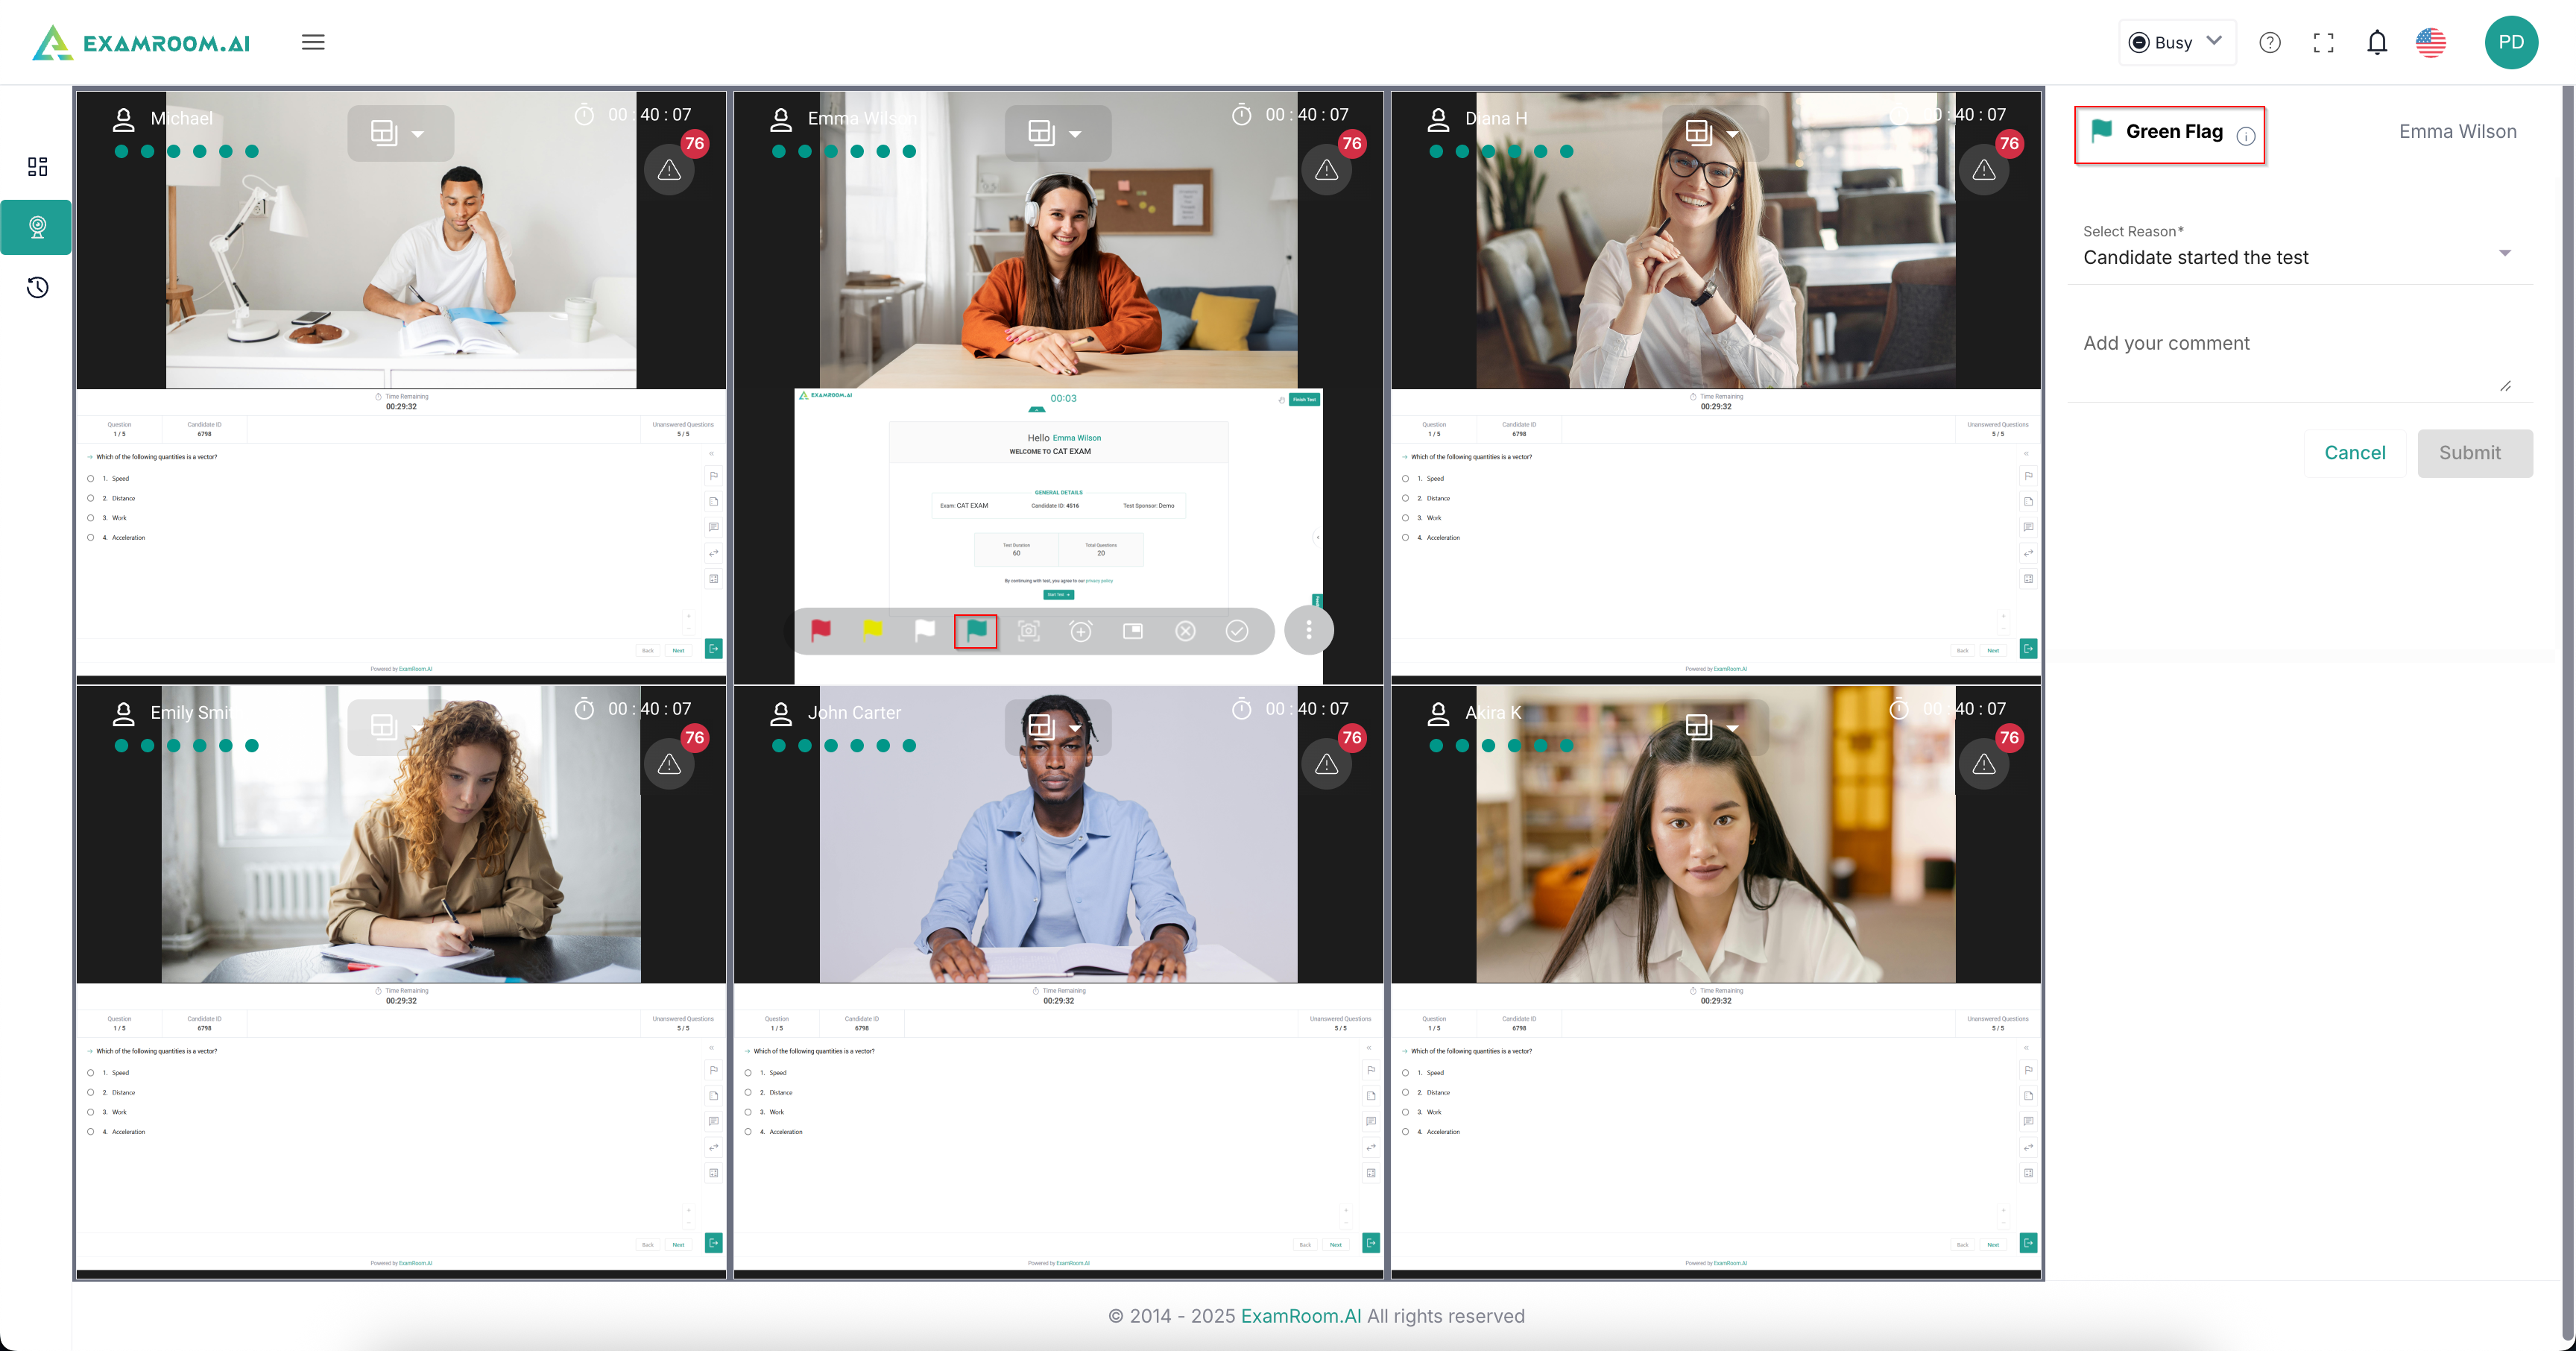
- Click the green flag icon to raise a green flag. In the right panel, select the reason for raising the flag from the drop-down menu, add a comment, and click Submit.
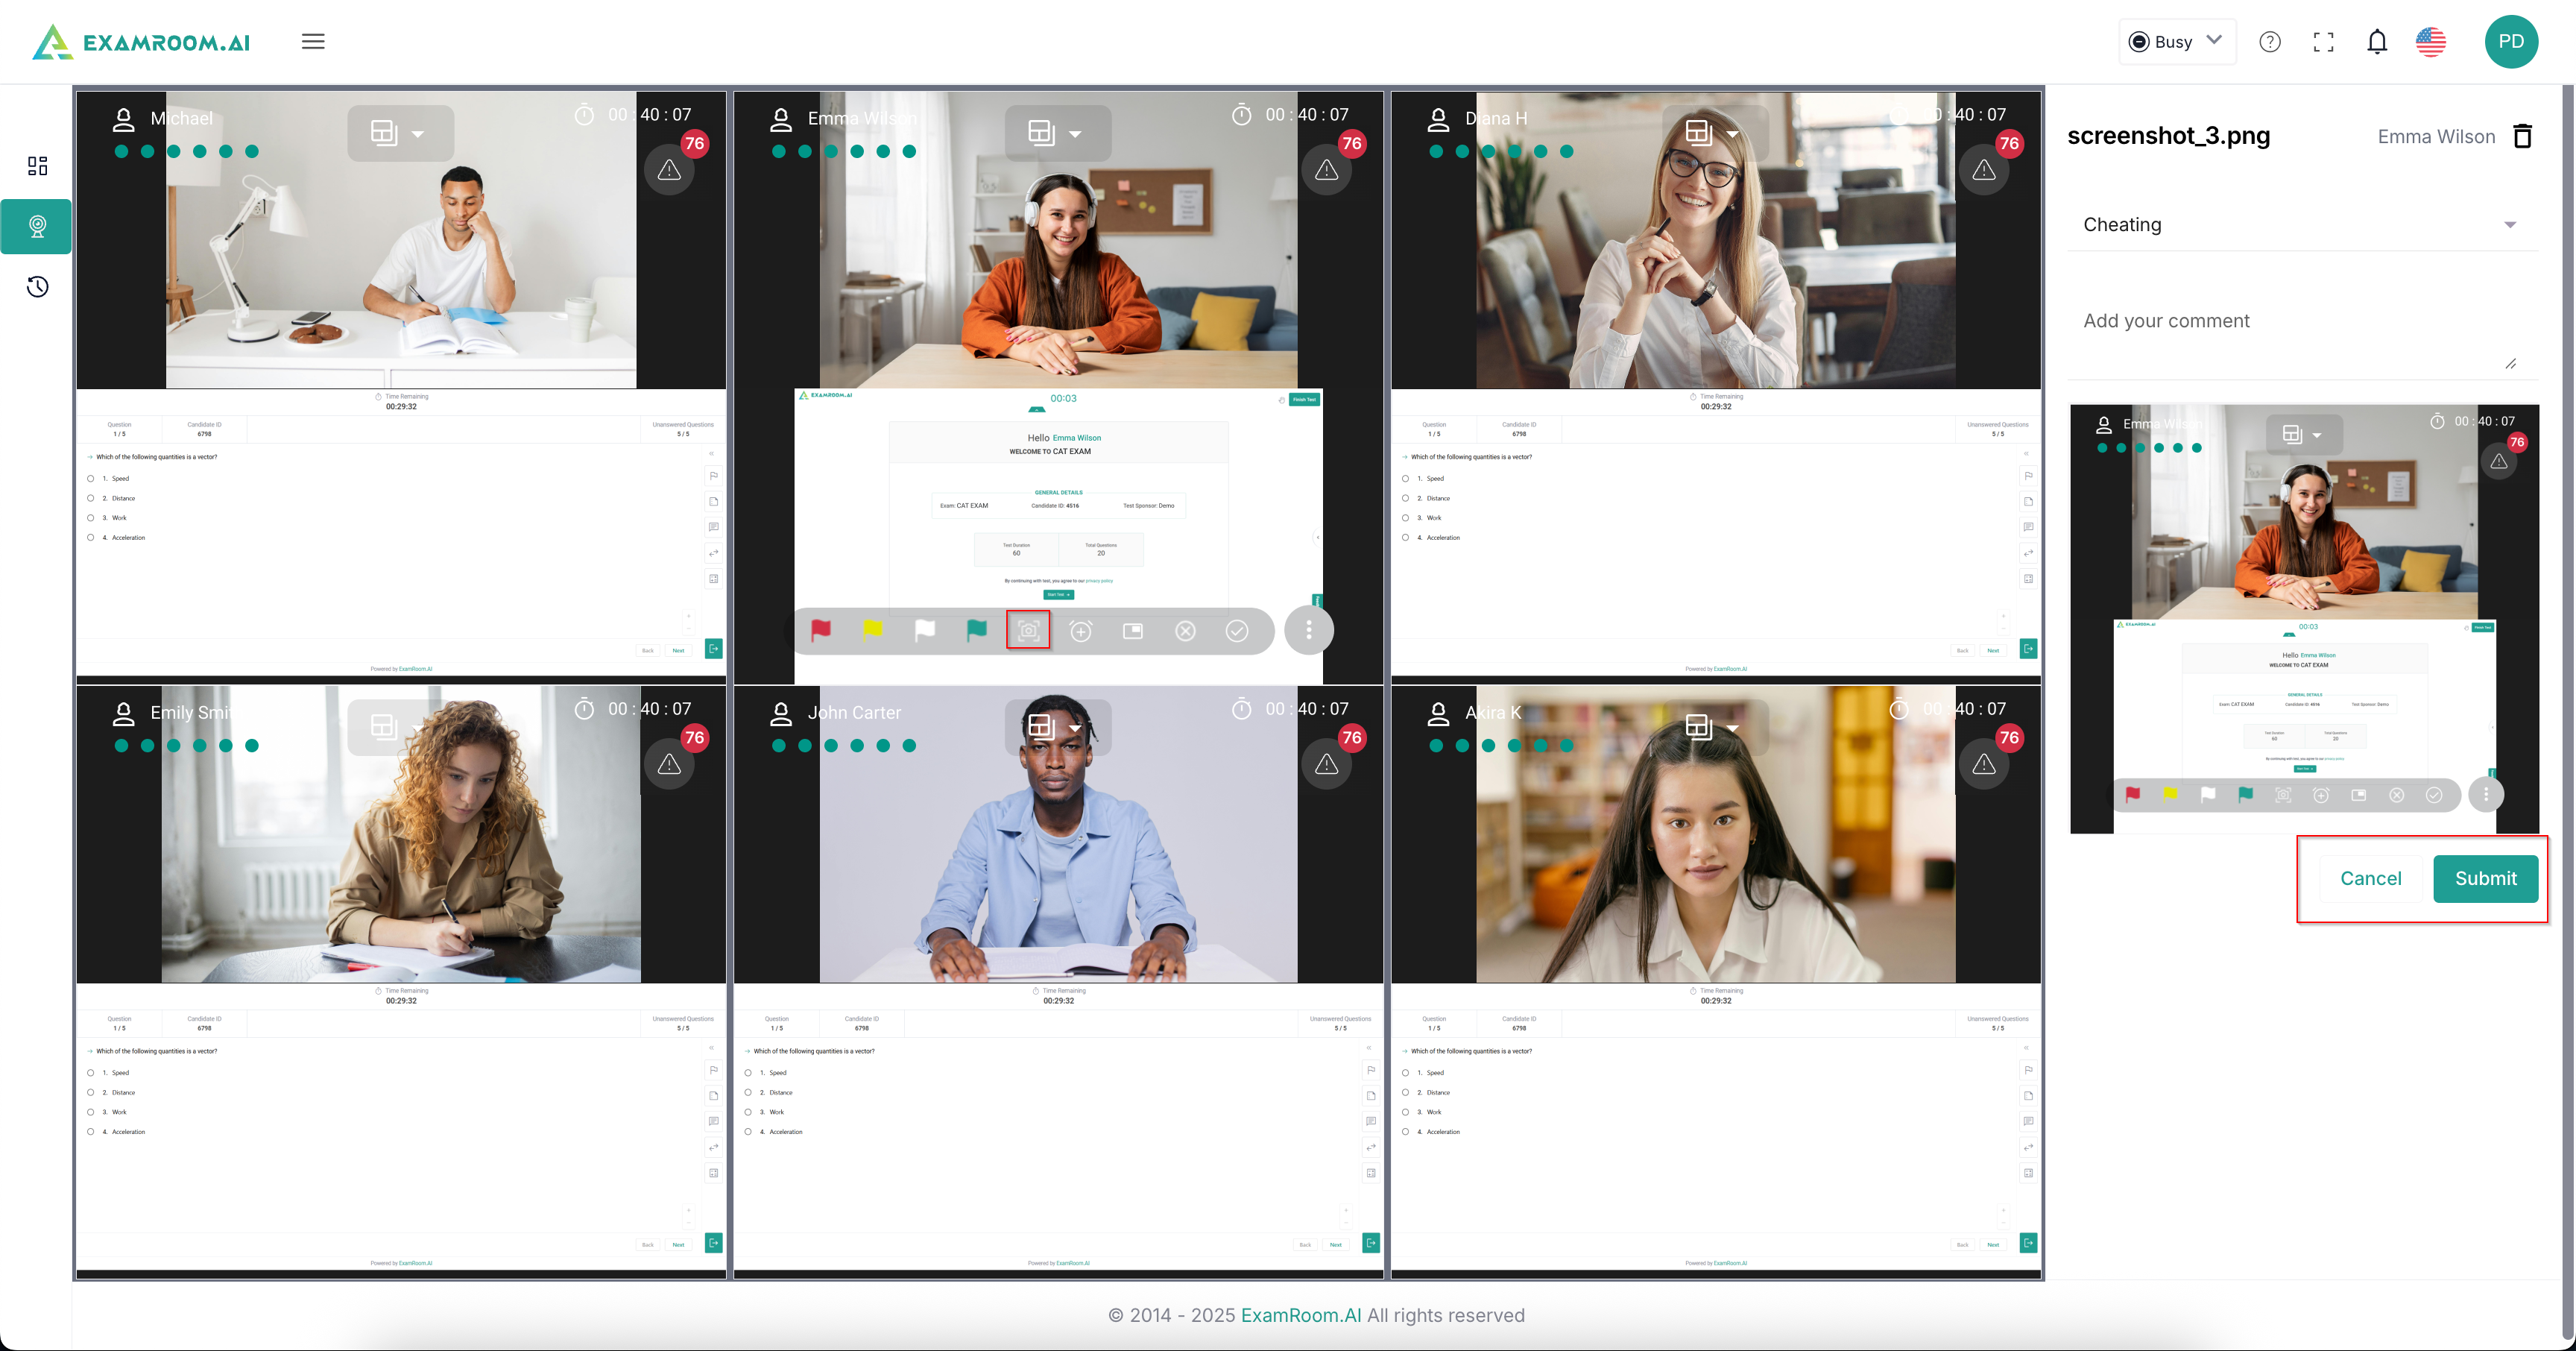
- Click to capture the screenshot of the candidate. In the right panel, select the reason from the drop-down menu and add your comments. Click Submit to submit the screenshot.
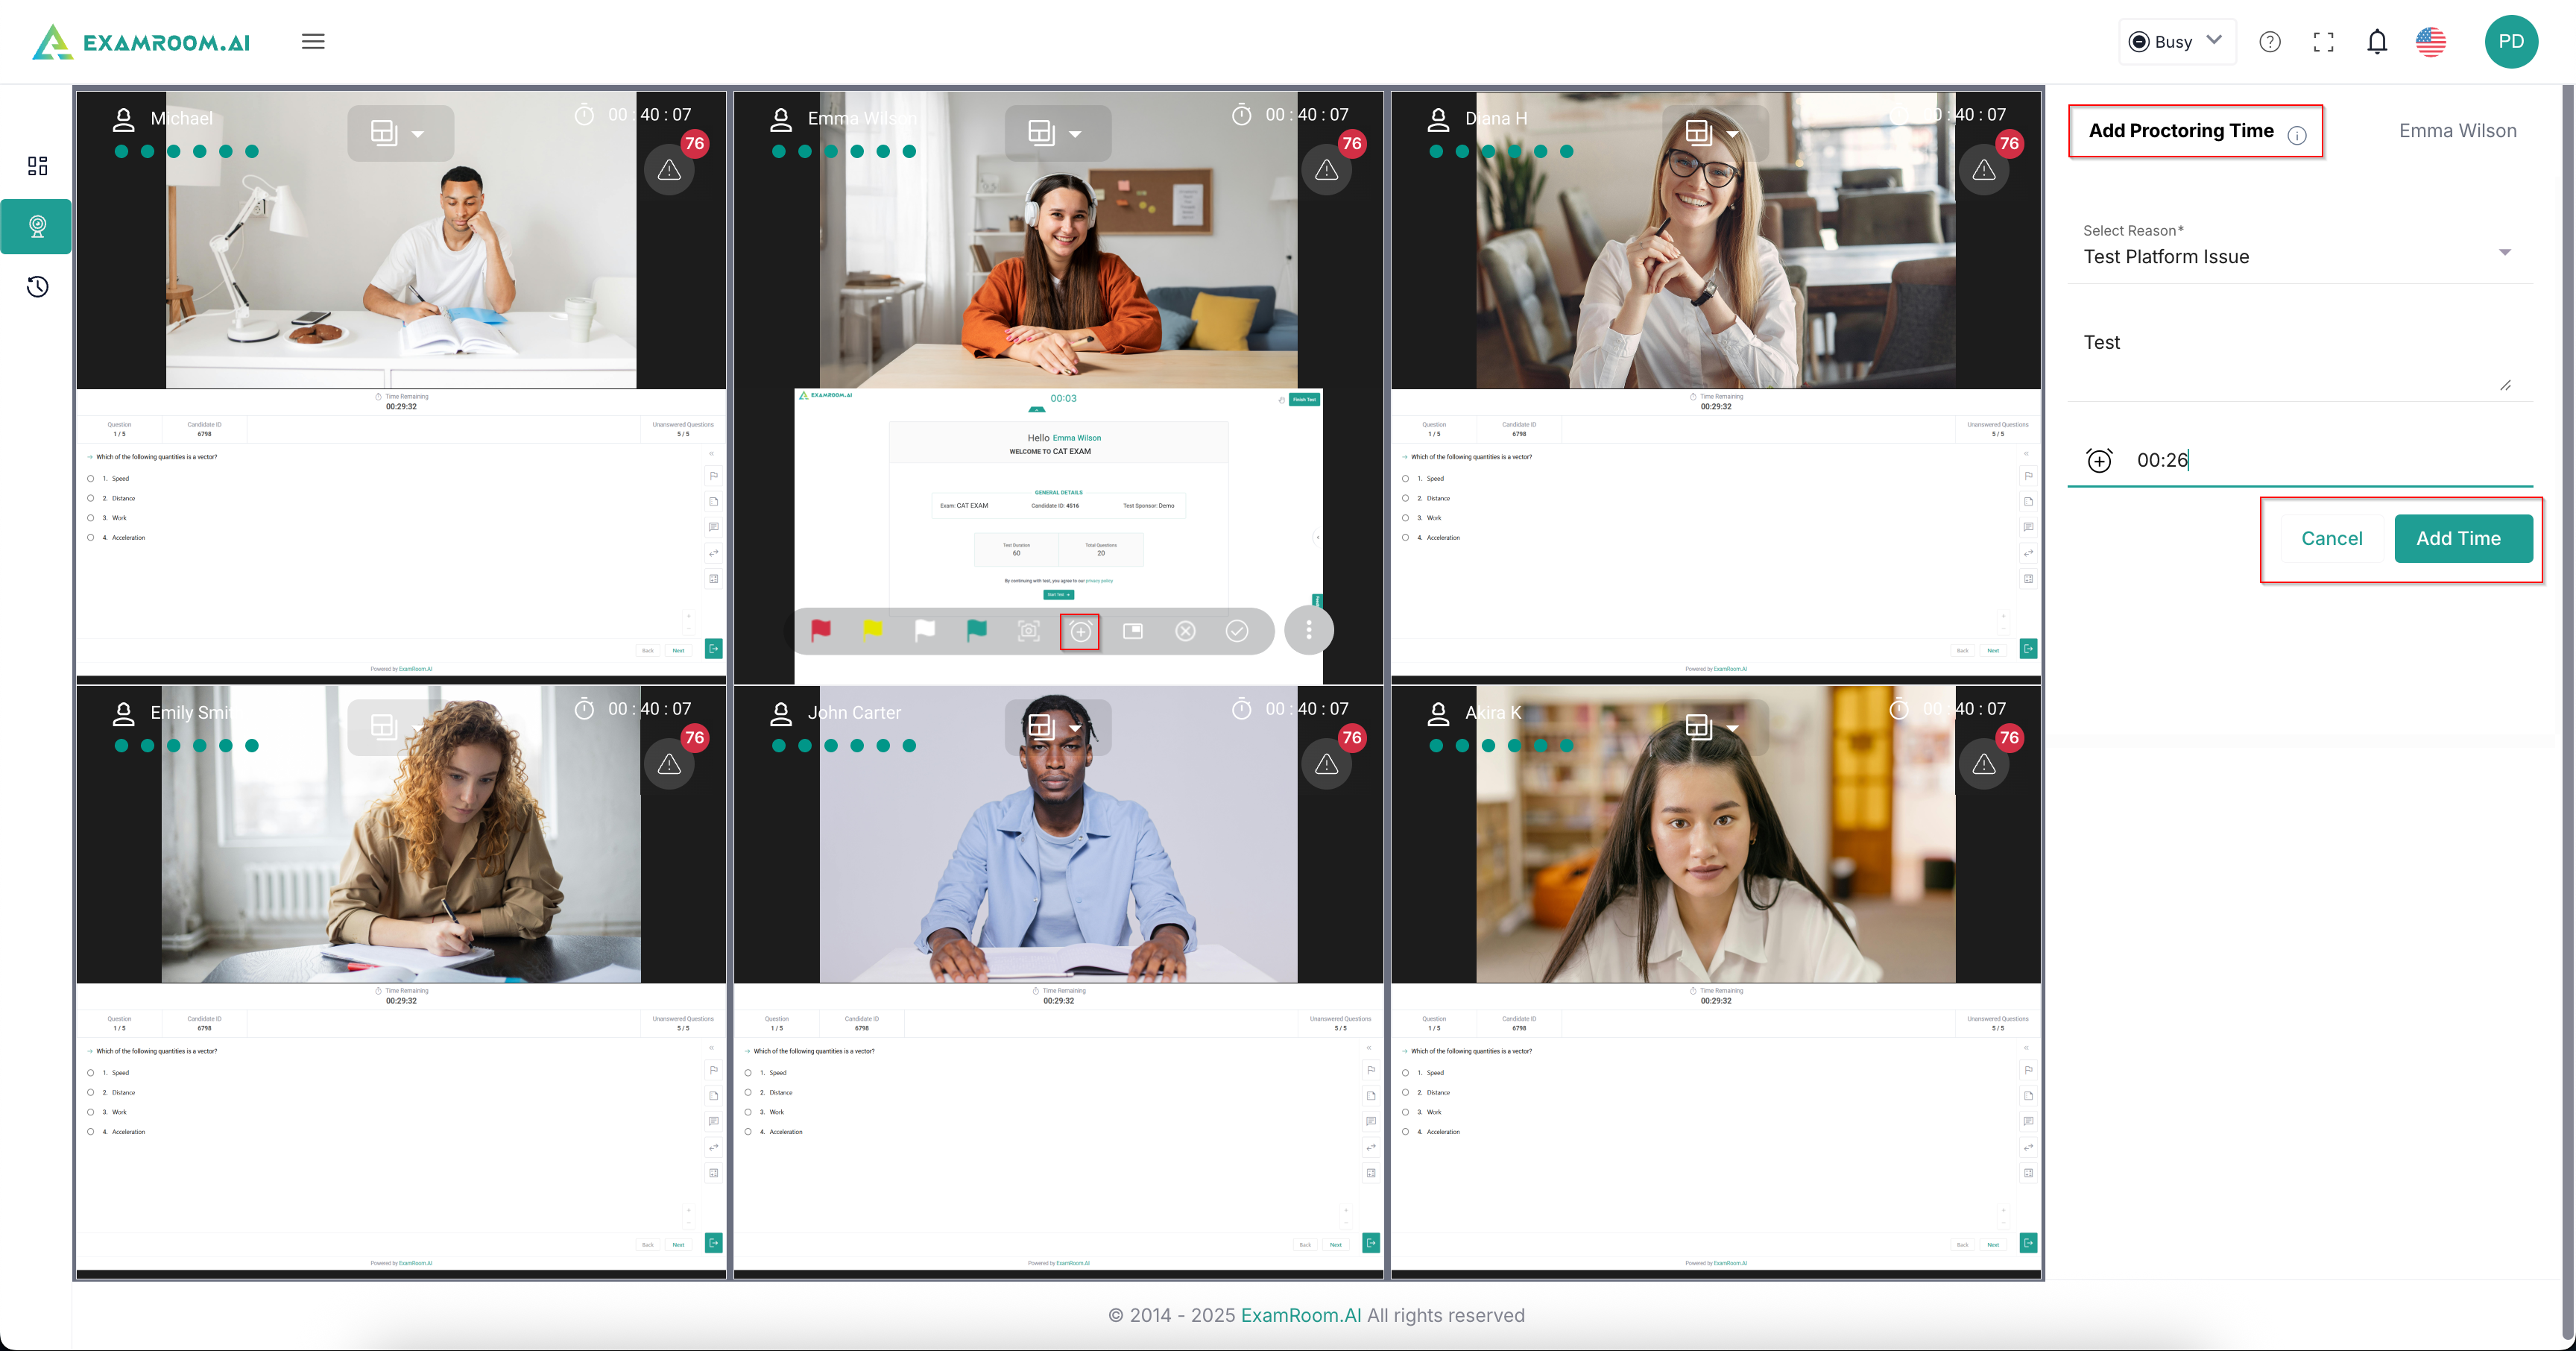
- Click to add proctoring time. In the right panel, select the reason from the drop-down menu and provide a comment. Mention the time you are extending for the candidate and click Add Time. It will reflect in the proctoring time as well as on the ExamRoom banner.
- Click to detach the screen for the particular candidate to view it separately.
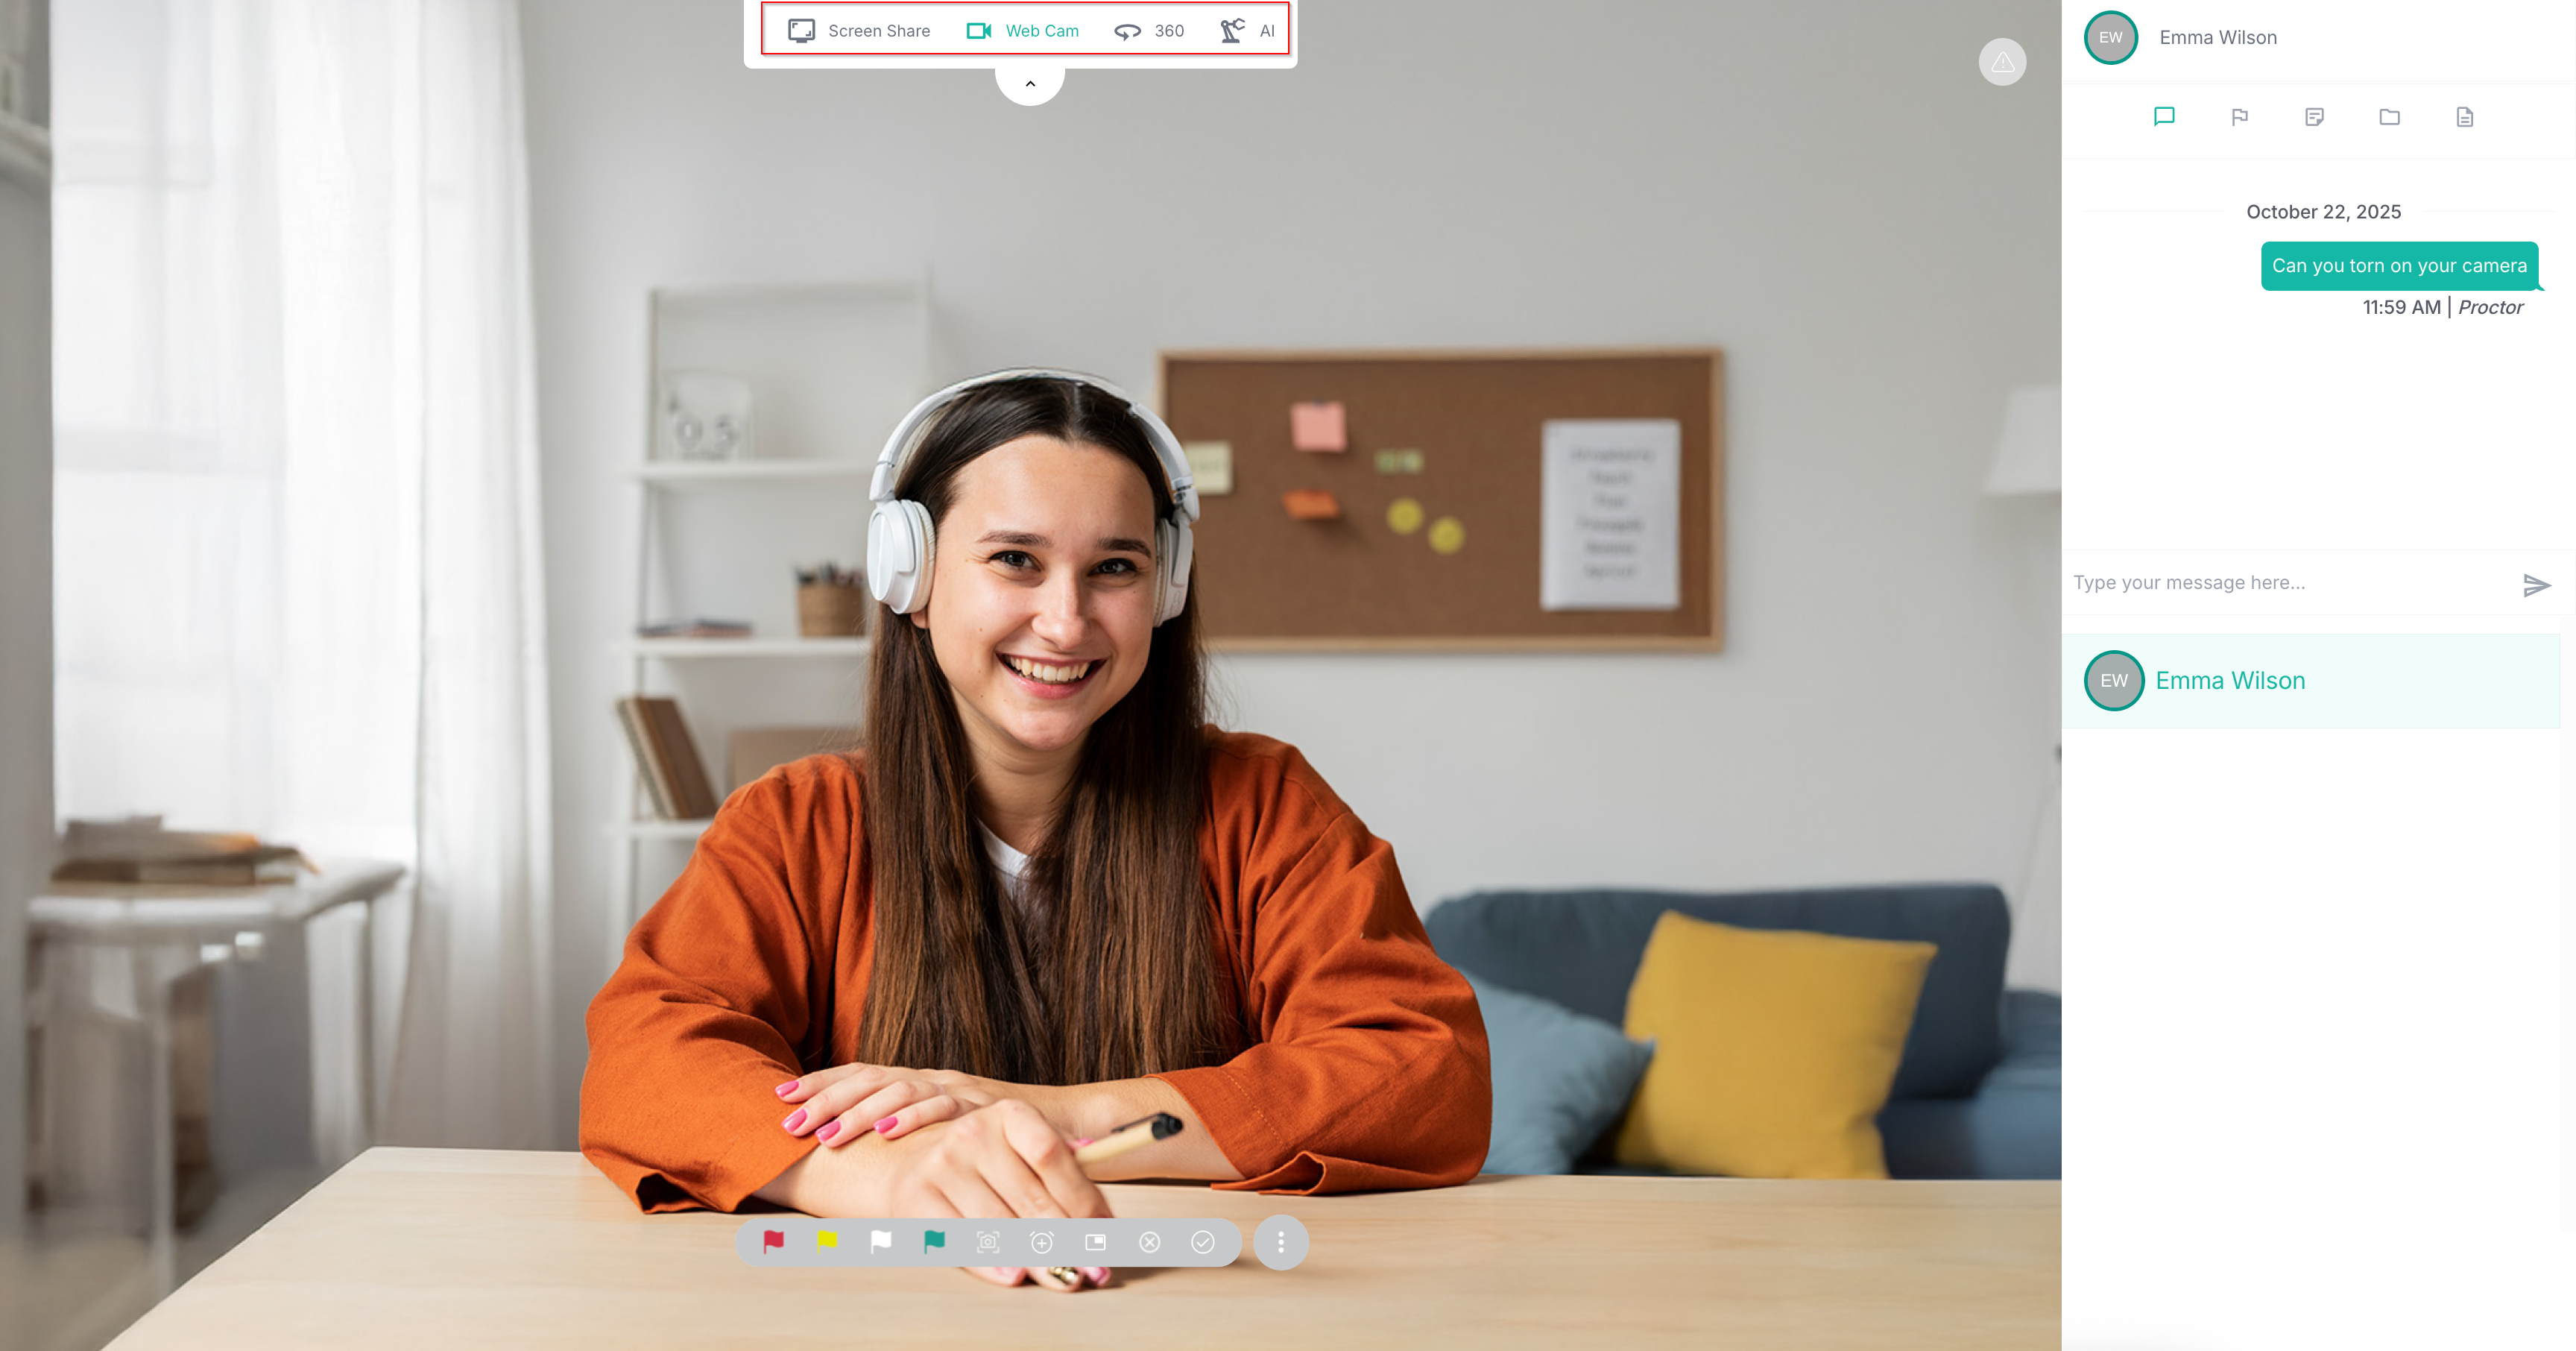
- When you click the detach icon, the selected candidate’s screen will separate into its own window and become the focused view. At the top of the screen, there are options available to change the view into screenshare, webcam, 360, and AI. For example, here we have shown Emma Wilson in the webcam view. On closing this detached window, it will be reattached back to the previous screen.
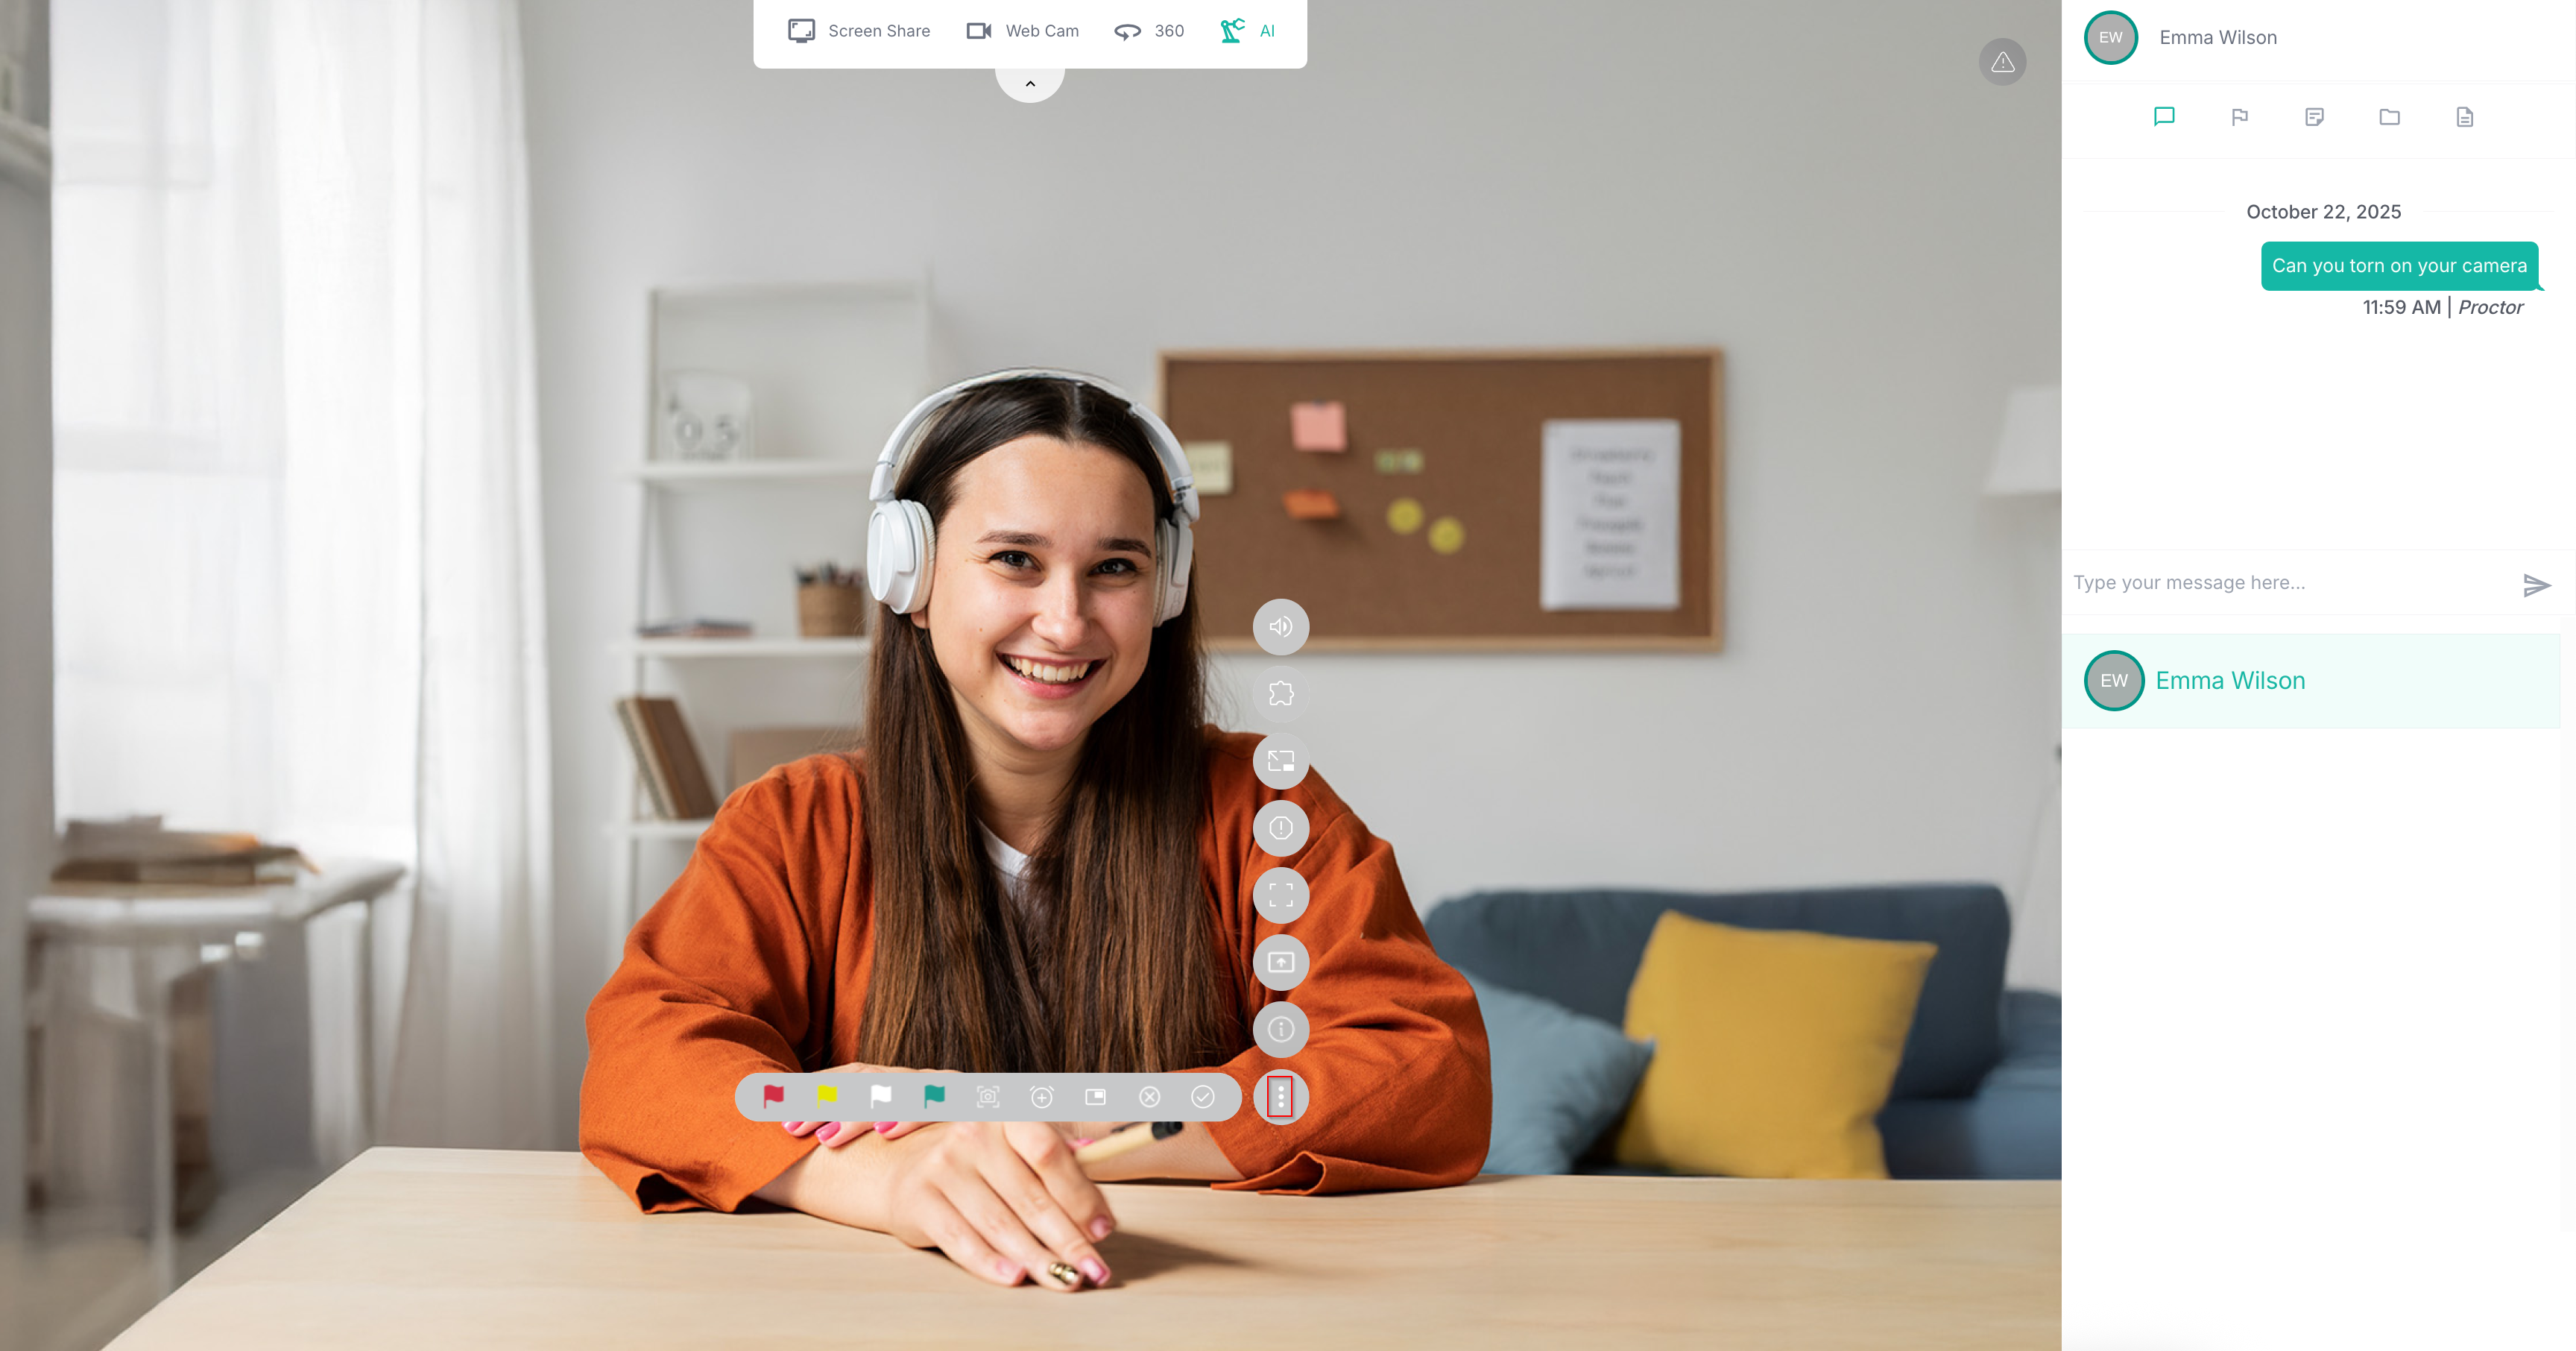
- Click the ellipsis icon to open the vertical action menu available for each candidate. This option can also be accessed from the main screen. For clarity of the icons, it is shown here in detached screen mode.
- The following icons are available here in the vertical action column in order from bottom to top, respectively:
- Information: Click to see the exam details, exam rules, onboarding rules, and instructions for the exam
- Screenshare request: Click to request screenshare if the candidate’s screen feed is lost during the exam. You will be notified if the candidate's feed is lost during the exam.
- Full screen: Click to request full screen if the candidate is not in full-screen mode at any time during the exam.
- Exam Pause: Click to pause/resume the exam for the candidate.
- Exam Window: Click this icon to pull the candidate back to the exam tab from any other tab. This feature is enabled only if the ExamLock Lite extension is installed in the candidate system.
- Extension enable/disable: Click to enable or disable the ExamLock Lite extension features at any point during the exam.
- Speaker: Click to mute or unmute the candidate.
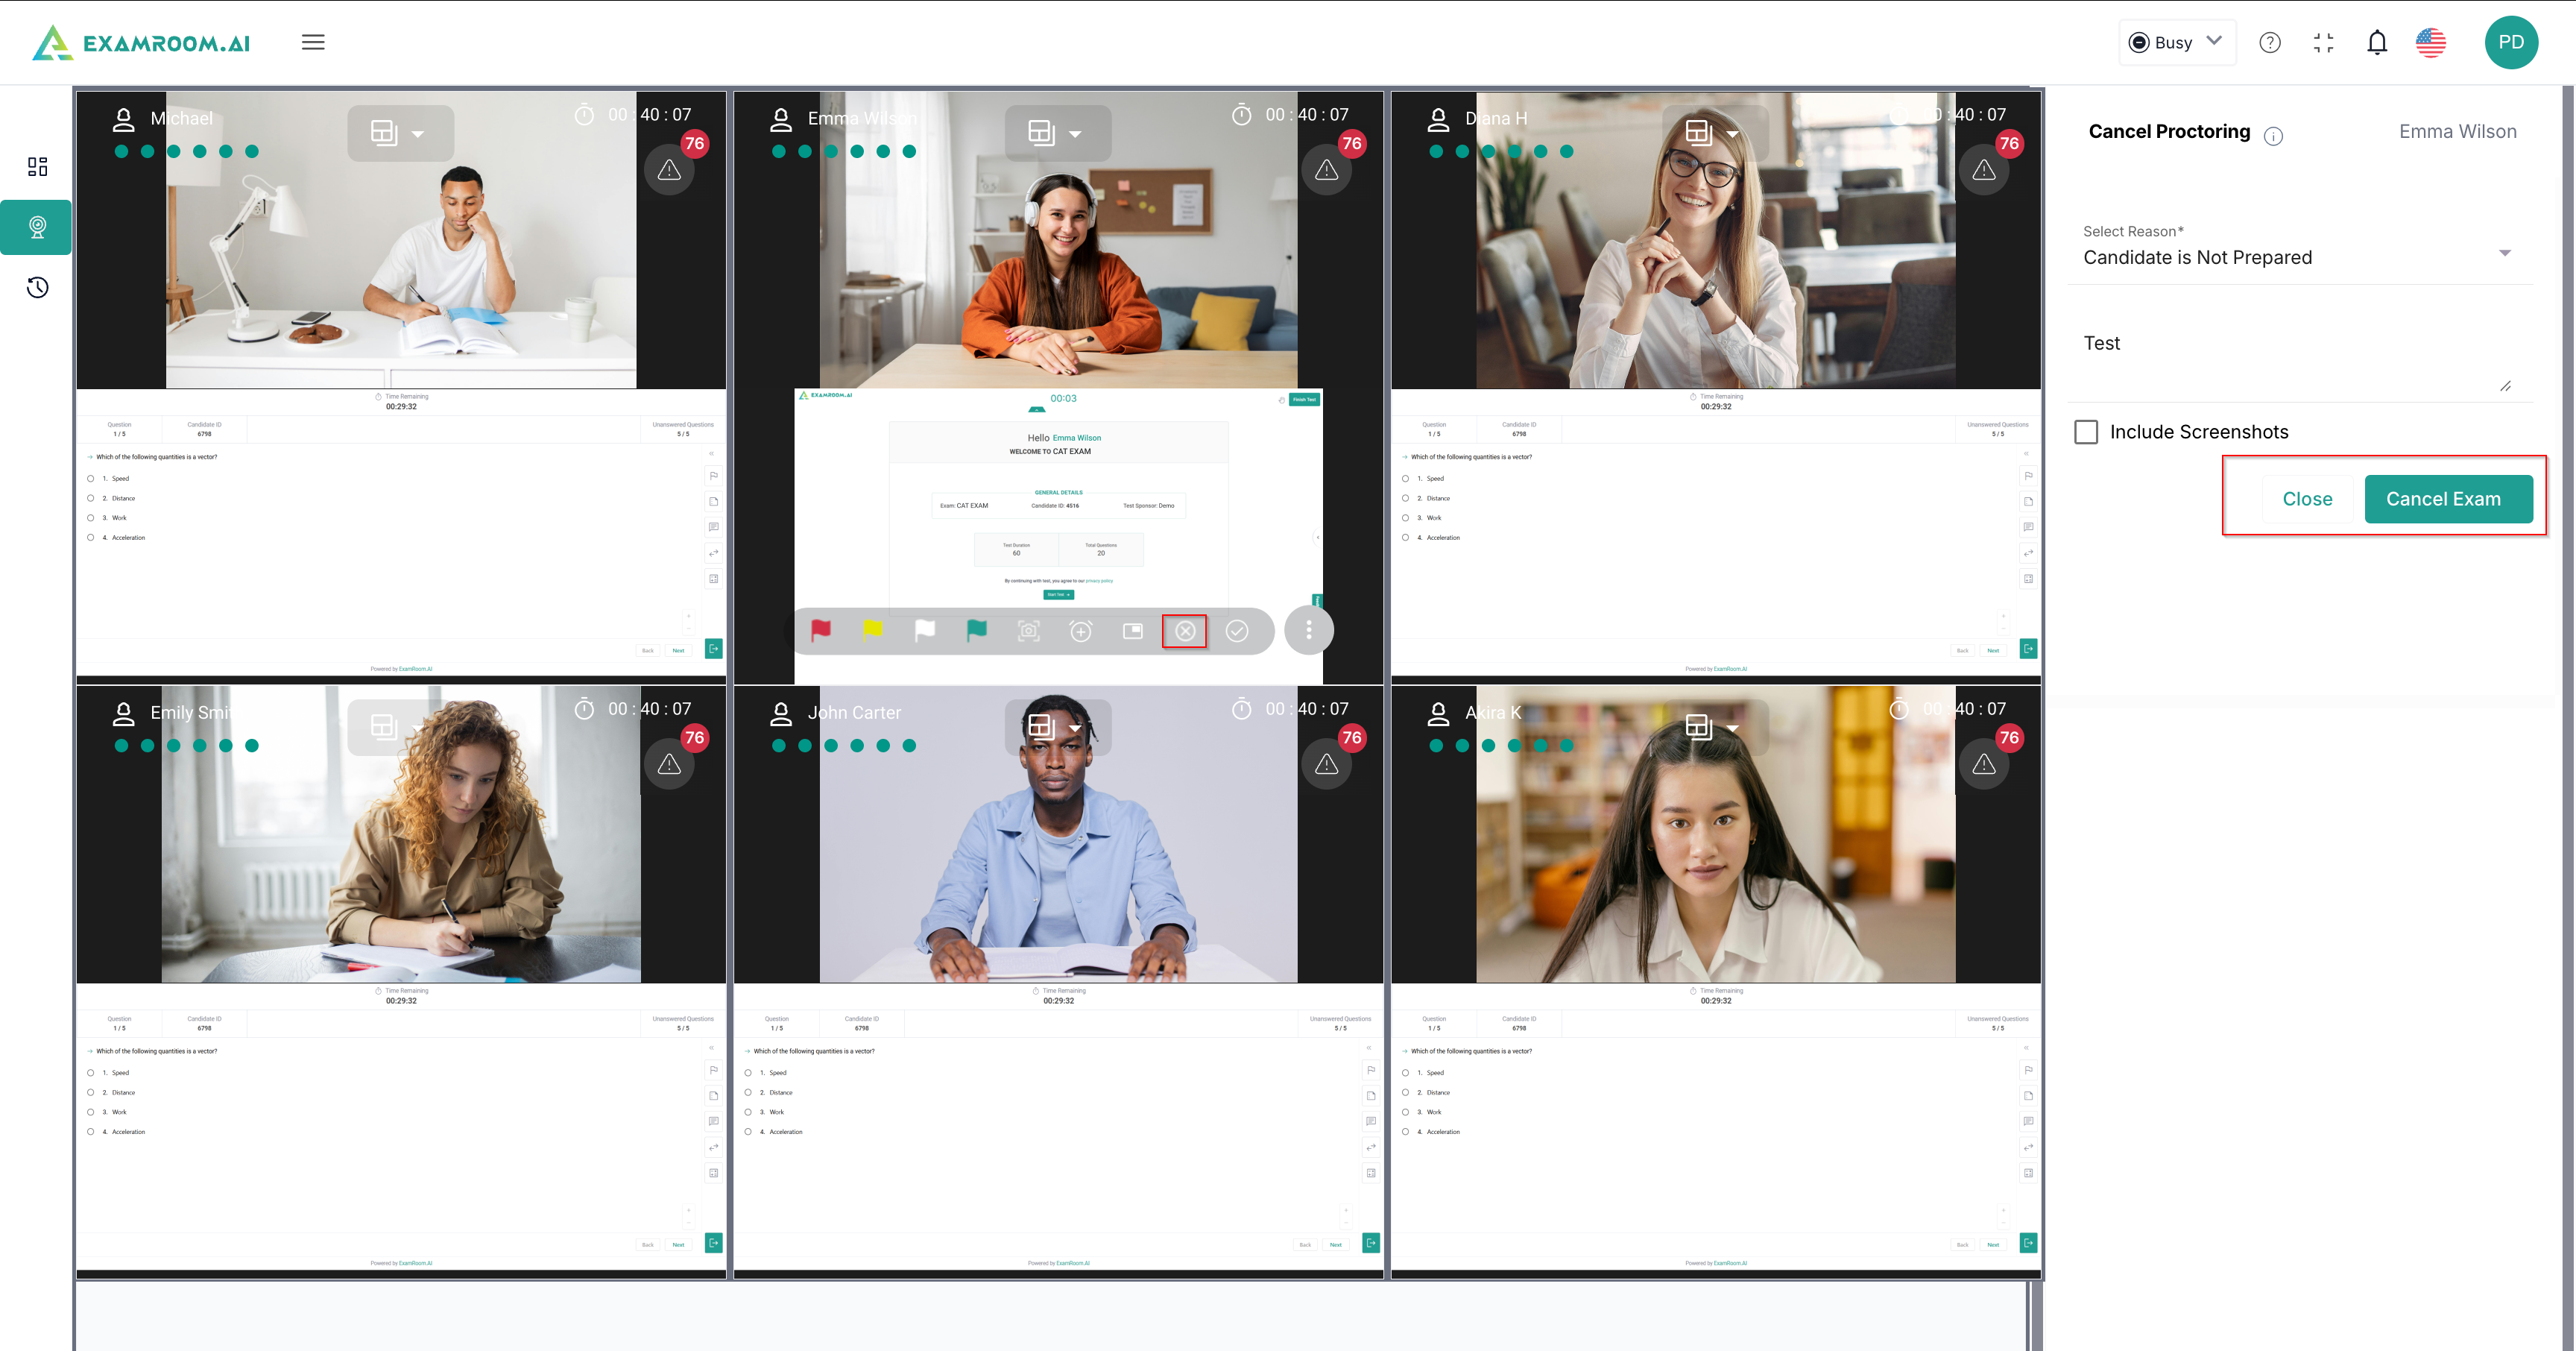
- Click to cancel the exam for the candidate. In the right panel, select the reason for canceling the exam from the drop-down menu, add a comment, and click Cancel Exam. If you wish to attach screenshots, select the checkbox to include screenshots. A pop-up opens, where you can select the image from the recent or all images tab. Click Upload to upload the image, followed by Cancel Exam.
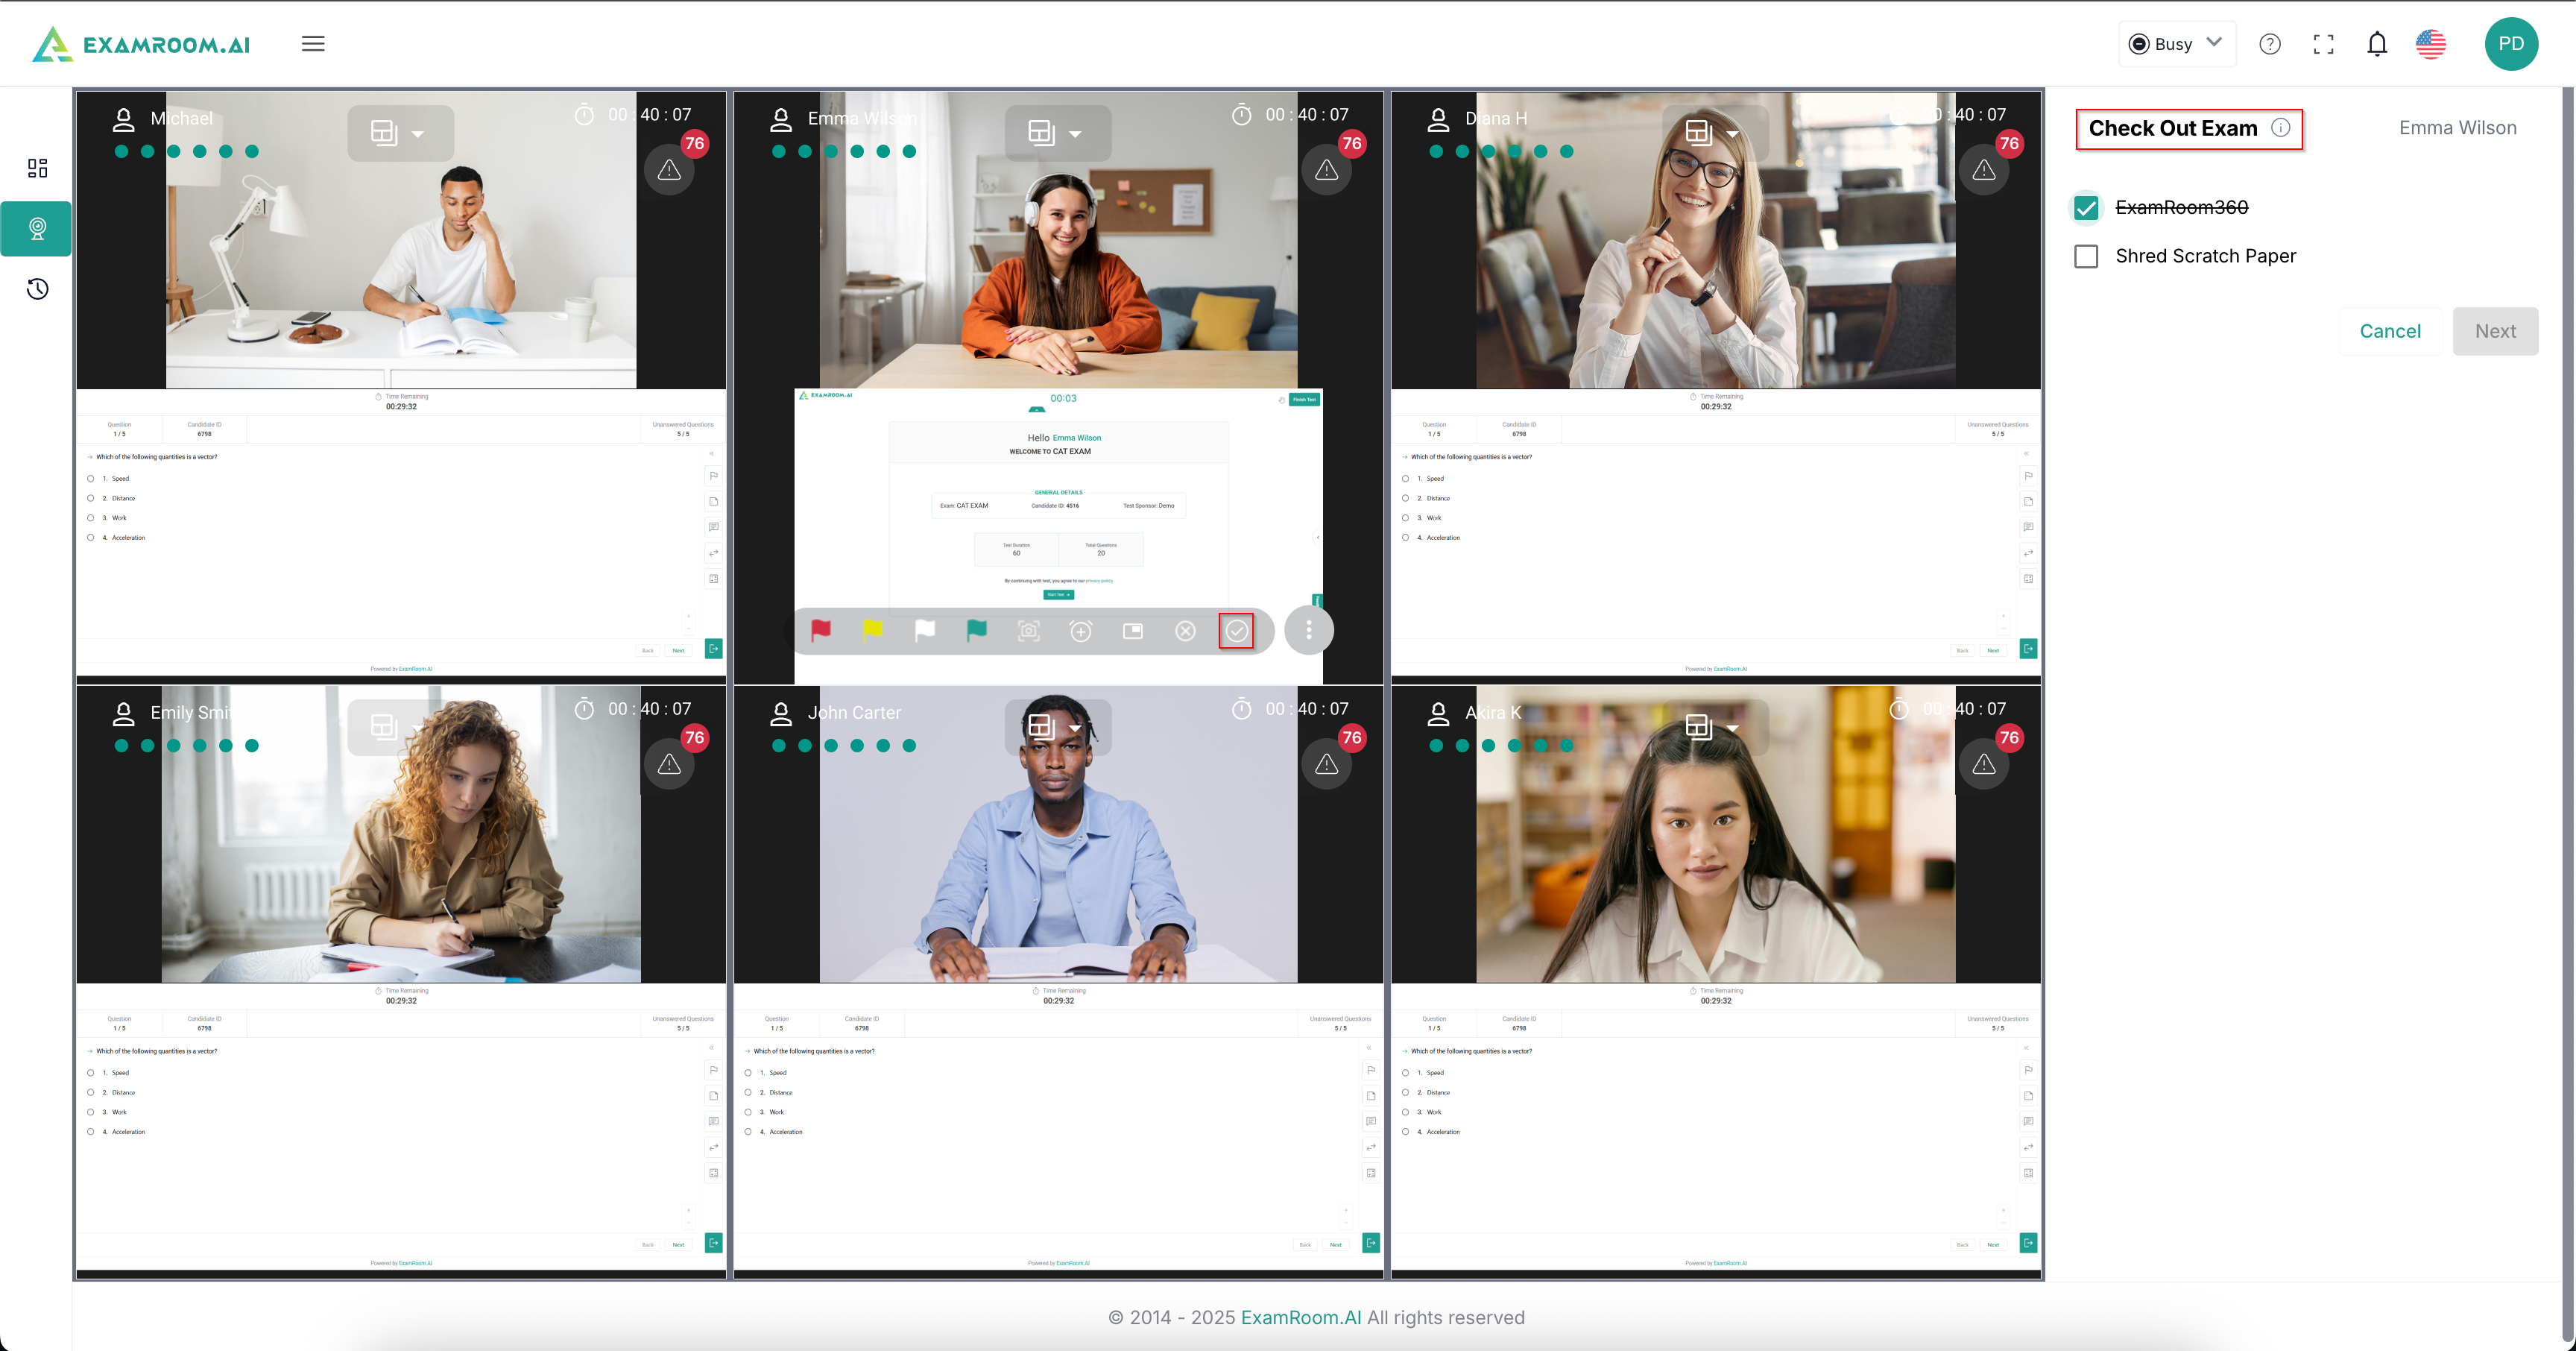
- Click the Complete button, which enables the checkout option. Click to check out the candidate from the exam. In the right panel, meet the conditions and select the checkbox as defined by the exam sponsor. Click Next after ensuring that the tasks mentioned above are completed.
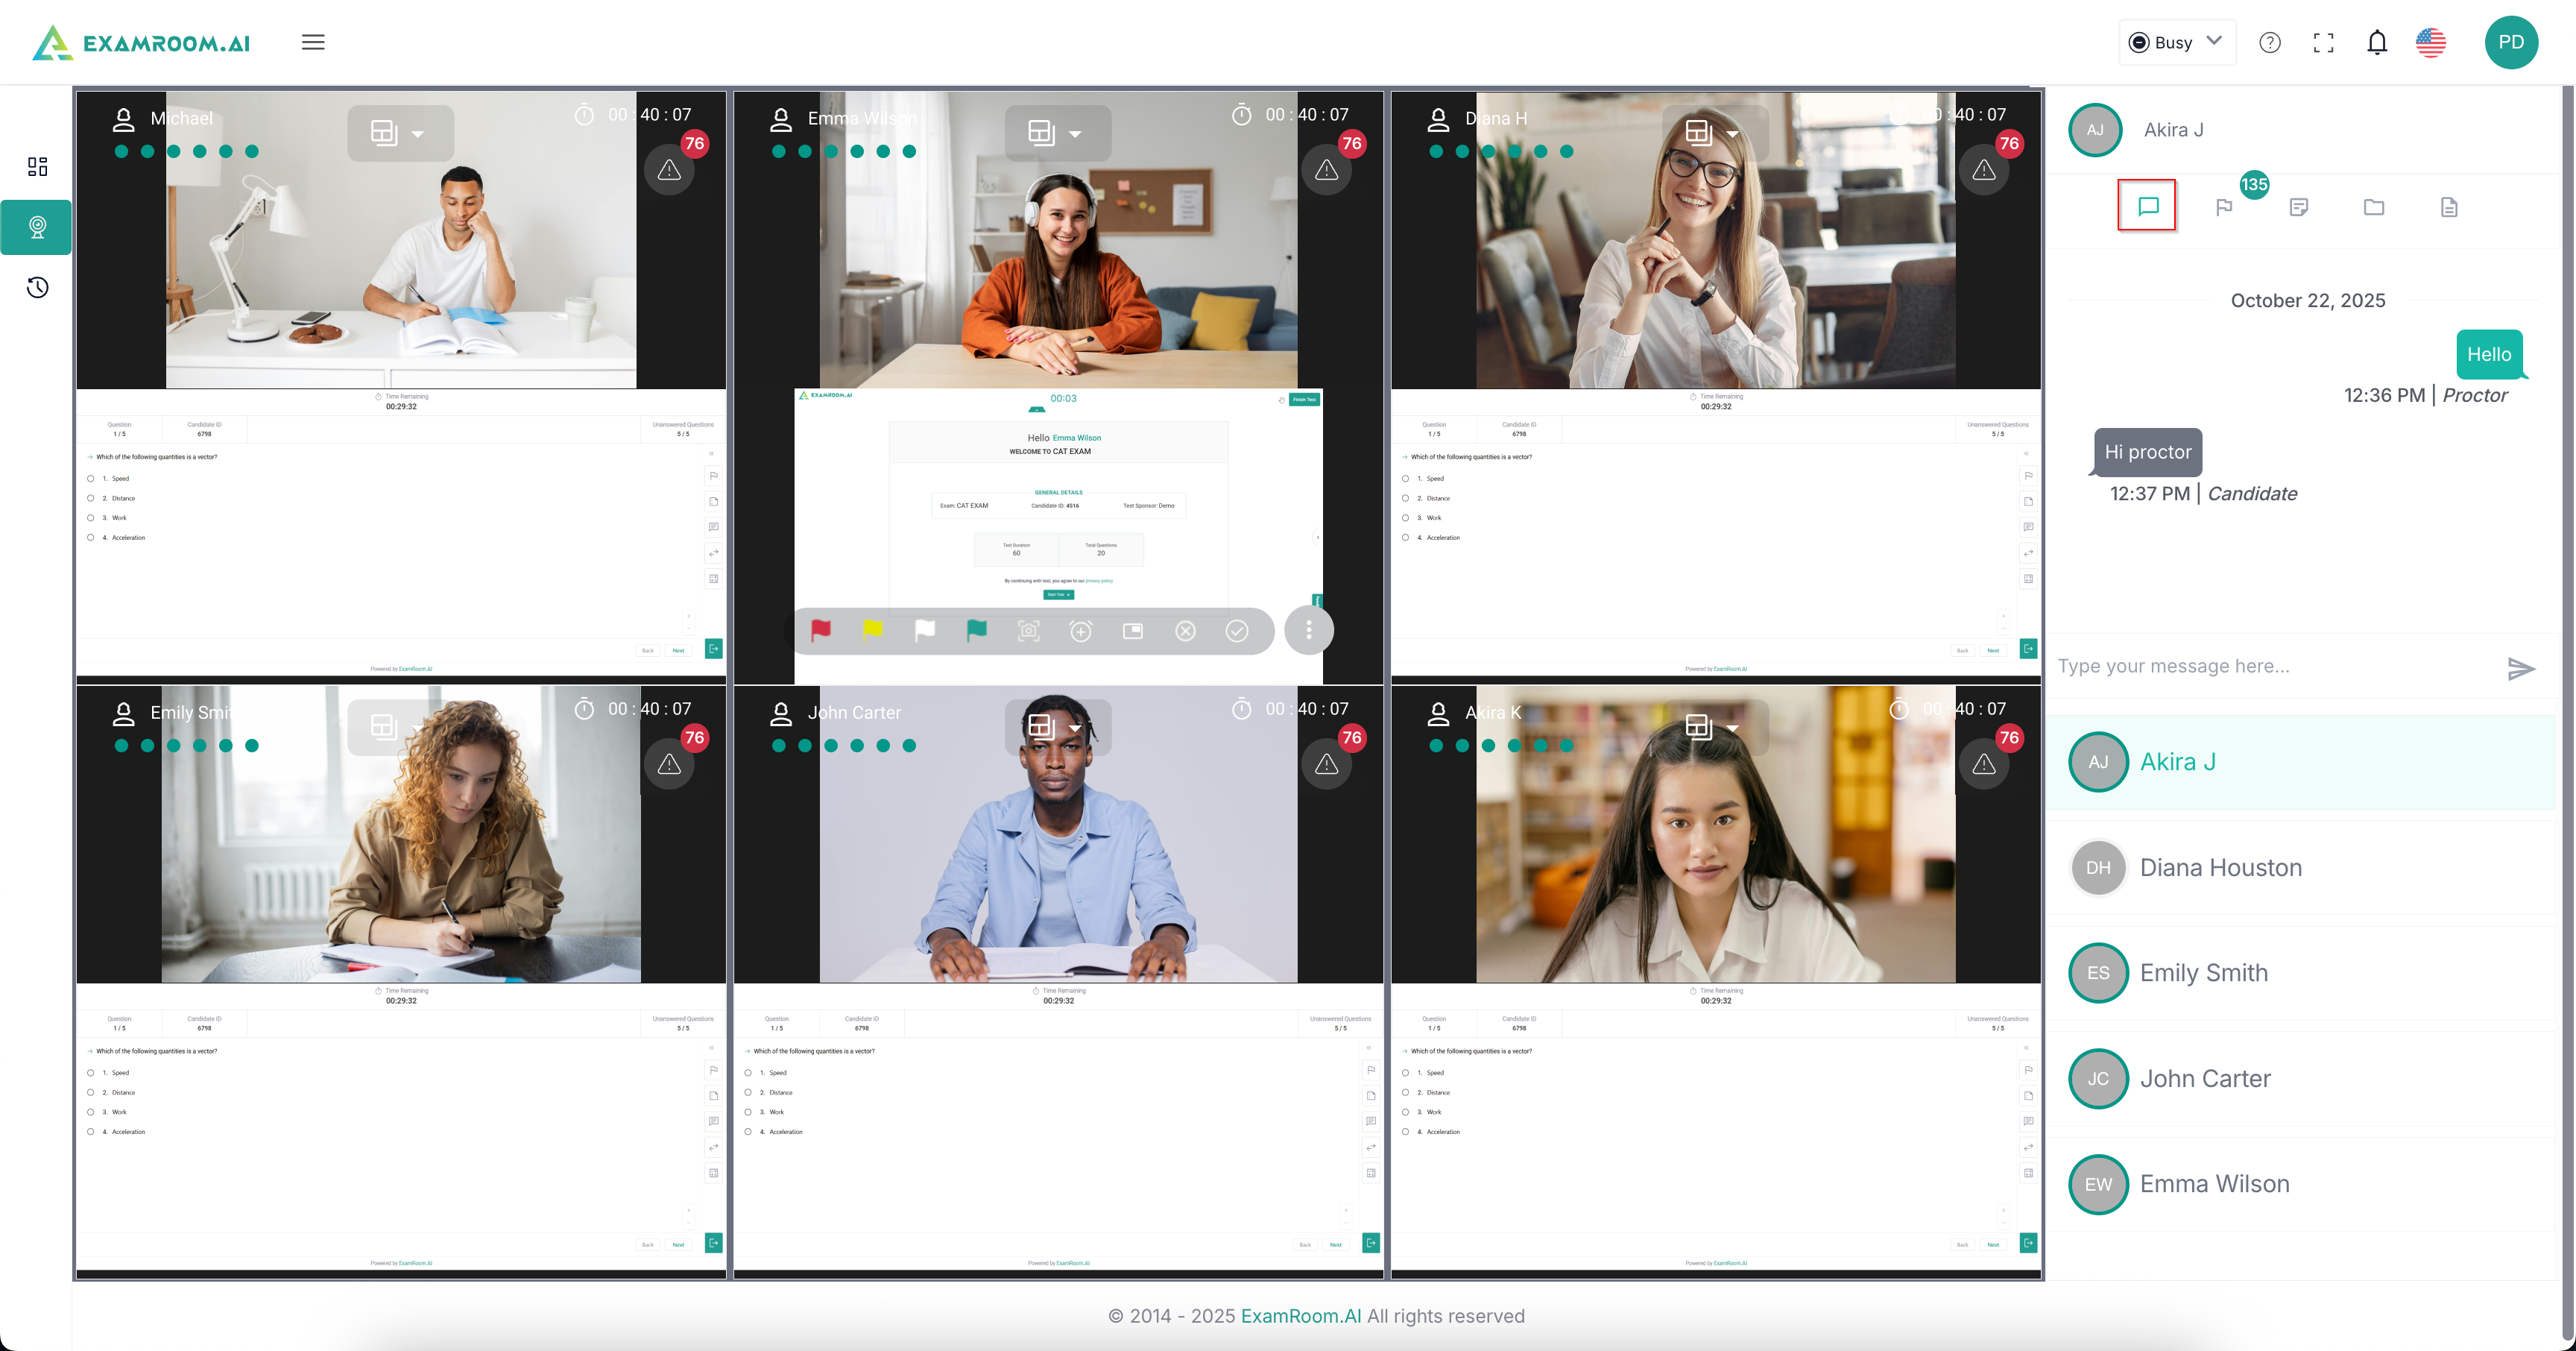
- Click a particular candidate’s name on the right-side panel to chat with the candidate.
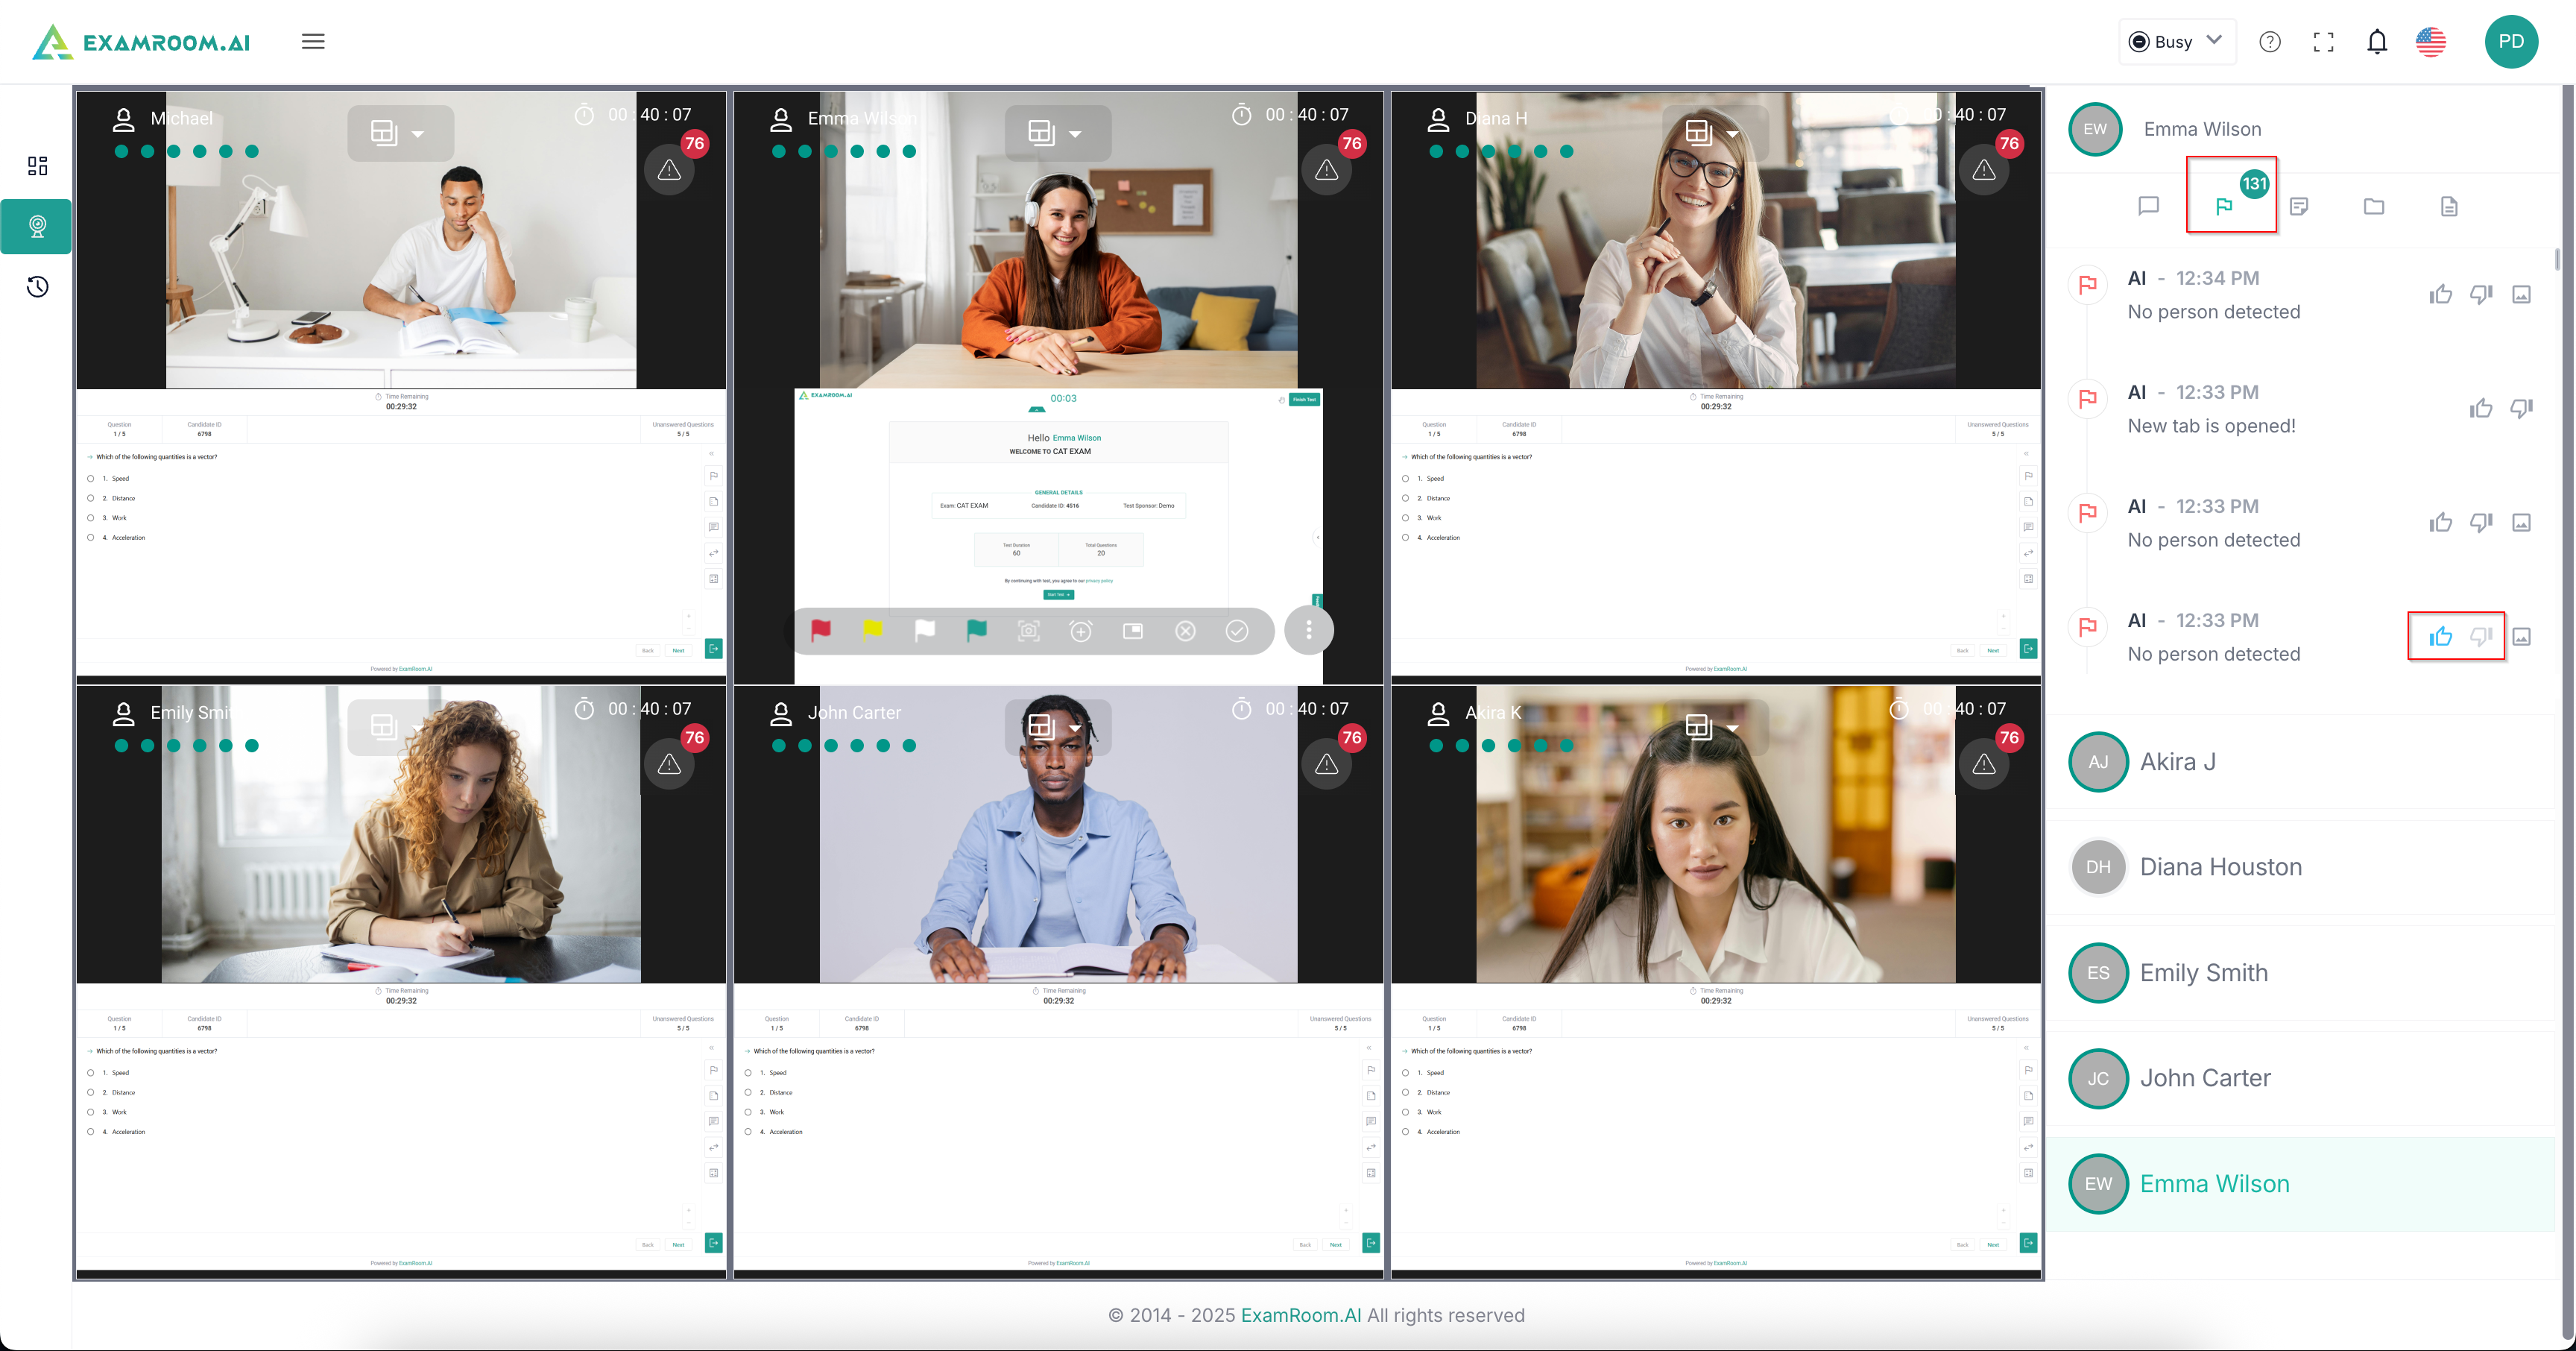
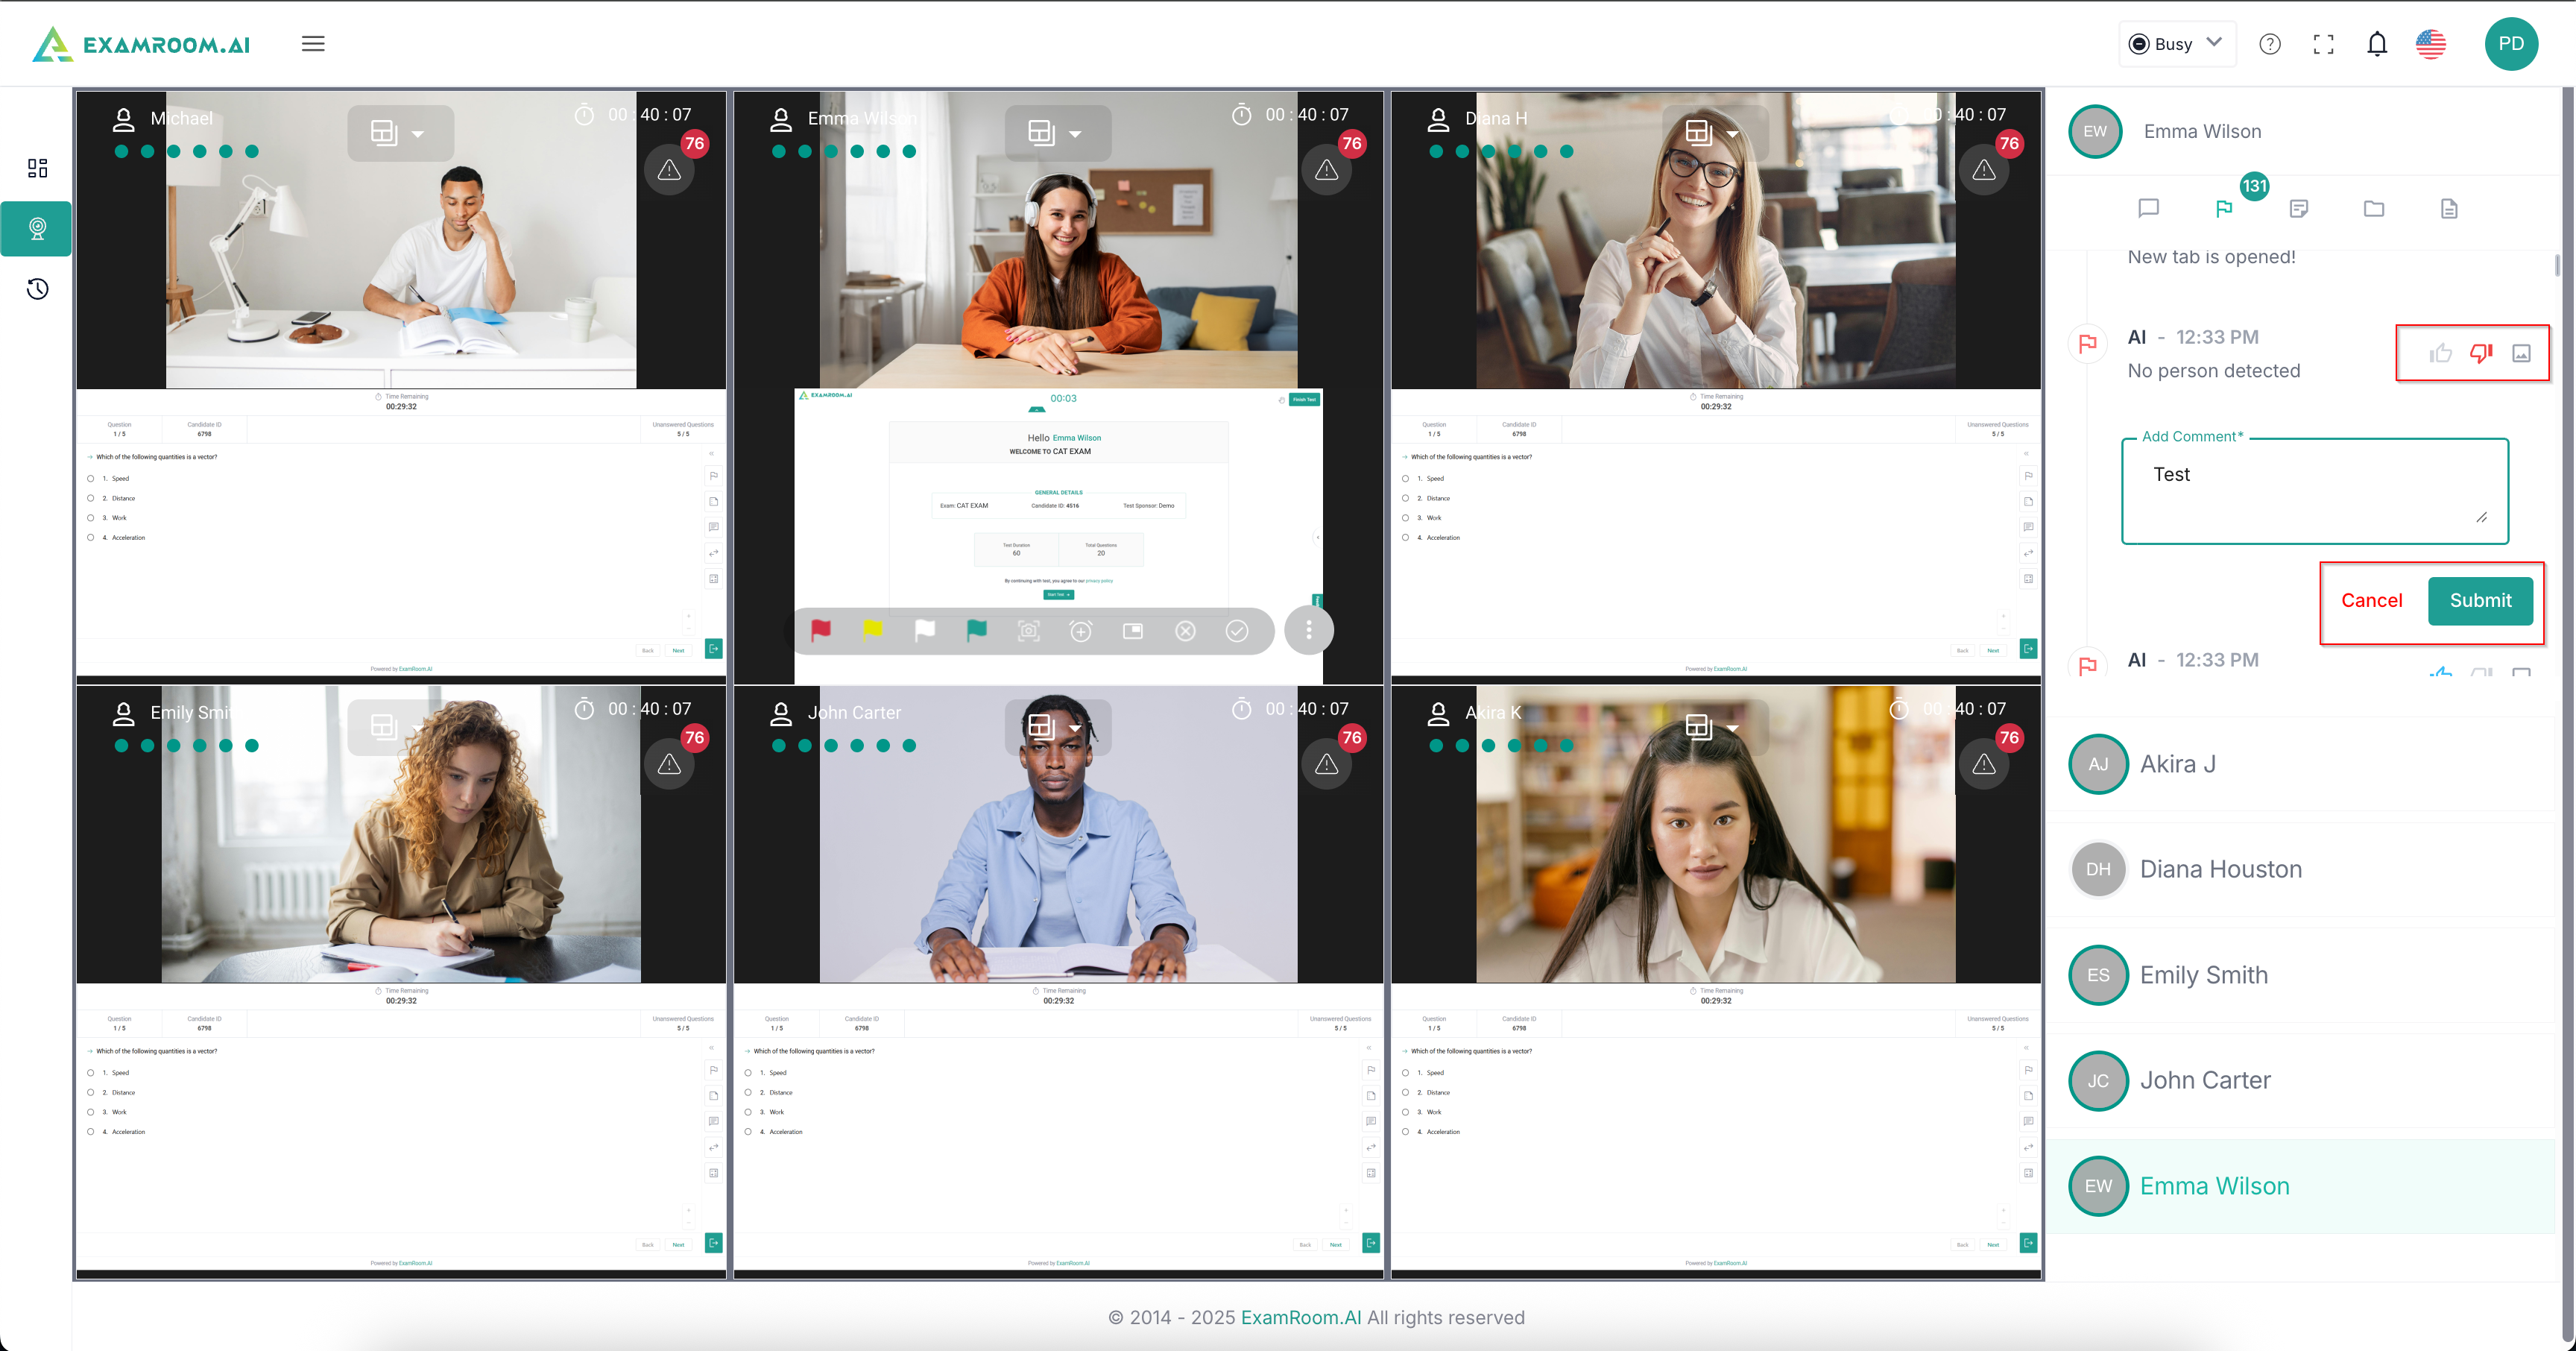
- Click the Flag icon to check the raised flags. If you click the alert icon, it redirects to the flags. Here you can see the actions for which the flags were raised, the color of the flags raised, with their time stamps. You will have the option to like or dislike the flags raised by AI.
- You can dislike the AI-raised flag; you need to give details in the comment section and click Submit. You can also click the picture icon next to the dislike icon to check if any screenshot is attached along with the flag.
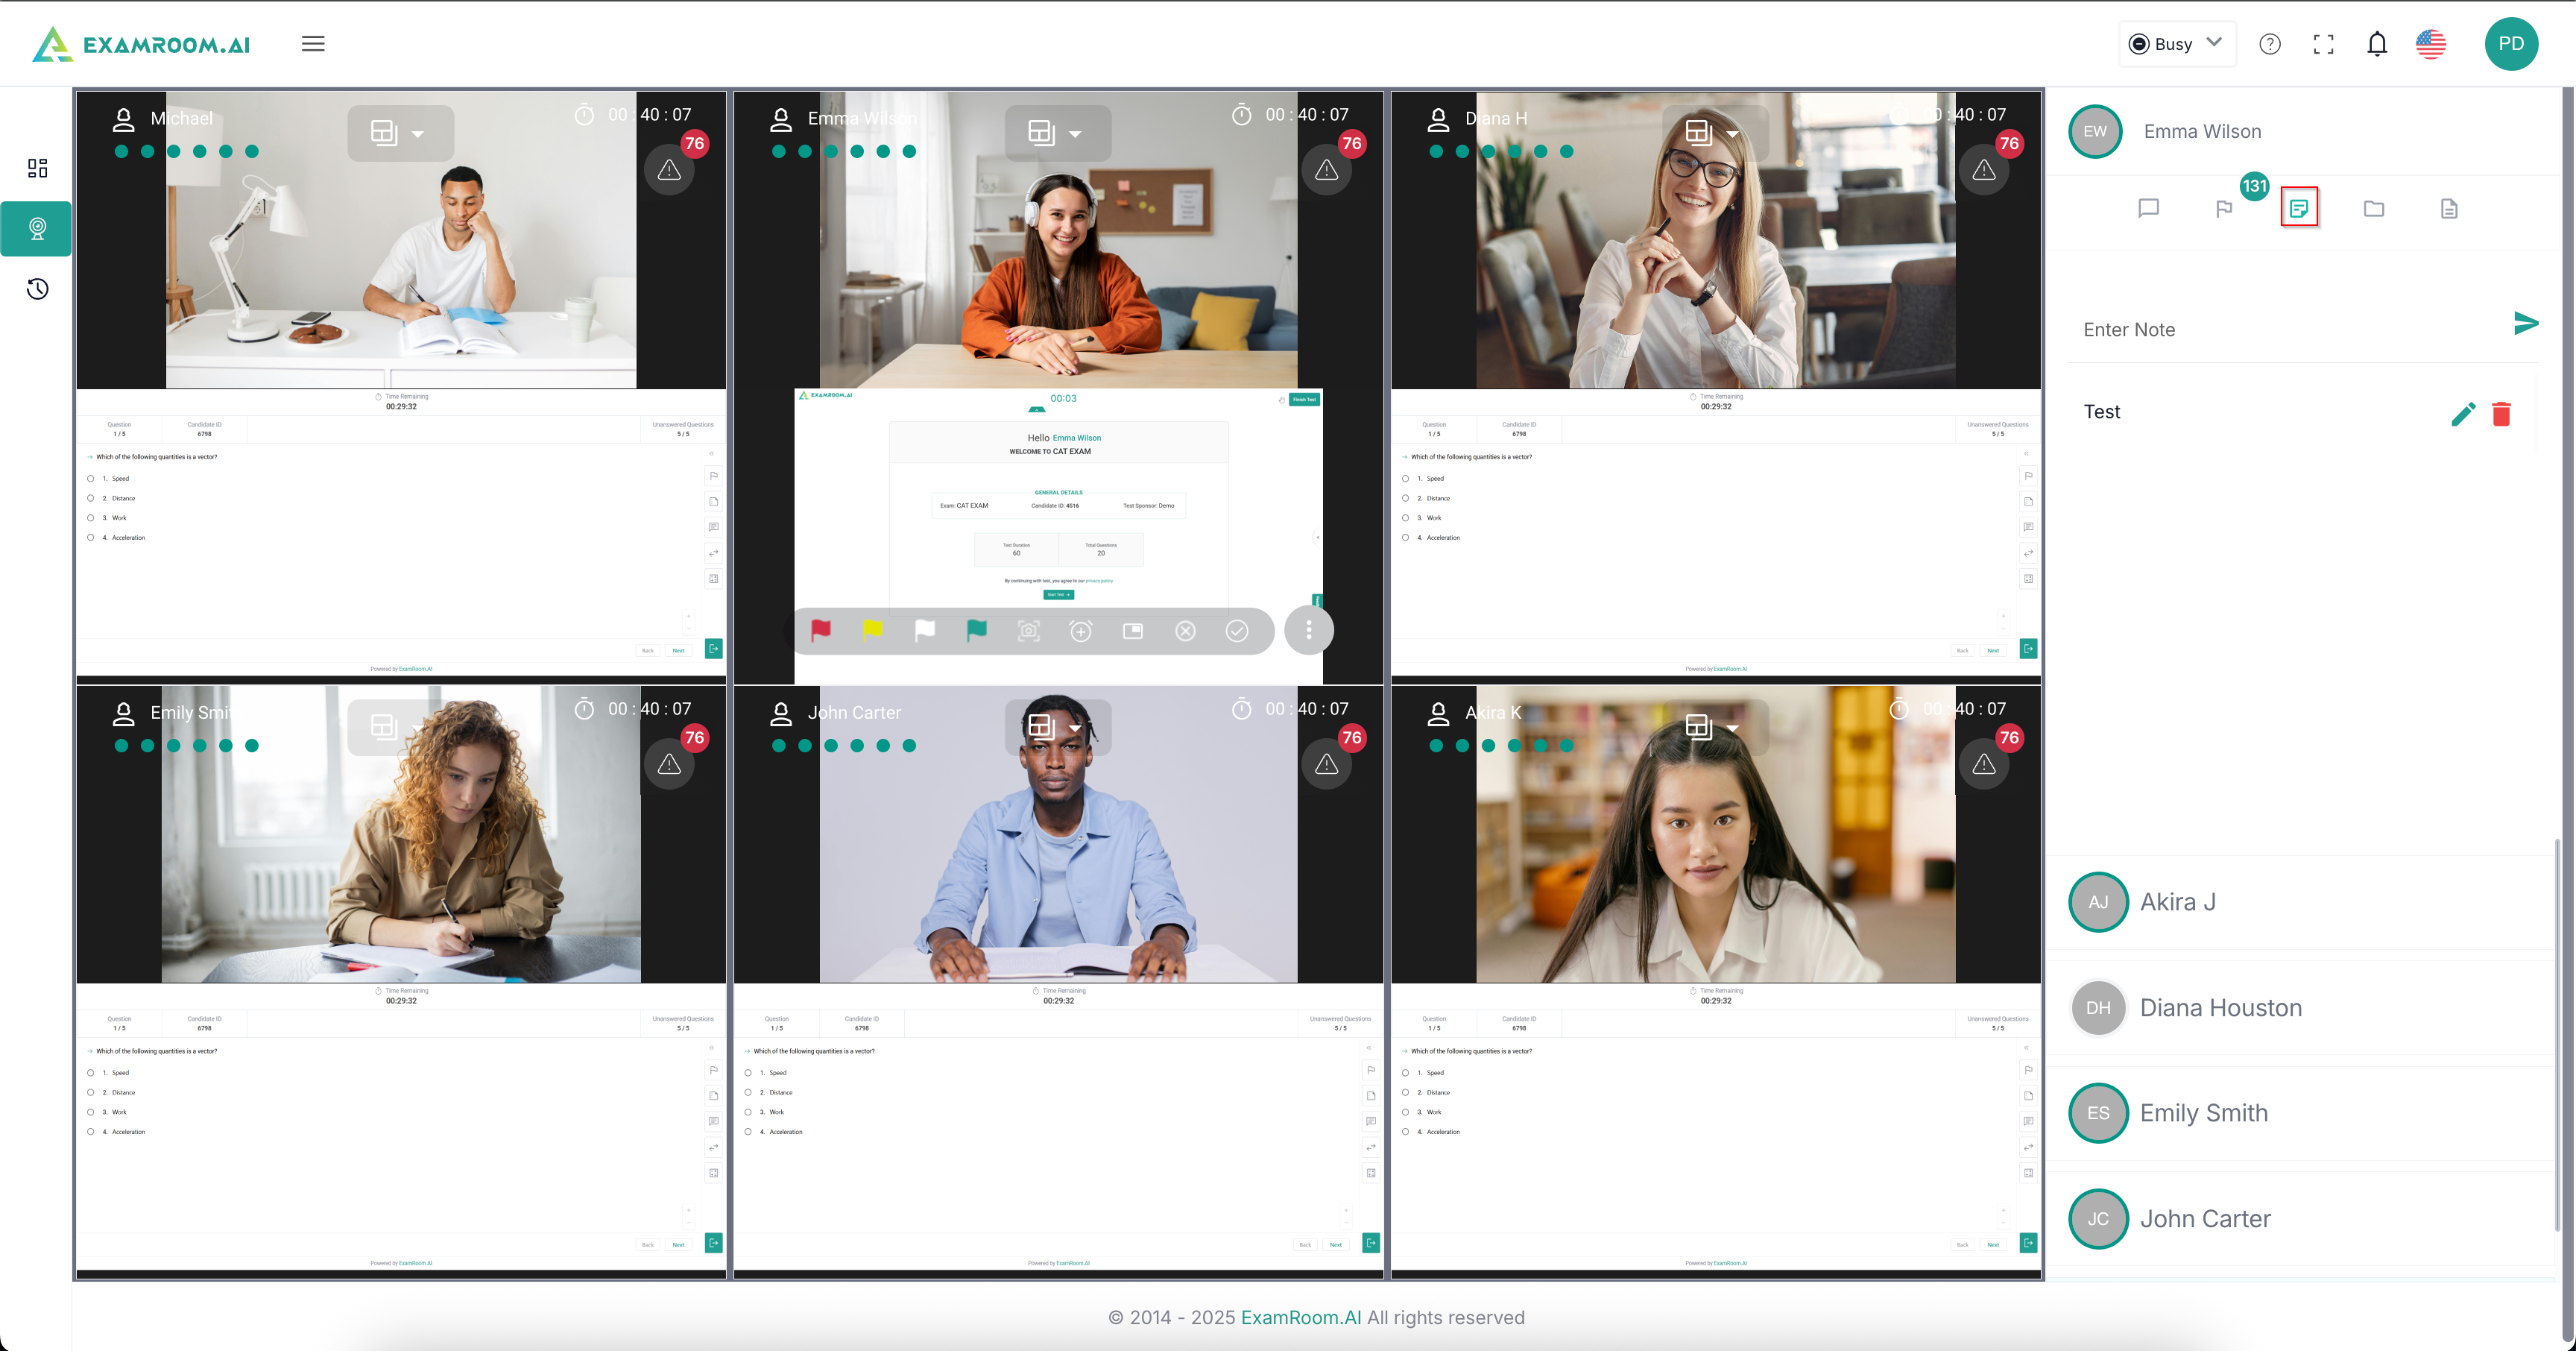
- Click to provide additional notes for each proctoring session for each candidate. These notes are mapped to each exam that the candidate takes.
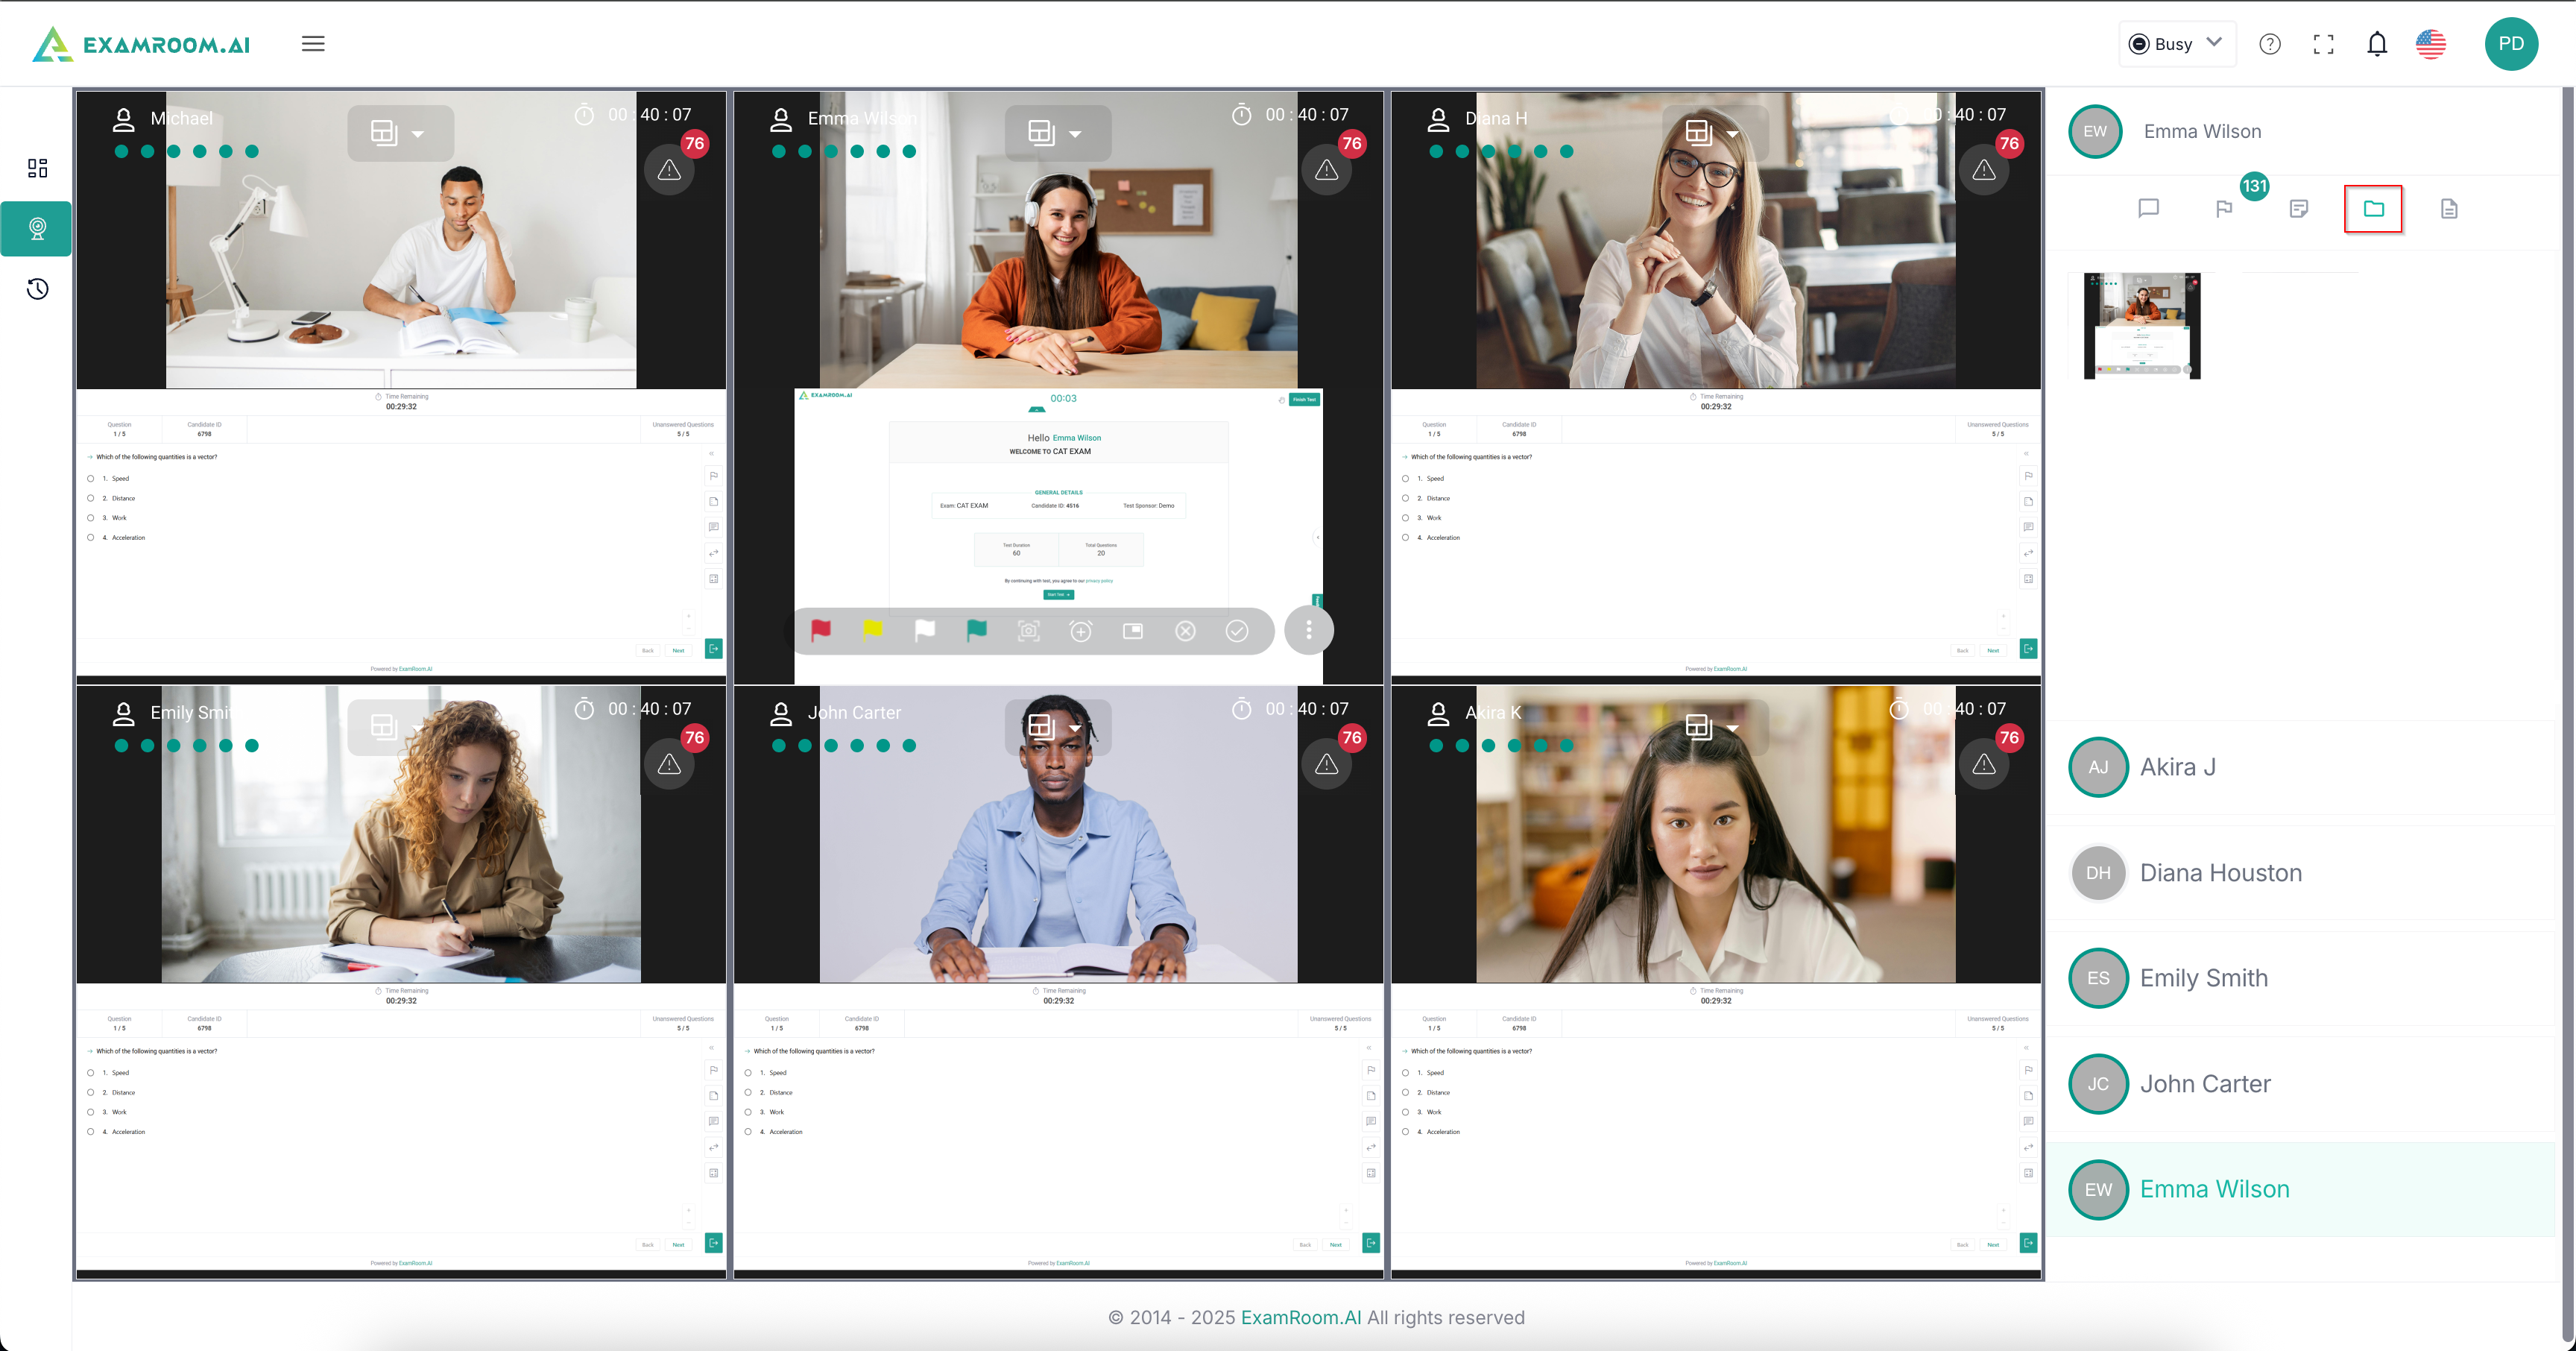
- Click to access all the screenshots of the candidate. Each screenshot has a unique identifier, the date, and the time of capture.
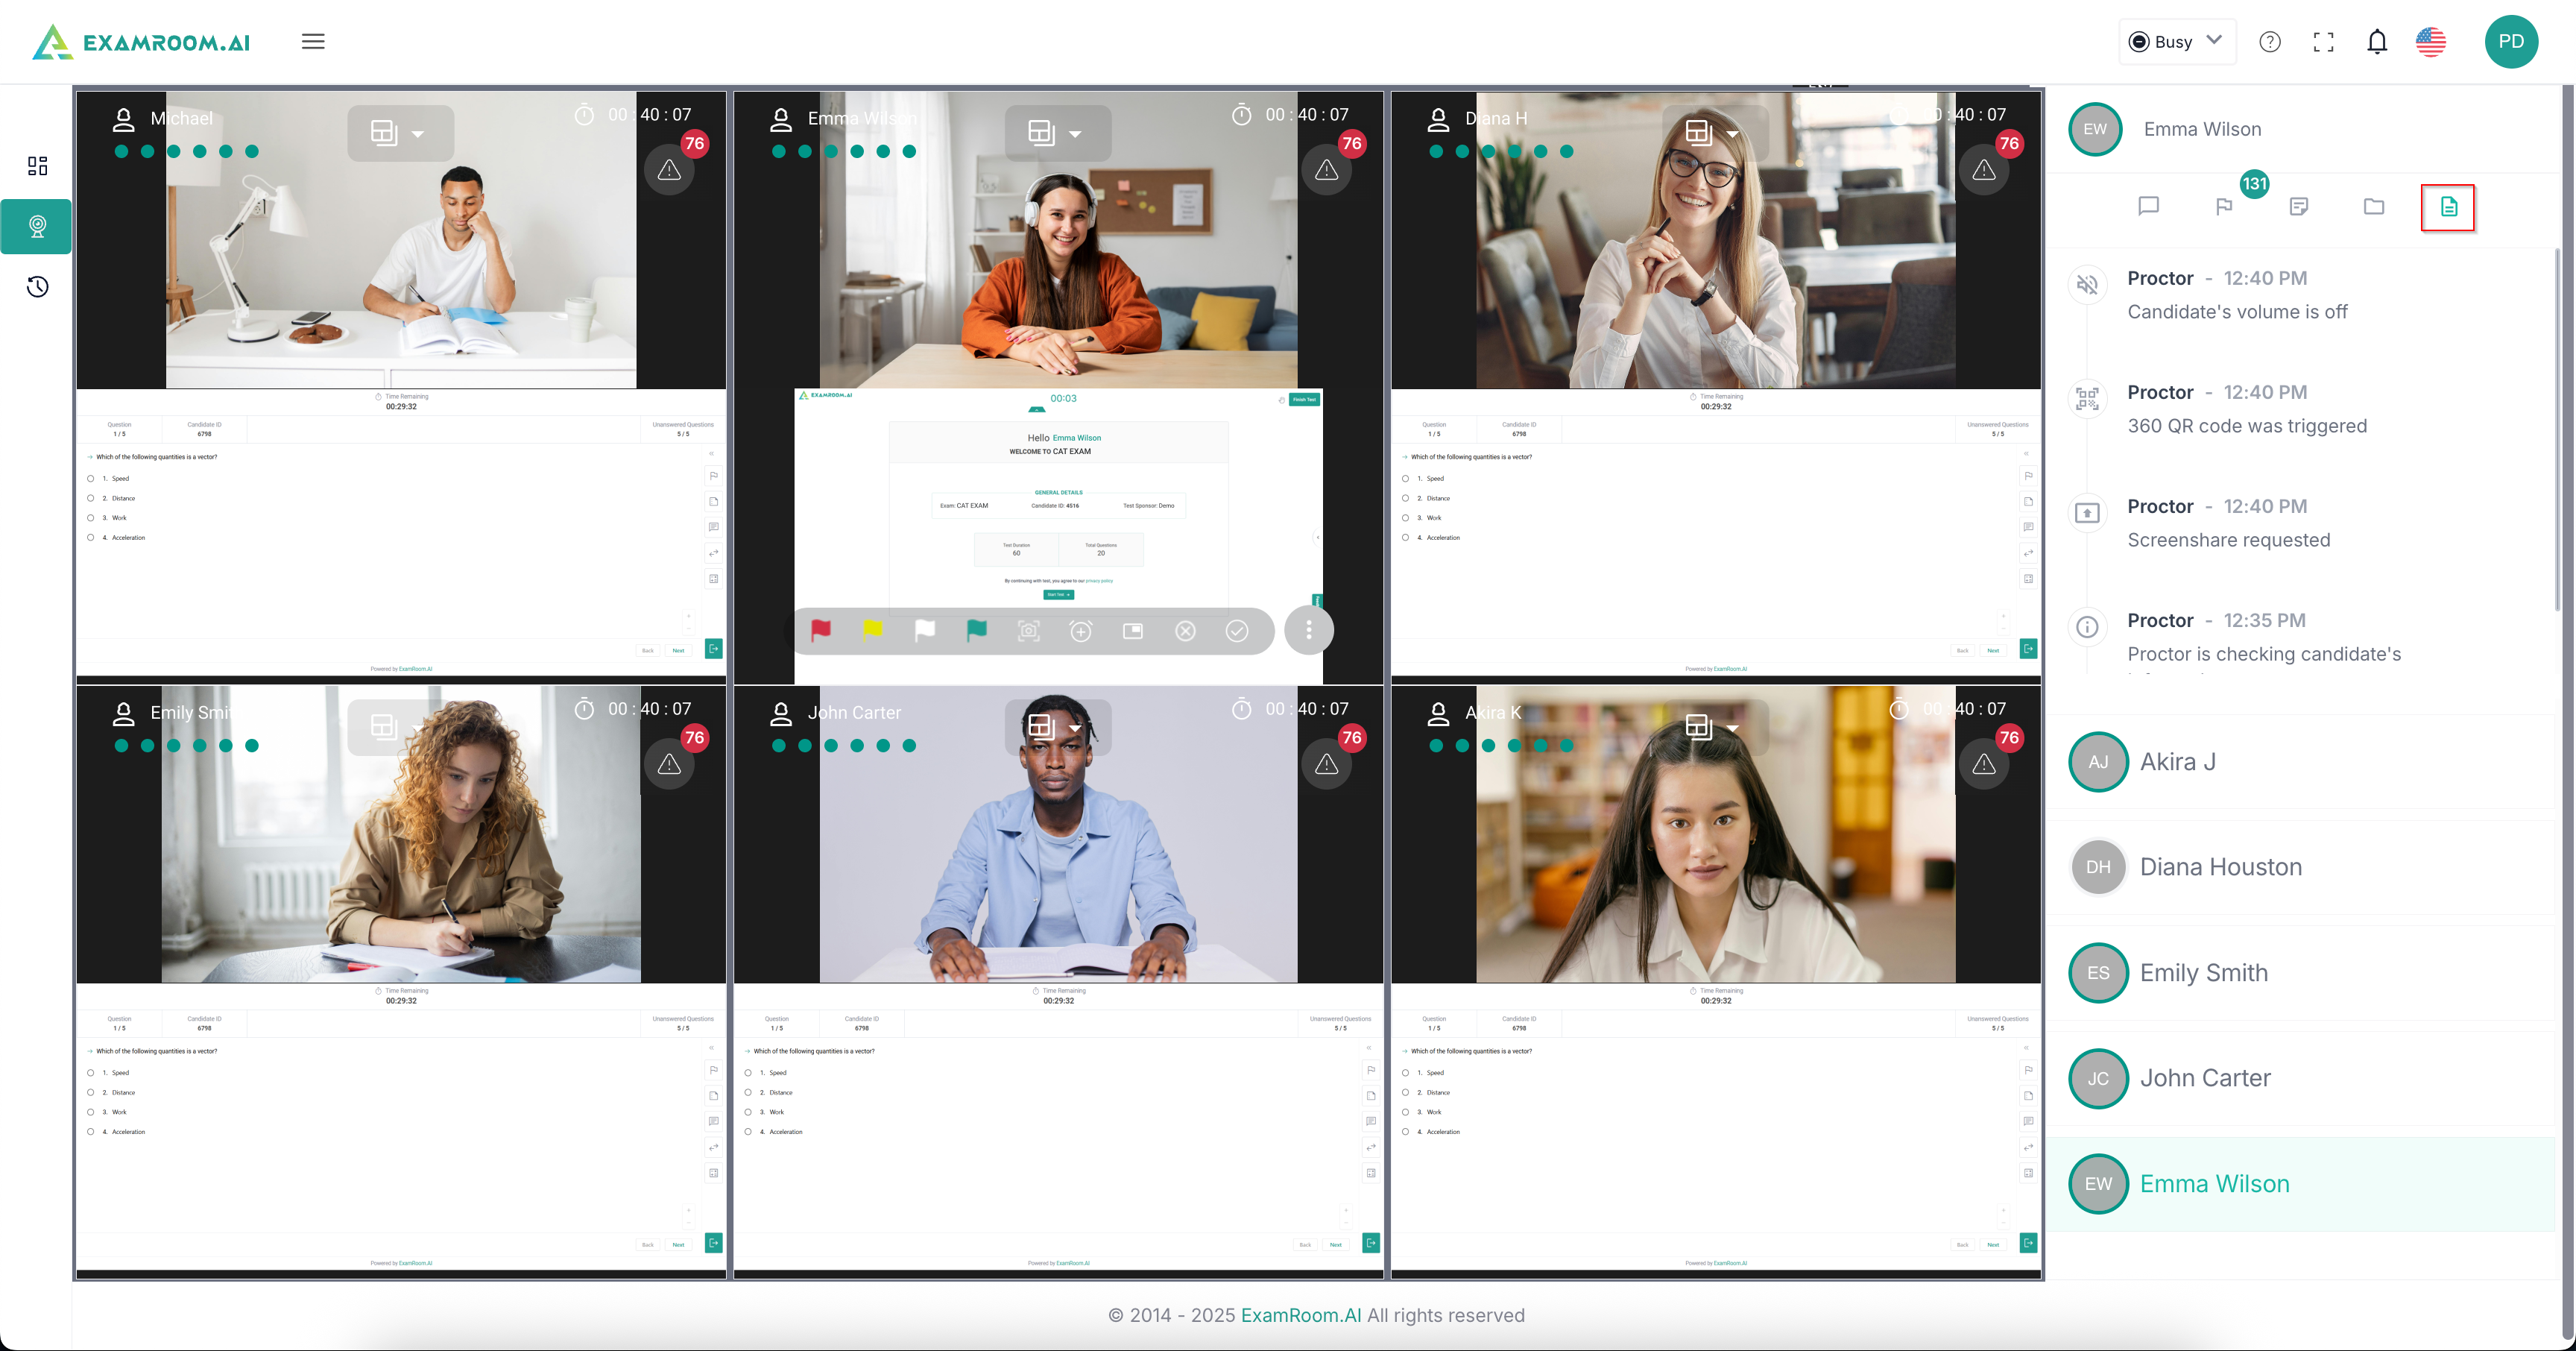
- Click to view the activity log, where you can view all the milestones of that exam chronologically. This is an activity timeline, complete with the event, the time of the event (or milestone), and a comment, if applicable.
Checking in the Candidate
- As you accept a candidate, you need to facilitate the check-in of the candidate for the exam. To begin the process, click the information icon available on the vertical action column, and navigate to the exam details in the right sidebar.
- Click Check-in to enter the Candidate ID, Exam ID, and Access Code for the candidate. Once these details are provided, the candidate will be able to begin the exam.